
This website contains affiliate links. Some products are gifted by the brand to test. As an Amazon Associate, I earn from qualifying purchases. The content on this website was created with the help of AI.
Dive into the weaving world of macramé, an art form that has been charming crafters across the globe for centuries. With its intricate knots and bohemian style, macramé is a versatile craft that can add charm to any space. Ideal for beginners, these seven simple and beautiful macramé projects will get you started on a creative path full of endless potential.
1. Macramé Wall Hanging
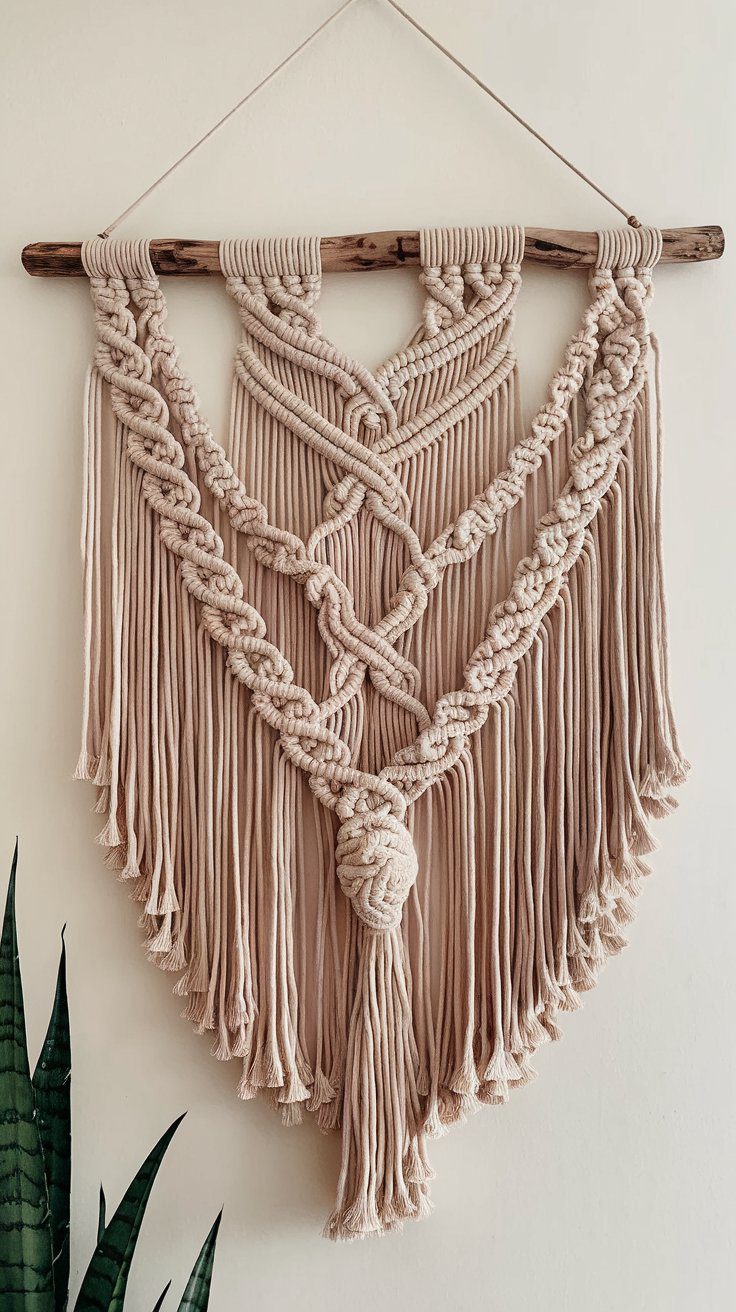
Picture a blank wall transformed into a dramatic focal point with a handmade macramé wall hanging.
What You Might Need: A wooden dowel rod, macramé cord, and scissors.
Steps to Creating Your Wall Hanging:
- Cut eight strands of macrame cord, each 5 meters long.
- Fold each strand in half and attach it to the wooden dowel rod using a latch hook.
- Begin by knotting the cords in your desired pattern, alternating the strands and tying the knots.
- Continue until you’ve created a beautiful tapestry of intricate knots.
Picture This: An artisanal wall hanging that adds a unique, bohemian charm to any room. Ideal for a living room or bedroom, the natural textures and craftsmanship of a macramé wall hanging bring serene, artistic ambiance that reflects your personal style.

2. Macramé Plant Hanger
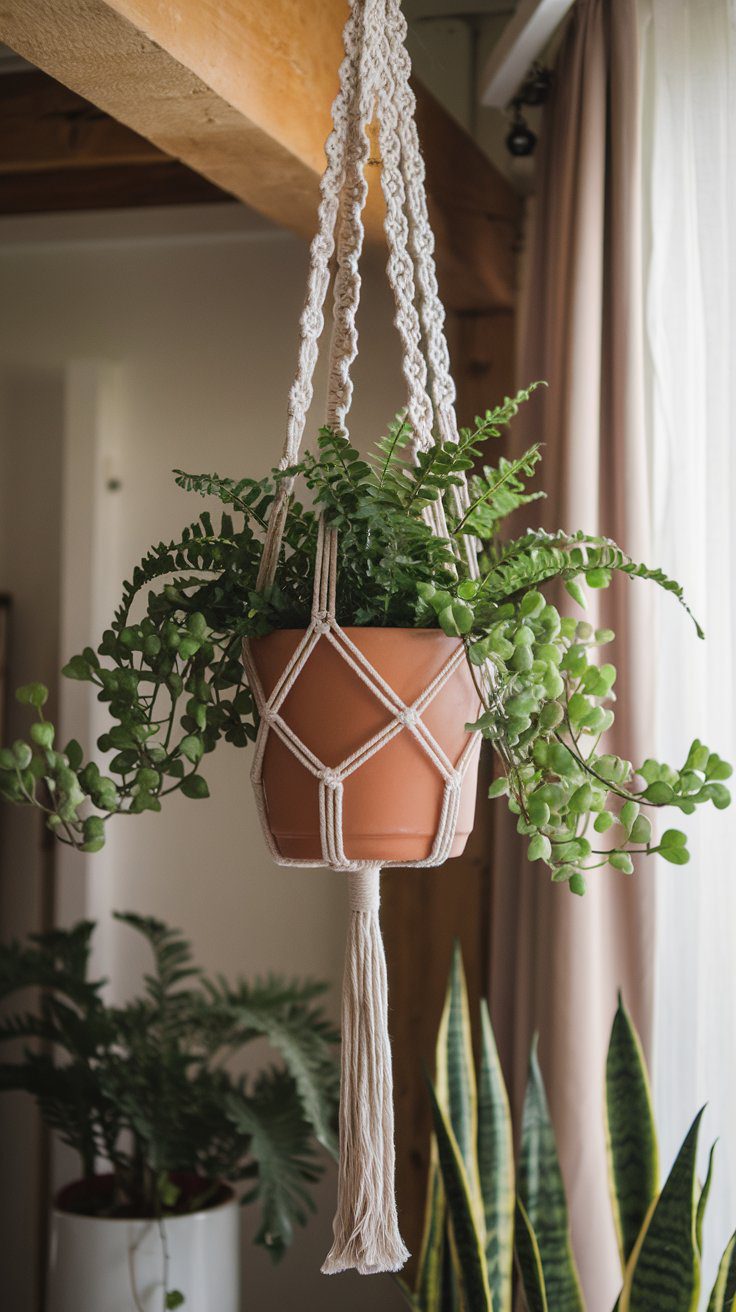
Imagine having your beloved plants hung elegantly in a DIY macramé plant hanger.
What You Might Need: A brass ring, macramé cord, and a plant pot.
Steps to Creating Your Plant Hanger:
- Cut four strands of cord, each about 3 meters long.
- Fold the cords in half and loop them through the brass ring, creating a set of eight working cords.
- Tie each cord in a symmetrical knot pattern until you reach the desired length for your hanger.
- Lastly, gather your cords together and knot them at the end, ensuring a secure cradle for your plant pot.
Picture This: A beautiful fern luxuriantly spilling over the sides of a pot, securely held by your boho-chic macramé plant hanger. Perfect for adding an earthy touch to a sunny corner or window, contributing to a tranquil, green haven.
3. Macramé Coaster
Envision setting your morning coffee on a delightfully textured macramé coaster.
What You Might Need: Macramé cord and scissors.
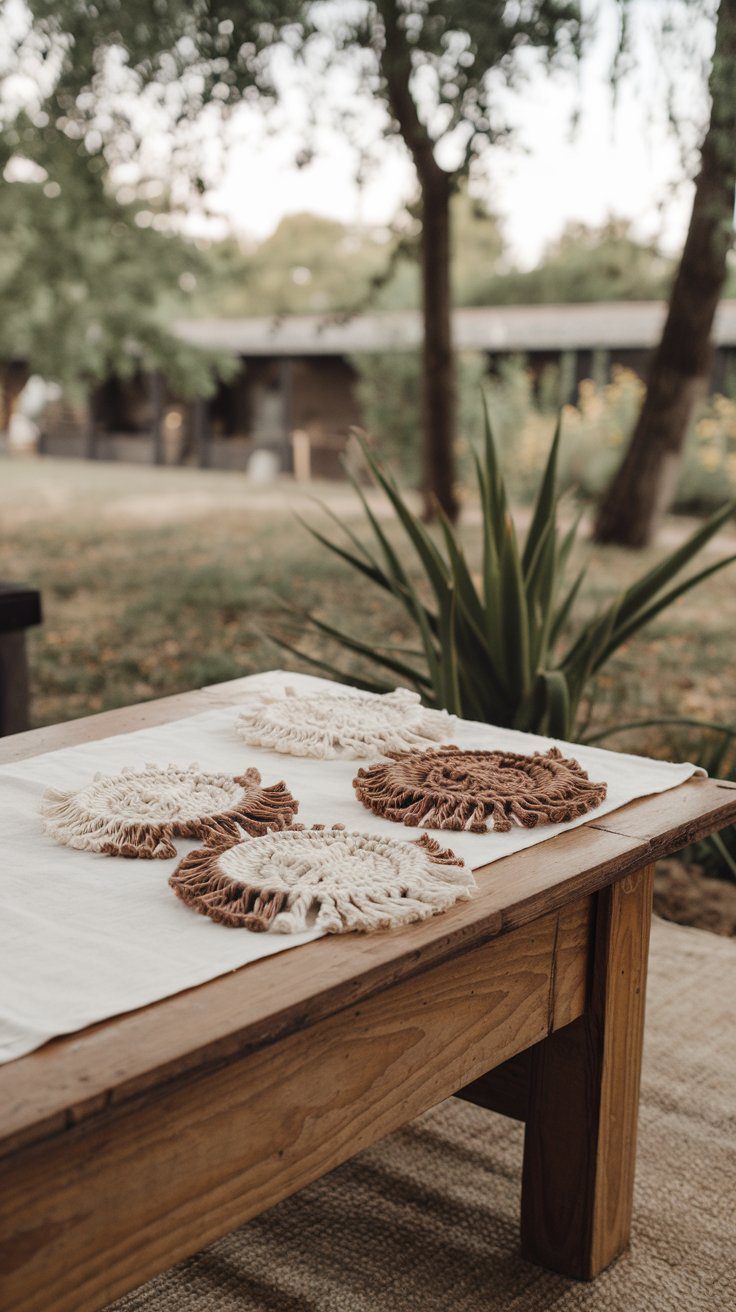
Steps to Creating Your Coaster:
- Cut one long strand of cord about 5 meters.
- Start by tying a simple series of square knots in a circular pattern until your coaster is the desired size.
- Finally, trim any extra cord and ensure your knots are sturdy.
Picture This: An eye-catching set of hand-crafted macramé coasters resting on a rustic wooden coffee table, offering a functional yet aesthetically pleasing accent to your décor.
4. Macramé Keychain
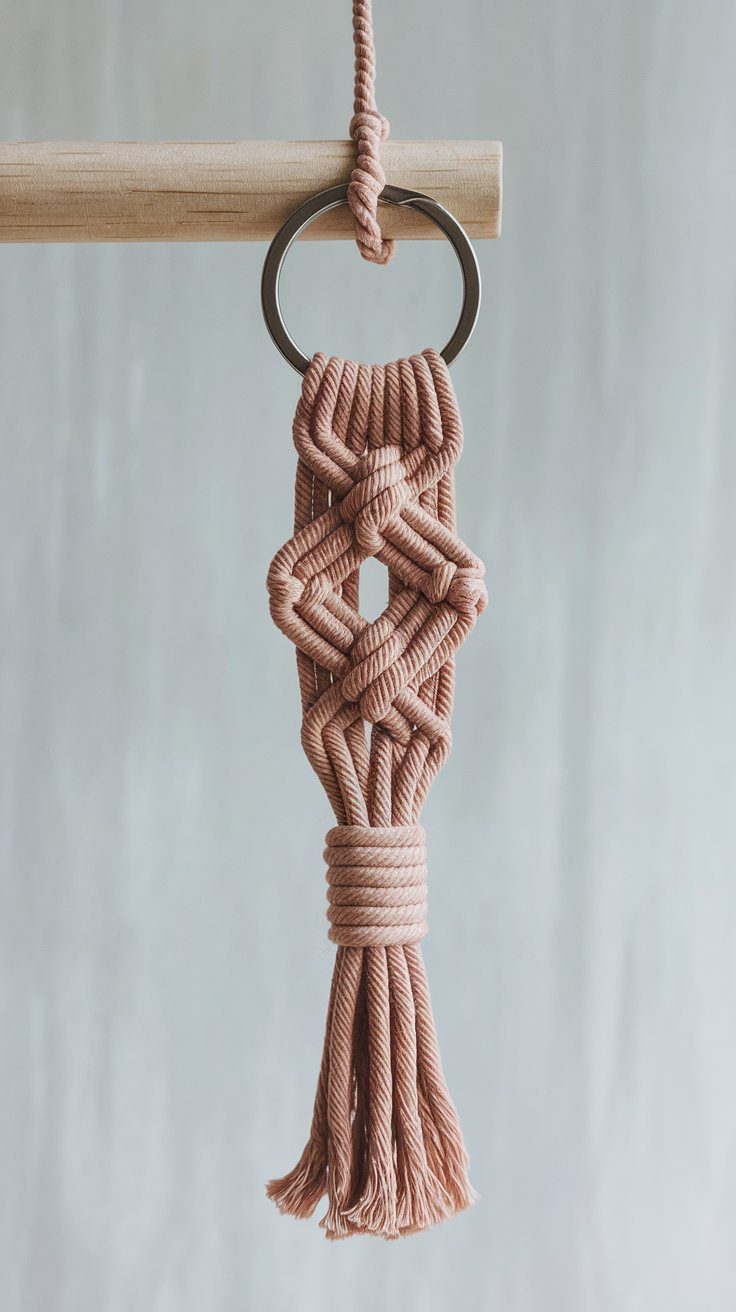
Try envisioning your keys playfully adorned with a hand-knotted macramé keychain.
What You Might Need: A keyring, macramé cord, and scissors.
Steps to Creating Your Keychain:
- Cut four strands of cord about half a meter long.
- Fold the cords in half and loop them through the keyring.
- Create your desired knot pattern until you reach the length you want for your keychain.
- Tie a final knot at the end to secure the pattern.
Picture This: A captivating macramé keychain that adds a whimsical, chic flair to your everyday items. It’s both a versatile accessory and a lovely handmade gift.
5. Macramé Bracelet
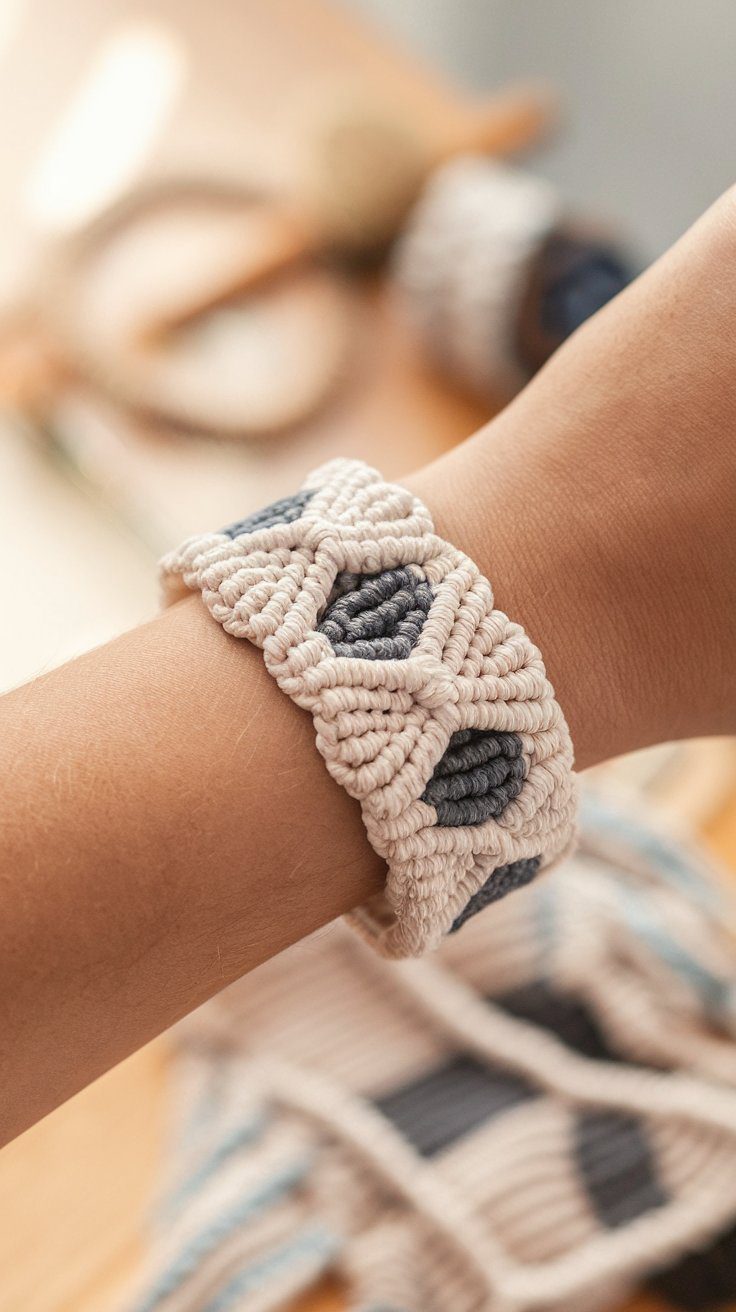
Imagine your wrist adorned with a fashionable macramé bracelet, a piece of wearable art.
What You Might Need: Macramé cord, scissors, and a clip board.
Steps to Creating Your Bracelet:
- Cut one long cord (about 120 cm) and one short cord (about 15 cm).
- Set your long cord onto the clip board and start weaving the short cord around it, tying alternating half-hitch knots until you achieve the desired length.
Picture This: A charming macramé bracelet, its intricate knots providing a touch of whimsy to your outfit. A statement piece that is both chic and laid-back, it’s wearable art right at your wrist.
6. Macramé Bookmark
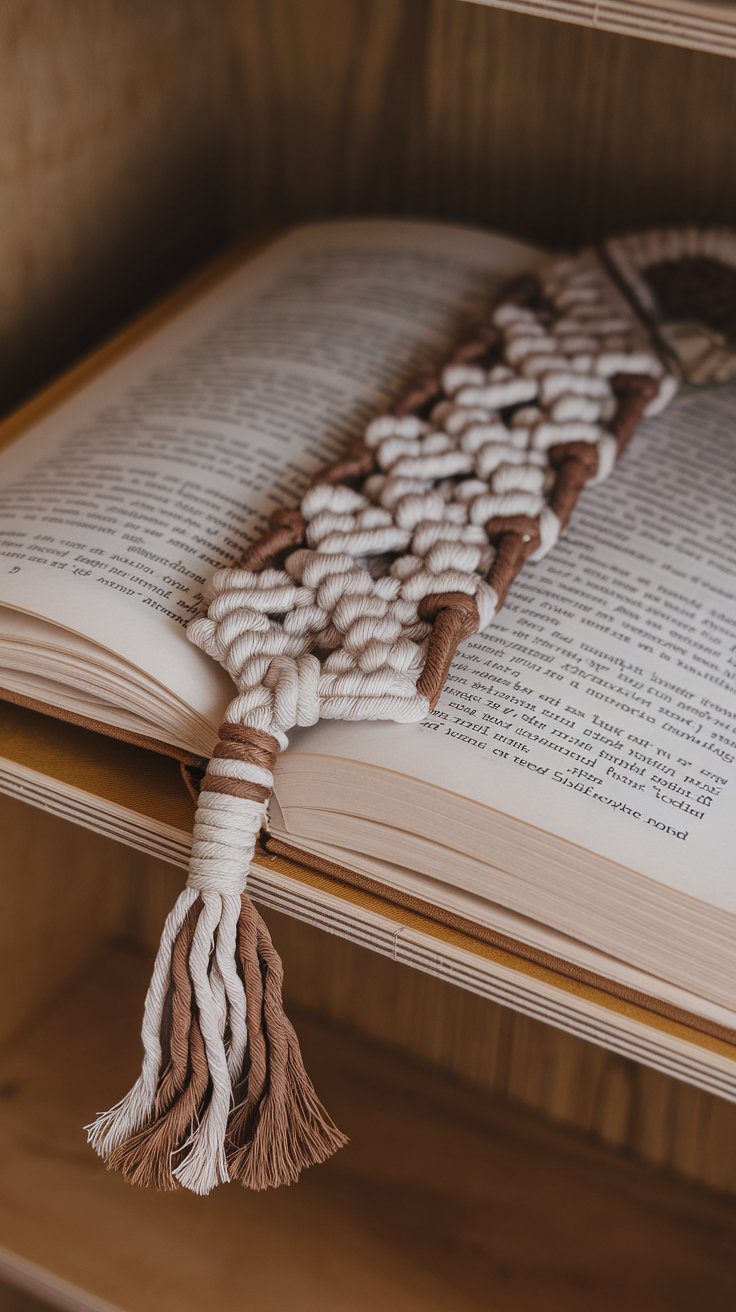
Consider the joy of opening your favorite book to find an exquisitely crafted macramé bookmark.
What You Might Need: Macramé cord, scissors.
Steps to Creating Your Bookmark:
- Cut a cord about 1 meter long.
- Start by creating a series of your favorite knots to the desired length, leaving some excess cord at the end as a tassel.
- Lastly, trim the tassel ends so they’re even.
Picture This: A beautifully textured, handmade macramé bookmark nestled between the pages of a beloved novel. It adds a personal, cozy touch to your reading experience.
7. Macramé Feather
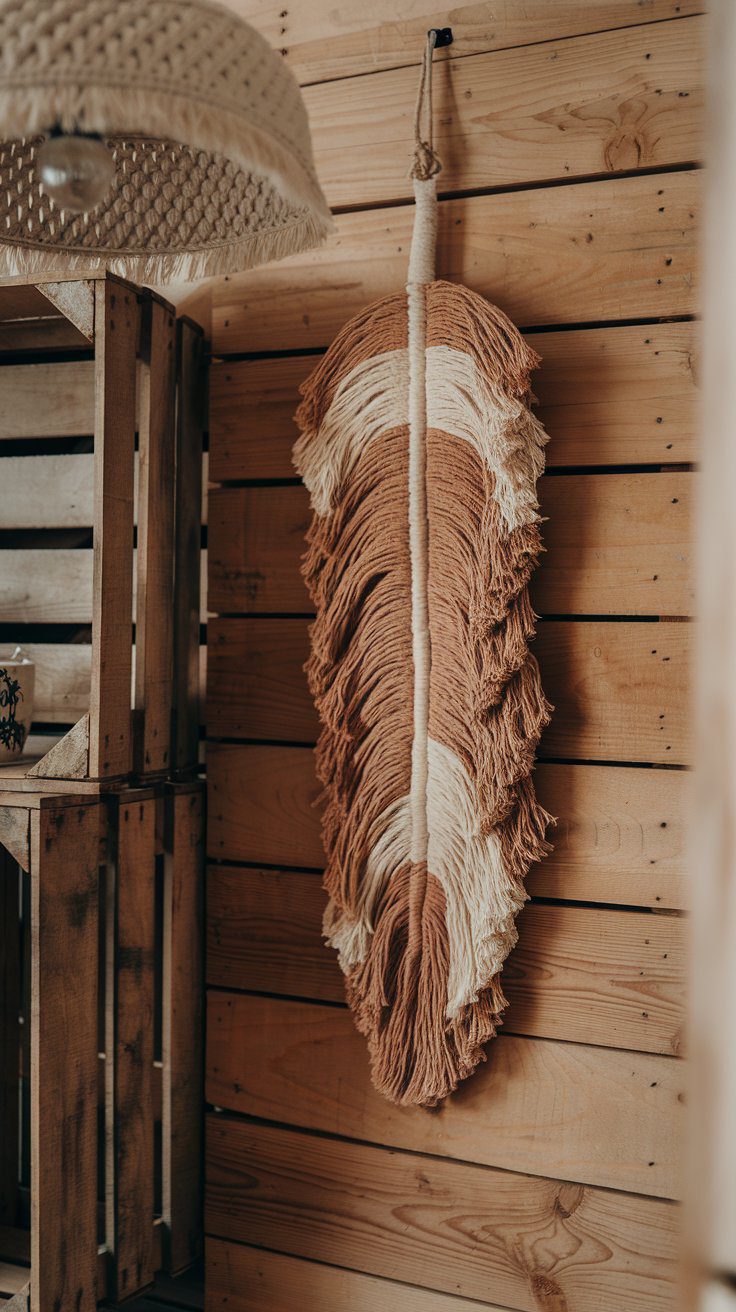
Envision a delicate macramé feather bringing an air of bohemian whimsy to your décor.
What You Might Need: Macramé cord, a comb, scissors
Steps to Creating Your Feather:
- Cut one long cord to serve as your feather spine and numerous shorter cords to create the feather ‘barbs’.
- Attach the short cords to the long one using lark’s head knots.
- Trim the short cords into a feather shape and use the comb to unravel and fluff them.
Picture This: A beautifully crafted macramé feather adding a focal point to your space. Perfect as a single piece or part of a larger wall hanging, the feather brings a whimsical, lightweight touch to your décor.
#8 Tie-Dye Macrame Wall Hanging

This one is a little different: the photo you see here isn’t just for ideas—it’s an actual macramé piece you can buy if you want something ready-to-hang. But for those who’d rather DIY, I’m also including step-by-step instructions so you can hand-make a similar version at home. That way, you can choose between instant boho décor or a fun, creative project that adds your own personal touch.
Here’s how to make a large tie-dye macramé wall hanging like the Wayfair piece:
Start with a smooth wooden dowel or branch about 60″ wide. Cut 60–70 strands of 5mm cotton macramé cord, each about 10–12 feet long (you’ll trim later) (grab a few rolls). Fold cords in half and attach to the dowel using lark’s head knots until the rod is full.
How to Tie a Lark’s Head Knot
This is one of the simplest knots in macramé and the go-to method for attaching cords to your dowel, ring, or branch.
- Fold your cord in half so you have a loop at the middle.
- Place that loop over the dowel, with the loop hanging behind it.
- Pull the two cord ends forward through the loop.
- Tighten by pulling both ends down evenly.
You’ll now have a neat, secure knot that holds your cord in place—perfect for starting wall hangings, plant hangers, or feathers.
Build the base with square knots and alternating square knots in sections, working in rows across the dowel. To create the mountain-like abstract shape, taper knots inward toward the center, leaving some strands long and free at the edges. Use double half-hitch knots for angled lines and to define “peaks.” Vary the density of knots (some tightly woven areas, some looser) for visual interest.
Once you’ve completed the main structure, separate the free-hanging strands into sections and comb them out with a pet brush for a softer fringe. Trim to a gradual “V” shape or layered diagonals for dimension.
For the dip-dye effect, gather the lower fringe and dip in a bucket of fabric dye (choose muted tones like indigo, terracotta, or sage). Hold cords in the dye for a gradient, keeping the upper macramé dry. Rinse gently, let dry completely, then brush the fringe smooth again.
Finish by attaching hanging hardware to the dowel, and steam the fringe if needed for a polished look.
How to Tie a Square Knot
Take four cords. Bring the left working cord over the two center cords and under the right cord. Then bring the right cord under the center cords and up through the loop on the left. Pull tight. Repeat the process from the opposite side. Together, the two steps make one complete square knot.
How to Make Alternating Square Knots
Once you’ve tied a row of square knots, move over by two cords and start the next knot. This staggered pattern makes the knots interlock and creates that classic woven look across your macramé.
How to Tie a Double Half Hitch Knot
Pick one cord to act as the “holding cord.” Wrap another cord around it twice, pulling tight each time. This creates a slanted line. Continue along the holding cord to form a smooth diagonal edge or curved shape.
What “Tapering” Means
Tapering is simply leaving some cords unknotted as you work toward the middle. This narrows the design, creating pointed or triangular shapes like mountains or chevrons in your wall hanging.
How to Comb Out Fringe
Once your cords are in place, separate the loose ends into small sections. Use a pet brush or fine comb to gently brush them until the strands unravel into a soft fringe. Trim the ends to the shape you want.
How to Dip-Dye Fringe
Mix fabric dye in a bucket following the instructions on the package. Gather the fringe together and dip just the ends into the dye. Hold it there for a gradient effect. Rinse lightly, let dry, and brush smooth again.
In conclusion, macramé is an accessible, versatile, and enjoyable craft that adds a unique charm to your home or wardrobe. So why wait? Embrace your creativity and start on your macramé journey today. Enjoy the calm focus that comes from crafting these intricate knots and immerse yourself in the world of this delightful artistic endeavor.
This website contains affiliate links. Some products are gifted by the brand to test. As an Amazon Associate, I earn from qualifying purchases. The content on this website was created with the help of AI.
