
This website contains affiliate links. Some products are gifted by the brand to test. As an Amazon Associate, I earn from qualifying purchases. The content on this website was created with the help of AI.
Time is money—especially when it comes to crafting for profit! If you’re looking for quick, easy, and sellable projects, this guide has you covered. These handmade crafts are perfect for busy creators who want to churn out high-quality products in no time. From trendy accessories to home décor, you’ll find something here to inspire your next bestseller.
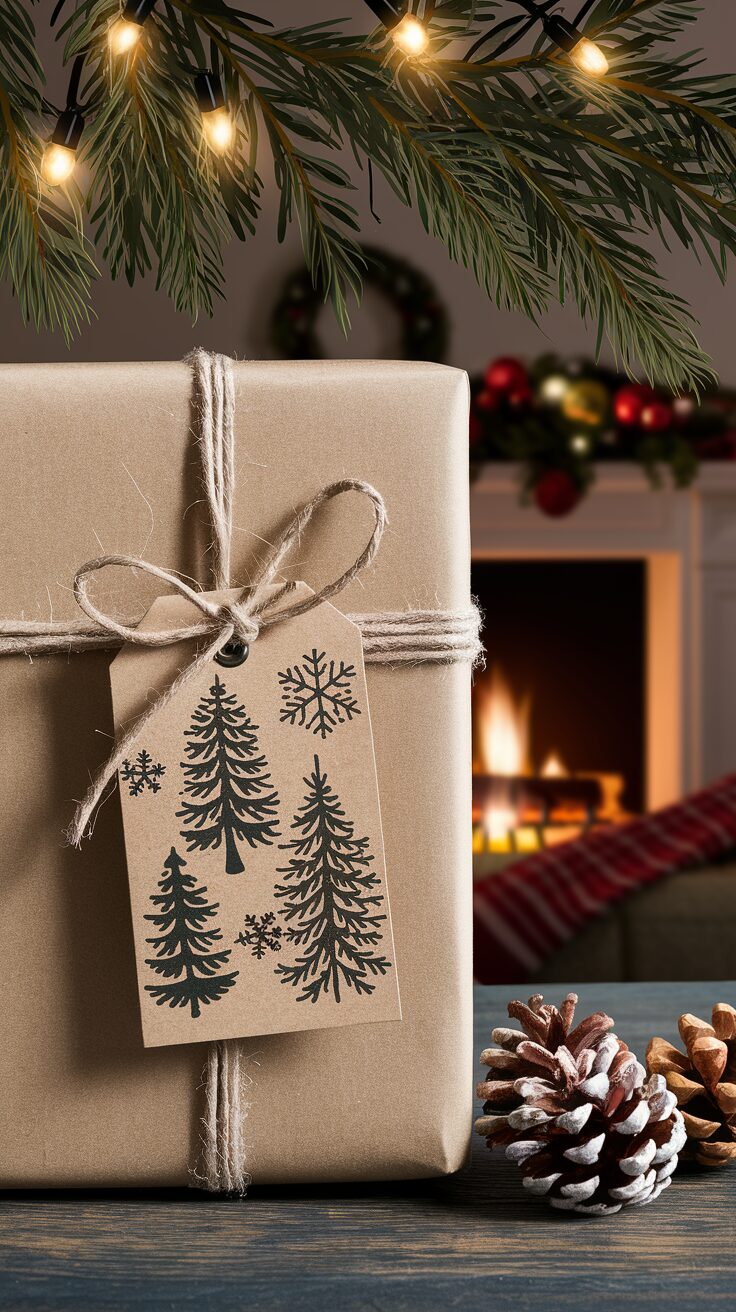
1. Hand-Stamped Gift Tags
Gift tags are the unsung heroes of holiday and event gifting, and they’re surprisingly simple to make!
Shopping List:


2. No-Sew Fabric Coasters
No Sew Coasters are functional, trendy, and ridiculously fast to make.
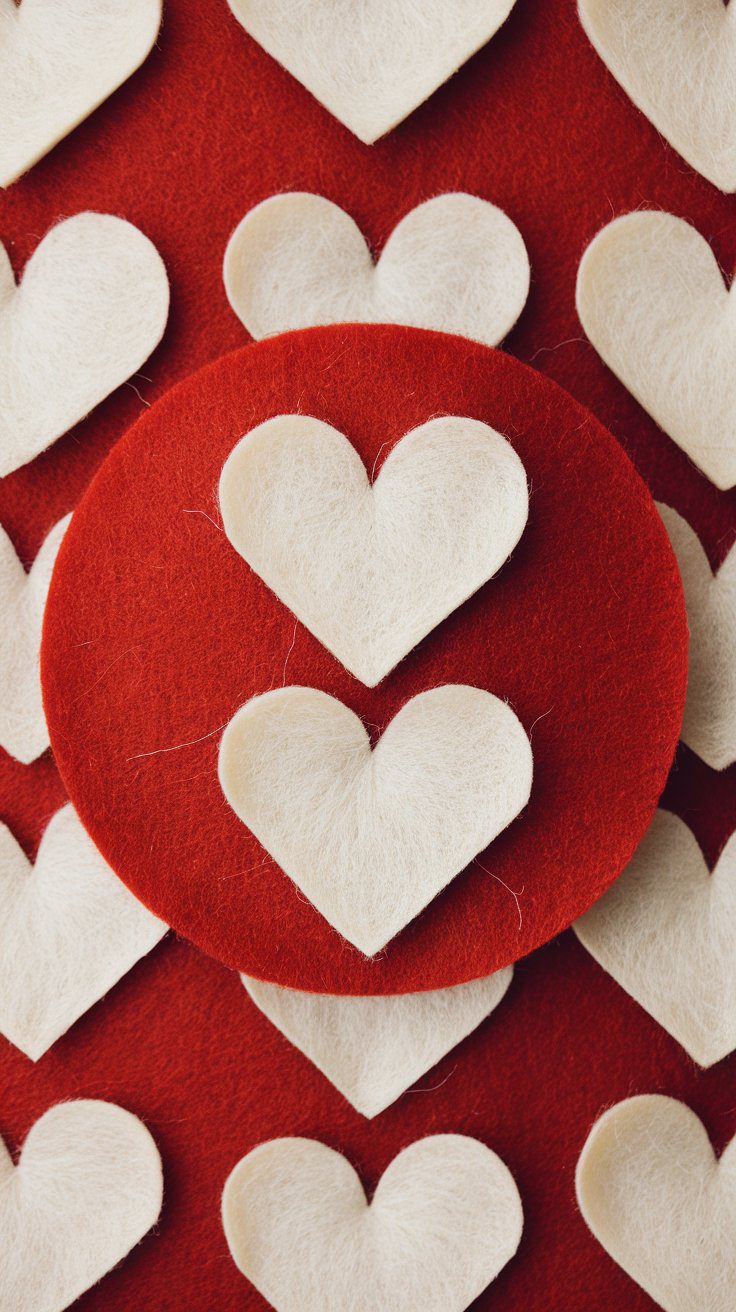
Quick, modern, and batchable—felt coasters are a 20–30 minute win you can bundle and sell in themed sets.
Shopping List:
Instructions:
- Trace & Cut: Use a 4″ round template to trace two circles per coaster onto felt. Cut cleanly with fabric scissors.
- Laminate Layers: Lightly glue one circle to another for thickness. Press flat.
- Edge Finish: Run a thin bead of glue around the perimeter and press to seal.
- Optional Backing: Cut a 3.9″ cork circle and glue to the underside for grip.
- Set & Cure: Stack under a book for 10–15 minutes.
Pricing & Bundling Tip: Sell in sets of 4 or 6; offer color palettes (Modern Neutrals, Cozy Autumn, Black & White Minimal). Include a small care card.
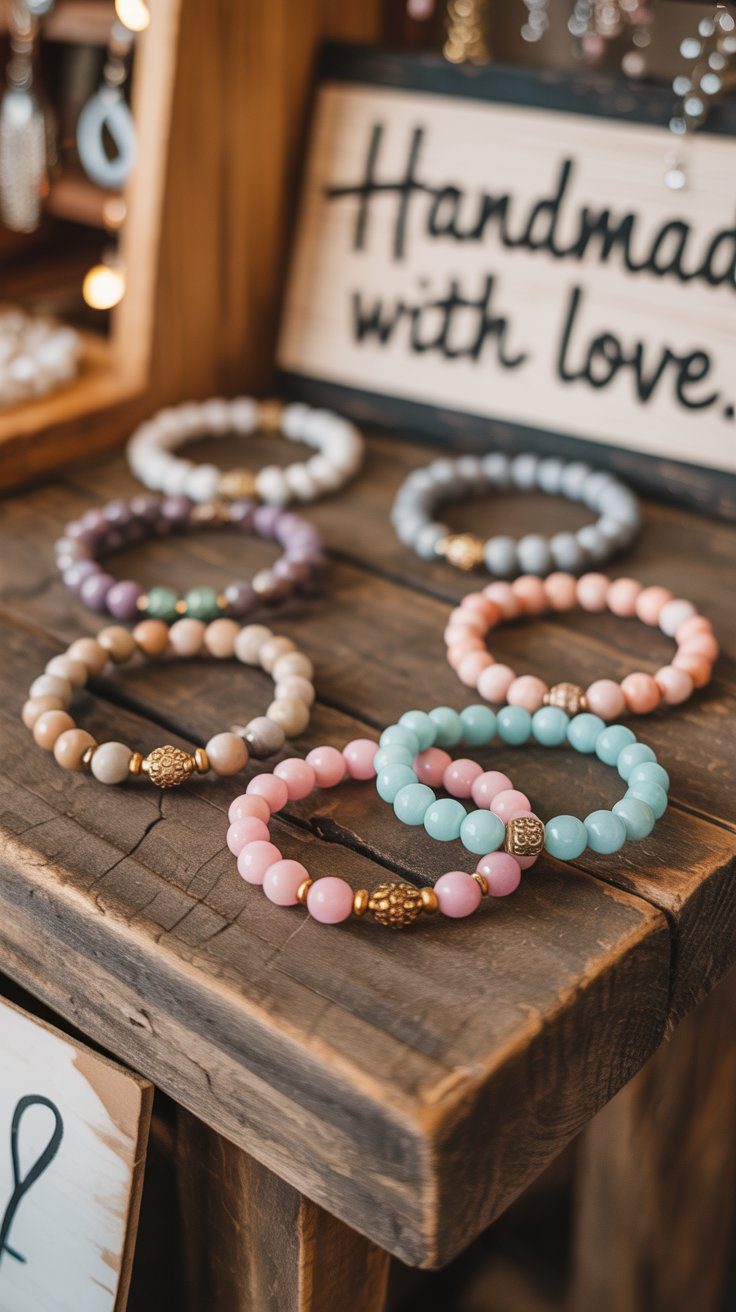
3. Minimalist Beaded Bracelets
Minimalist beaded bracelets are the ultimate quick-sell accessory—lightweight, trendy, and endlessly customizable. Mix matte and glossy textures, neutrals and pops of color, or metallics for a luxe finish.
Shopping List:
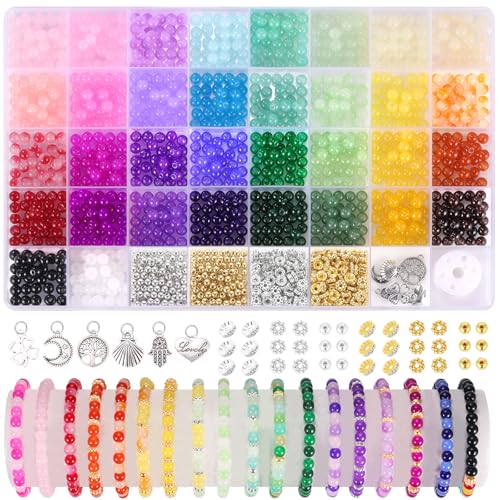

Instructions:
- Measure & Prep: Cut 10–11″ of elastic; pre-stretch gently so the bracelet won’t loosen later.
- Design: Lay out beads in your color story (neutrals + one accent, metallic mix, or monochrome).
- String: Keep total length slightly smaller than wrist for a snug fit.
- Secure: Tie a surgeon’s knot; add a tiny drop of
jewelry glue . Let cure 5–10 minutes. - Bundle: Create 3-bracelet stacks in coordinated palettes for higher AOV; package on branded cards.
4. Mason Jar Candles
Handmade candles? Check. Adorable packaging? Check. Fast and easy? Double check.
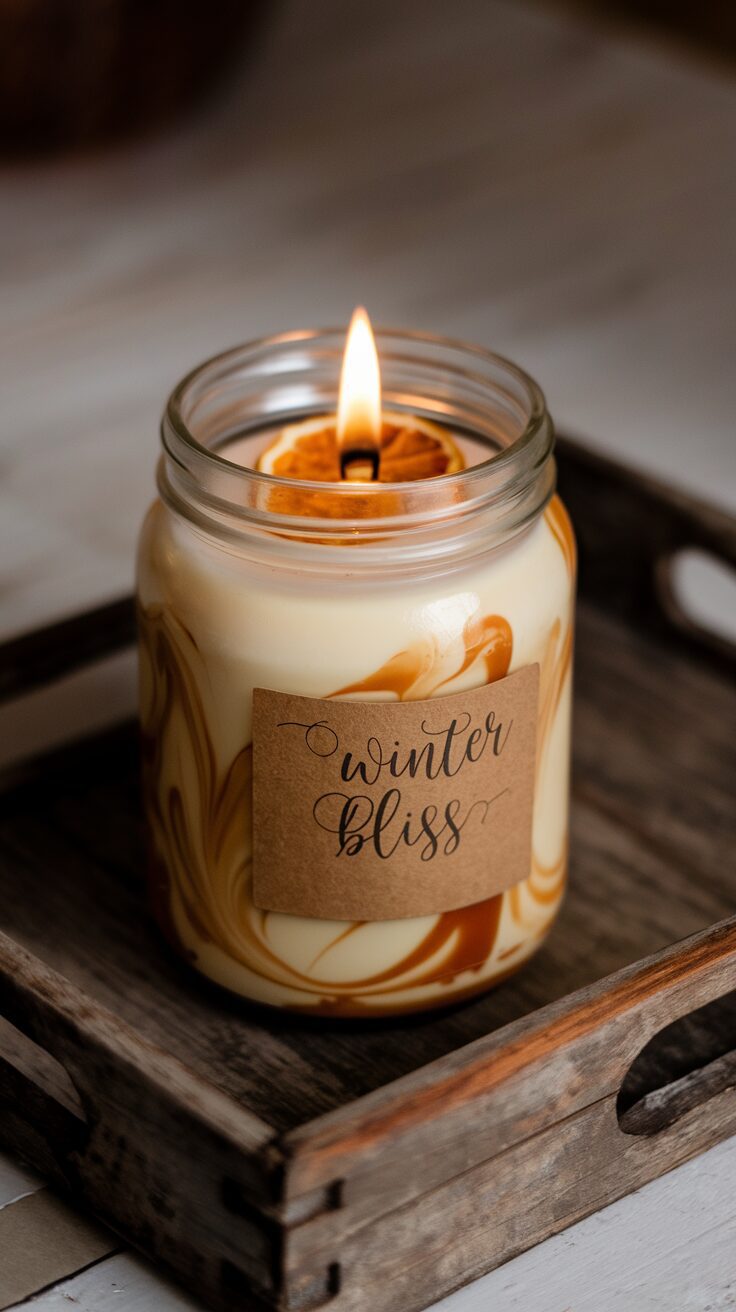
Cozy, customizable, and fast—great for seasonal bundles and gift sets.

Instructions:
- Wick the jars: stick a pre-tabbed cotton wick to the jar center with a wick sticker; add a centering clip.
- Melt wax: heat soy wax in a pouring pitcher until fully liquid (~170°F).
- Cool & scent: cool to ~135–145°F, then stir in fragrance (typically 6–10% by weight). Stir 1–2 minutes.
- Pour: fill jars slowly to reduce bubbles; keep wicks centered.
- Set & trim: let cool completely; trim wicks to ¼″.
- Cure & label: allow 24–48 hours before burning; apply warning labels.
Pro Tips: Test one jar per scent for hot throw, pour slightly cooler for smoother tops, and offer trio sets (Cozy Cabin, Winter Citrus, Vanilla Bean).
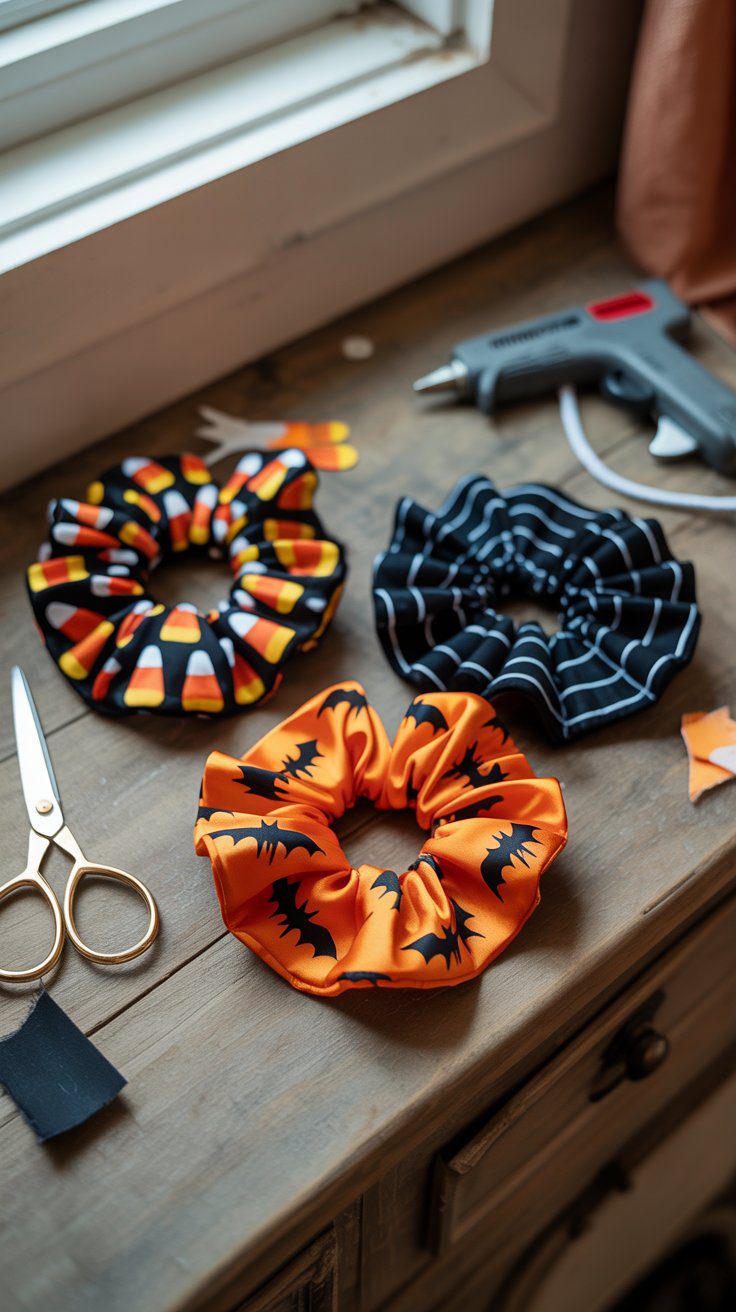
5. Scrunchies (No Sewing Machine Needed!)
Scrunchies are back and bigger than ever (literally—oversized scrunchies are a thing).
Shopping List:
Instructions:
- Cut Fabric & Elastic: Fabric 4×22″; elastic ¼″ × 8–9″.
- Make Tube: Fold fabric lengthwise and glue a ¼″ seam to form a tube.
- Thread Elastic: Attach a safety pin to one end of elastic; feed through the tube. Tie elastic ends in a tight square knot.
- Close Ends: Tuck one tube end ½″ into the other; glue the overlap closed.
- Finish: Roll gathers evenly around the elastic.
Selling Tip: Offer 3-packs by theme (velvet neutrals, satin pastels, floral brights) and display in a small basket or carded sleeve.
6. Personalized Keychains
Keychains are the perfect mix of personal and practical, and they’re a breeze to make!
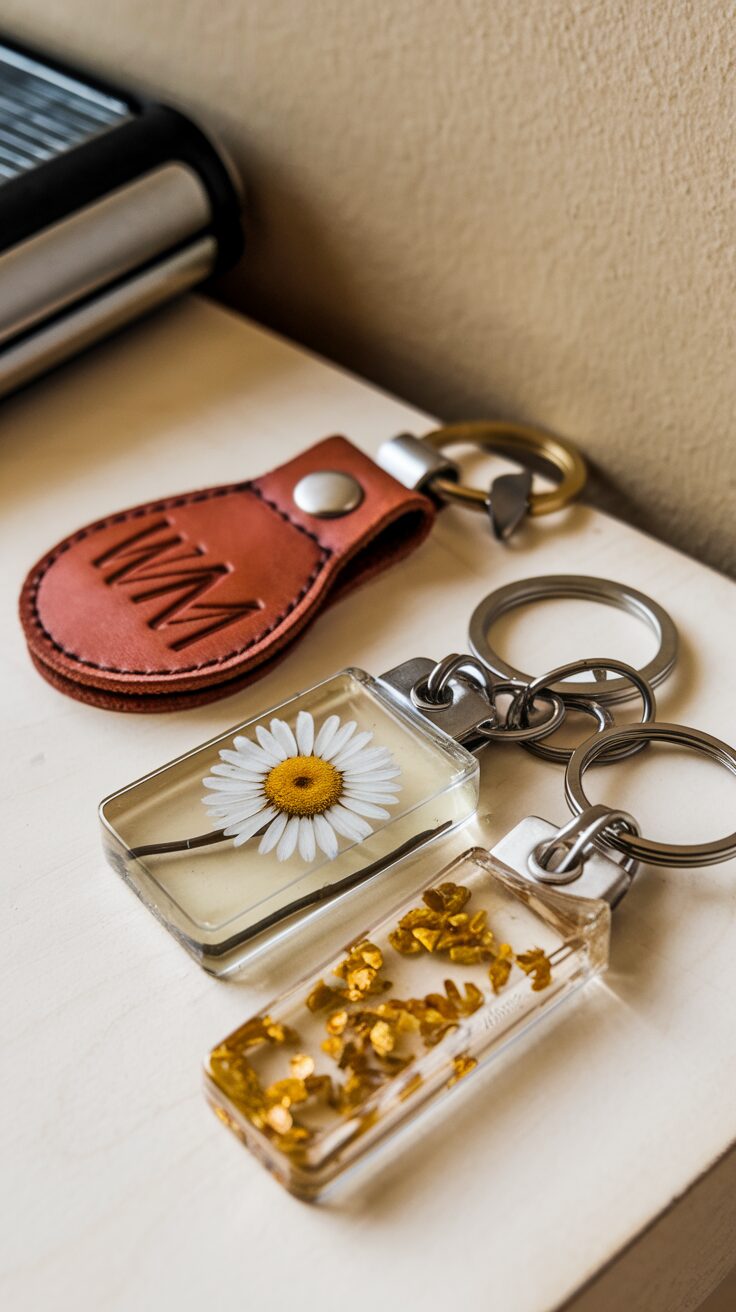
Fast, giftable, and customizable—offer initials, flowers, glitter, or school colors.

- Silicone Keychain Molds
- Key Rings + Jump Rings Set
- Pressed Flowers / Glitter / Confetti
- Letter Beads / Charms
Instructions (Resin Option):
- Arrange dried flowers in silicone keychain mold.
- Pour UV resin; cure with UV light or sunlight.
- Demold, sand edges, attach jump ring and key ring.
Selling Tips: Batch 10–20 blanks, upsell $2–$5 for personalization, and offer sets for wedding favors or team colors.
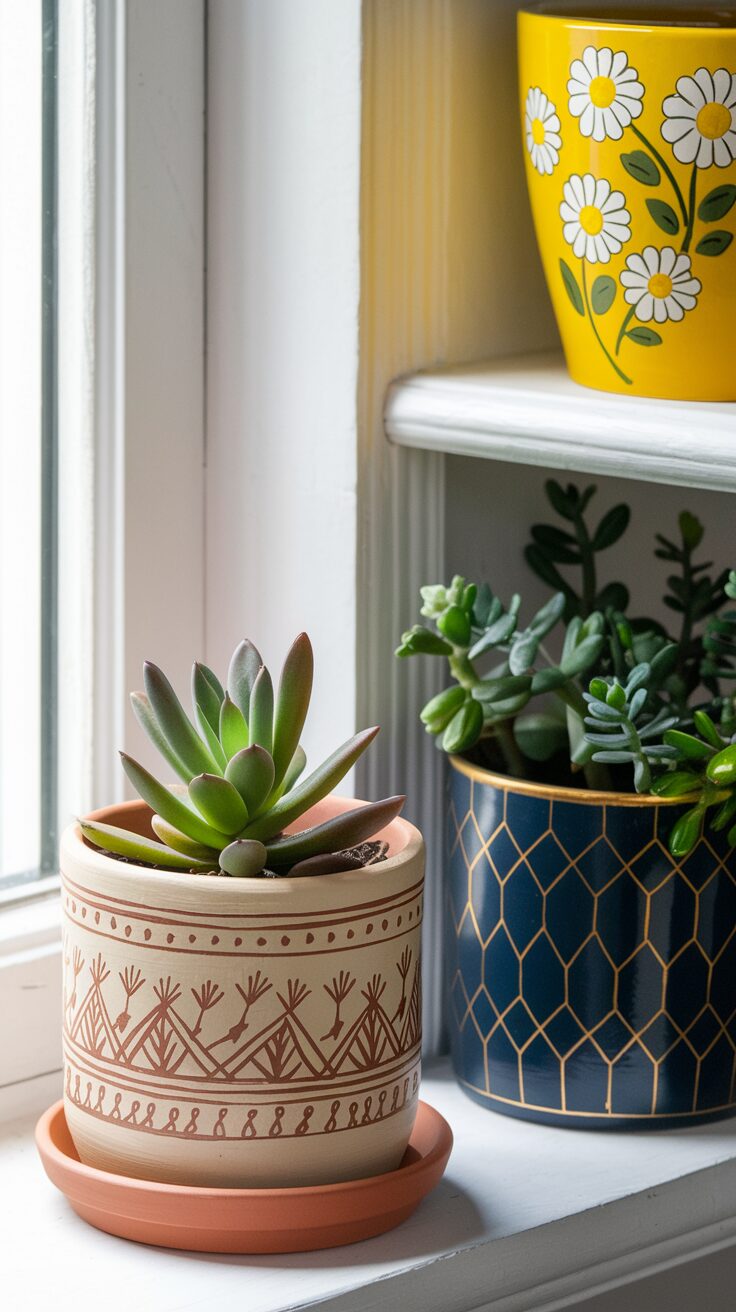
7. Hand-Painted Plant Pots
Plant parents, unite! These mini masterpieces are fun to make and super popular.
Shopping List:

Instructions:
- Prep Pots: Wipe each pot with rubbing alcohol; let dry completely.
- Base Coat: Brush on a thin base color; let dry.
- Plan & Mask: Lightly sketch your design with pencil. Use painter’s tape for stripes or geometric edges.
- Paint Details: Apply acrylics in thin layers, drying between coats. Use fine brushes or paint pens for florals, dots, or lettering.
- Seal: Spray a light, even coat of clear acrylic sealer on the exterior only.
- Finish: Pair with a matching saucer and add a small care tag.
Selling Tip: Bundle as a “mini garden set” (painted pot + saucer + succulent) and offer three palette options (Warm Neutrals, Pastel Spring, Bold Primary).
8. DIY Magnets
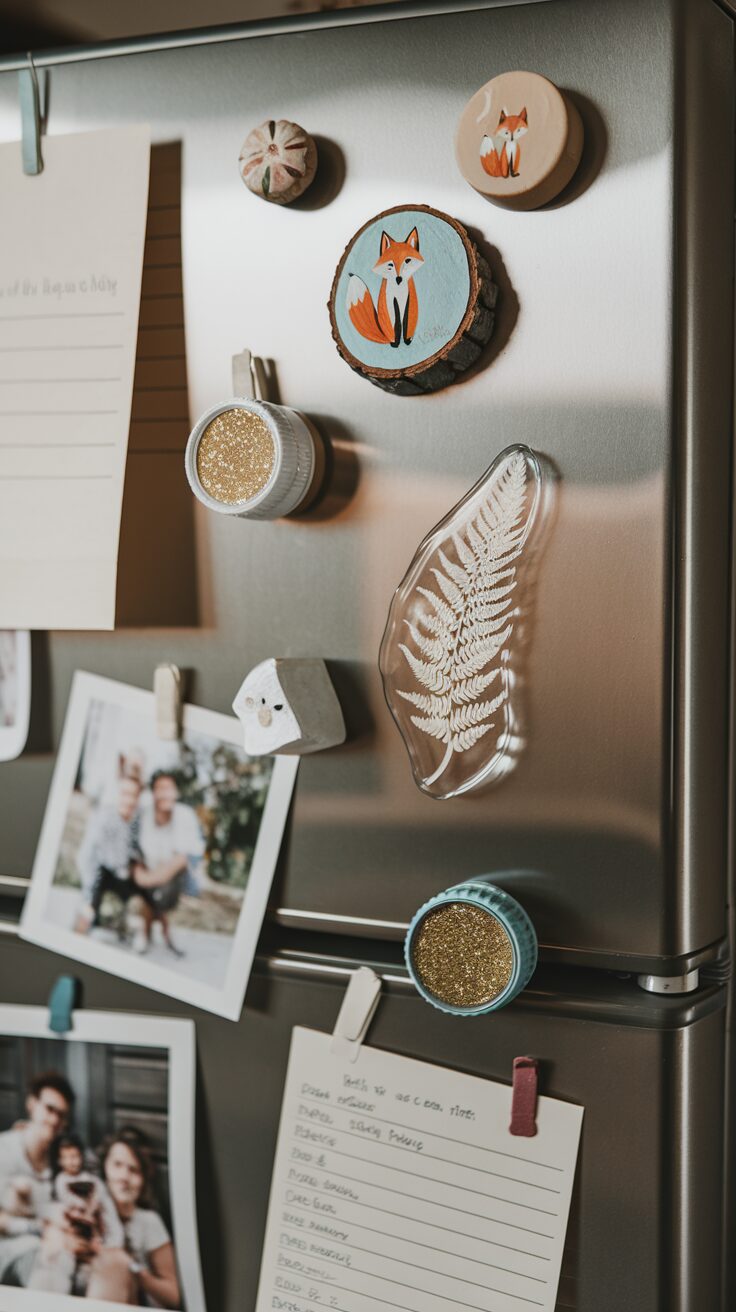
Shopping List:
- Strong Round Magnets
- Small Wood Slices
- Bottle Caps + Epoxy Domes
- Mod Podge / Clear Sealer
- E6000 or Strong Craft Glue
Instructions (Wood Slice Option):
- Lightly sand the face; wipe dust.
- Paint mini art, letter, or pattern; let dry.
- Seal the face with Mod Podge / clear sealer.
- Glue a round magnet to the back; cure fully.
Finishing: Sell in themed sets of 3–4 (farmhouse, coastal, retro) with a branded backing card.
With these quick crafts, you’ll be selling out in no time—literally! Whether you’re stocking your Etsy shop, prepping for a craft fair, or just looking for a fun side hustle, these ideas are sure to bring in the sales. So, what are you waiting for? Start creating!
This website contains affiliate links. Some products are gifted by the brand to test. As an Amazon Associate, I earn from qualifying purchases. The content on this website was created with the help of AI.
