This website contains affiliate links. Some products are gifted by the brand to test. As an Amazon Associate, I earn from qualifying purchases. The content on this website was created with the help of AI.
The Farmers Market Booth Checklist That Gets You Paid
Everything to pack the night before, sorted by what it actually does for your sales: keep you standing, get you seen, and get you paid.
Get the printable checklist ↓
What do you need for a farmers market booth? A 10×10 canopy with weights, a 6-foot folding table with a fitted cover, display risers for height, a card reader plus cash for change, clear price signs, and a small comfort and fix-it kit. That’s the whole list.
Your first market isn’t lost because your product isn’t good enough. It’s lost at 6:45 a.m. when you realize you forgot change, your canopy is flapping like a kite, and your best items are lying flat where nobody can see them. This checklist fixes that.
What every booth has to do
Stay standing
A canopy that’s weighted on every leg, so wind and rain don’t end your day early.
Get seen
A covered table and risers that show your whole booth from ten feet away.
Get paid
Cards, tap, and cash, so nobody who loves your product has to walk away.
Survive the day
Water, shade, clamps, and tape. The small stuff that saves a long market.
Set up the booth itself
Shelter: A Canopy That Won’t Fly Away
A 10×10 pop-up canopy is the standard booth size at most markets, so it’s the one piece you can’t skip. It keeps you and your products out of the sun and rain, and it makes your booth look like a real shop instead of a folding table in a parking lot.
Look for three things: a frame you can set up alone, a wheeled bag (you’ll be hauling it from your car), and included weight bags. A white top keeps your booth cooler and makes your products look brighter.
Shop this step
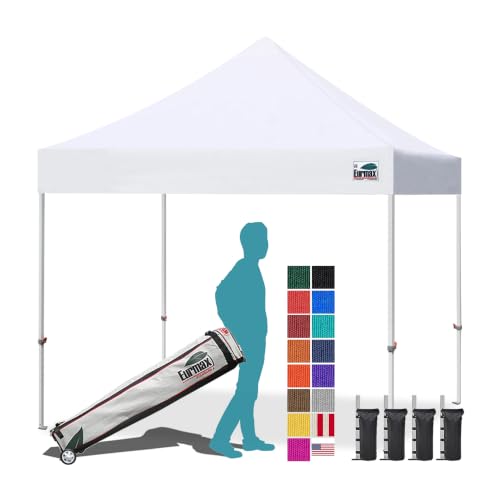

Table Setup: The Table Is Your Storefront
A 6-foot folding table fits under a 10×10 canopy with room for you to stand behind it. Get one that folds in half with a carry handle so it fits in your car and doesn’t wreck your back.
Then cover it. A bare plastic table says “yard sale.” A fitted stretch cover looks crisp, won’t blow around like a loose tablecloth, and hides the backstock you’ll stash underneath.
Shop this step

Height: Get Your Products Off the Table
This is the fix almost every beginner misses. When everything lies flat, shoppers walking by only see the front row. Add height and they can see your whole booth from ten feet away.
Put your best sellers on the top tier at eye level and small add-on items up front where people can grab them. A 3-tier wooden stand works for soaps, candles, jars, jewelry, and most small crafts.
Shop this step

Print the checklist before your next market
Open it, print it, and check it off the night before. It’s free.
Open the printable checklist →Get paid and get through the day
Getting Paid: Take Cards From Day One
Plenty of shoppers don’t carry cash anymore. If you only take cash, you’ll watch people love your product and walk away anyway.
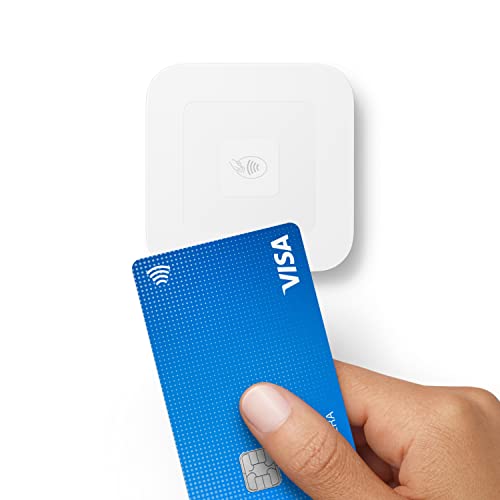
A Square Reader pairs with your phone and takes tap, chip, and phone payments. Still bring cash for change: small bills and coins in a locking cash box, plus a power bank so a dead phone doesn’t end your sales day.
Shop this step
Signs and Pricing: Answer the Question Before They Ask
Lots of shoppers won’t ask what something costs. They’ll just leave. Price every item, or use one clear sign per group (“All soaps $8”).
You also need a booth sign with your name so people can find you again next week. A sidewalk chalkboard sign is cheap, easy to update, and great for calling out a special. Add a small “We take cards” sign on the table.
Shop this step
The Comfort and Fix-It Kits
Markets are long. Pack a folding chair, more water than you think you need, snacks, sunscreen, and a layer for the cold morning setup.
Then keep a small bin of fixers: spring clamps, zip ties, tape, scissors, pens, markers, a trash bag, and paper towels. Something always slips, tears, or spills. The vendor with the clamp gets to keep selling.
Shop this step
Your 4-step pack-out routine
Pack in reverse
The canopy goes in the car last, so it comes out first.
Charge everything
Phone, card reader, and power bank, all at 100%.
Count your float
Write down your starting cash so you know your real sales at the end.
Practice once
Set up in your driveway and time it. Twenty minutes is a good goal.
Loved this? Pin it.
Hover or tap the checklist below and hit Save so it’s there the night before your next market.

Start small, then upgrade
You need shade, a covered table, some height, and a way to take cards. Start there, sell for a few weekends, and upgrade whatever slows you down.
Start with the canopy →This website contains affiliate links. Some products are gifted by the brand to test. As an Amazon Associate, I earn from qualifying purchases. The content on this website was created with the help of AI.
