This website contains affiliate links. Some products are gifted by the brand to test. As an Amazon Associate, I earn from qualifying purchases. The content on this website was created with the help of AI.
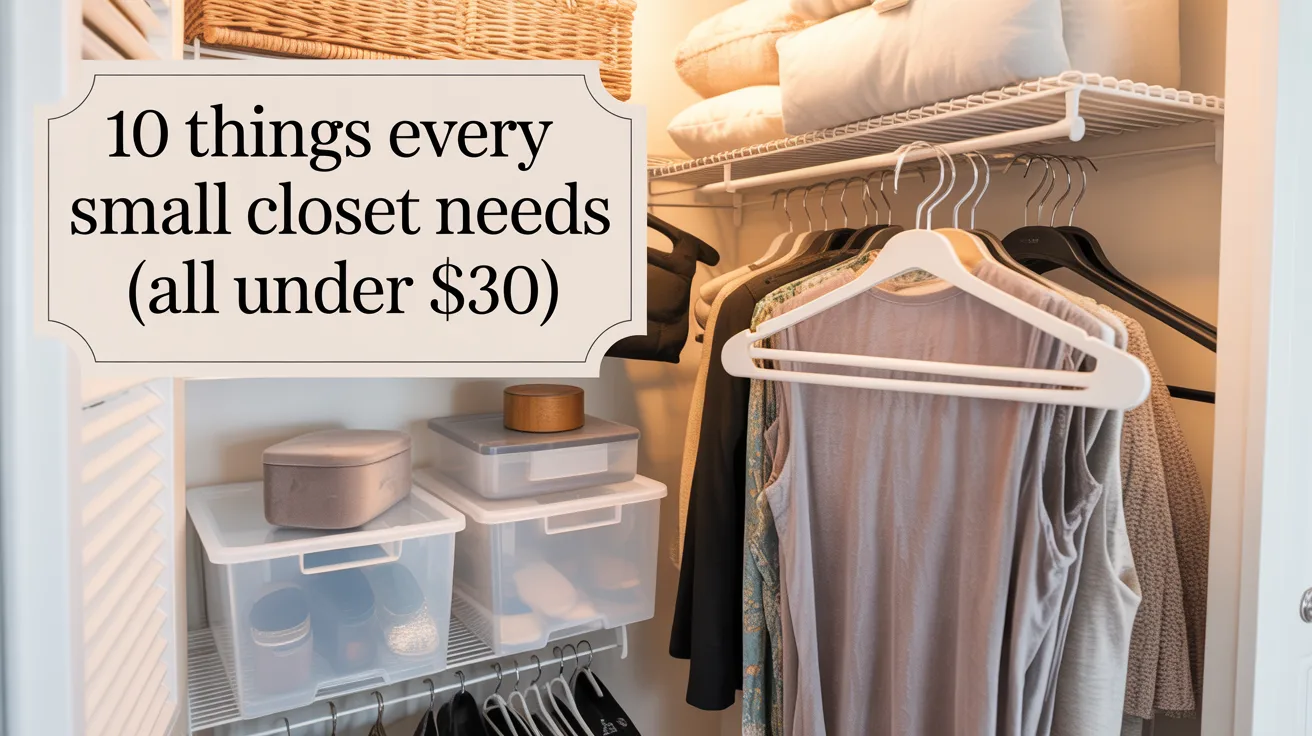
Most closet organization advice tells you what to do but not what to buy or where to start. I’m doing it differently. If I were starting a closet from absolute zero — bare rod, empty shelves, nothing — here are the exact products I’d order on Amazon and the exact order I’d tackle them. Skip what you already have. Buy the rest.
The order matters. You don’t buy bins before you’ve fixed your rod. You don’t buy a label maker before you know what your categories are. This sequence is designed so each step builds on the one before it.
Step 1: Replace Every Single Hanger
Before anything else. Velvet hangers are not optional in a small or medium closet — they’re the foundation. Plastic and wire hangers take up three to four times as much rod space. Switching to velvet gives you 30 to 40 percent more hanging room before you buy a single other thing. It’s the highest-ROI move in closet organization and it costs $15.
Do the whole closet at once. Mixing hanger types defeats the point. The Amazon Basics 50-pack in black is the one to get — consistent, clean, and the 360° swivel hook means you can rehang clothes one-handed. Order two packs if you have a full rod.

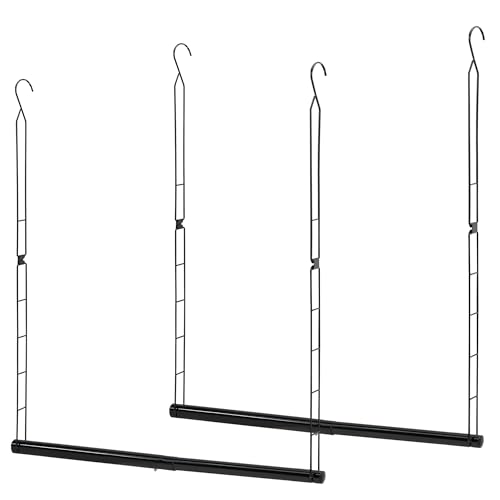
Step 2: Double Your Hanging Space
Now that your rod has breathing room, look at what’s hanging. Anything shorter than 40 inches — blouses, blazers, folded pants, kids’ clothes — is using only the top half of the closet. A hanging rod extender drops a second level below your existing rod and doubles the hanging capacity in that zone. The space below your short items is the most wasted real estate in most closets.
The STORAGE MANIAC 2-pack adjusts in both width and height so it fits any closet configuration without measuring. Hooks directly over your existing rod, no tools required. Use both extenders side by side if your short-item section is wide enough.
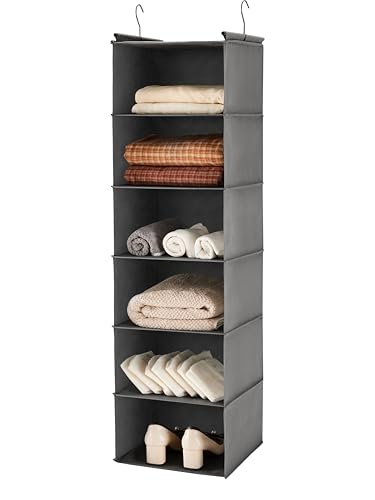
Step 3: Add Shelves Without Installing Anything
Find the section of rod with the most open space below the hanging clothes. That’s where you hang a 6-shelf organizer. It clips onto your rod and gives you six stacked shelves for sweaters, handbags, gym shoes, or anything else that would otherwise end up on the floor or in a pile on one shelf. You just created a shelving unit from a rod you already had.
The MAX Houser collapses flat when you want to take it down or reconfigure, which is the detail that makes it worth buying over generic versions. Use it in the section of your closet that doesn’t have a great built-in shelf situation.
Step 4: Activate the Back of Your Door
Most people never use this space. The back of your closet door is free square footage. An over-door organizer with 24 pockets handles shoes, accessories, scarves, belts, and anything else without a permanent home — and does it without touching the walls or the floor. In terms of storage you’re adding per dollar spent, this is one of the best purchases on this list.
Gorilla Grip’s 24-pocket version holds up to 40 lbs, has breathable mesh so shoes don’t hold odor, and the four hooks fit standard closet doors without any installation or damage. If your door swings outward, measure that you have clearance before ordering.

Step 5: Fix Your Shoe Problem
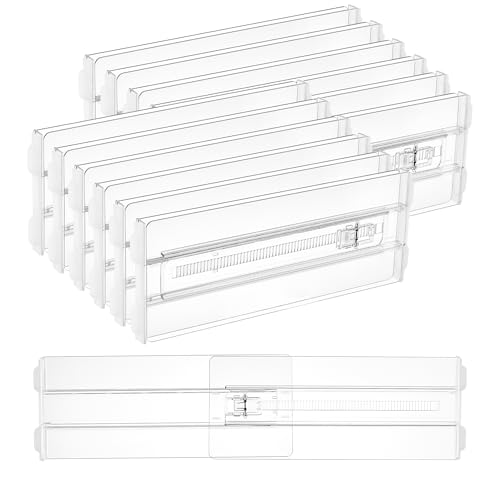
Shoes on the floor are how a clean closet turns into a mess. They take up floor space you could be using for something else, they’re hard to find, and they damage each other when they’re piled. Stackable clear shoe boxes solve all three problems: contained, visible, and protected. They stack vertically so they use height instead of floor space.
The drop-front magnetic door design means you don’t have to unstack boxes to get the pair you want. Stack them on a shelf or on the floor in the corner. Buy one 6-pack to start and add another if you need it.

Step 6: Divide Your Shelves
Shelves without dividers are unstable. Stack sweaters, jeans, or towels on an open shelf and they topple into each other within a week. Acrylic shelf dividers clip directly onto your existing shelves — no tools, no damage — and create permanent lanes that keep each category standing upright on its own.
BAUMFEUER’s 12-pack gives you enough to divide an entire closet in one shot. Clear acrylic disappears visually, which is what you want in a small space — organization that doesn’t add visual noise. Install them in under ten minutes and your shelves stay neat on their own from that point forward.

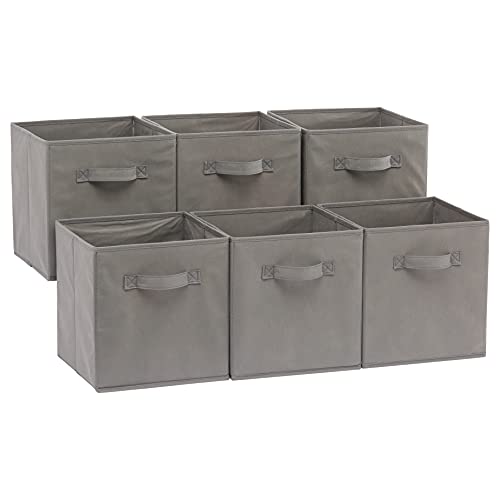
Step 7: Contain the Shelves with Bins
Now that your shelves have dividers, give each category a bin. One for workout gear. One for extra linens. One for off-season accessories. Bins transform open shelves from a place things get shoved into a place things actually live — and the handles mean you can pull the whole thing out instead of digging around.
The Amazon Basics collapsible gray 6-pack is neutral, sturdy, and folds flat when you don’t need them. Six bins covers most closets completely. Get them before you label anything — knowing what each bin holds tells you what your labels need to say.
Step 8: Fix Your Drawers
If you have a dresser in or near your closet, this is the step that makes the whole system click. Drawers without dividers become one mixed-up pile in about one laundry cycle. With expandable dividers, every category has a fixed zone — socks here, underwear there, accessories in the back — and it stays that way because the dividers hold it in place.
Vtopmart’s 12-pack adjusts from 10 to 17 inches, which means they fit essentially any standard dresser drawer without measuring. Clear plastic so you can see each section at a glance. Do the whole dresser at once while you’re in the organizing mindset — don’t leave half the drawers undivided or you’ll just move the mess there.
Step 9: Fold Everything the Same Way
This is the step most people skip and it’s why their drawers stop working. The KonMari vertical fold — standing clothes upright like files in a drawer instead of stacking them — only works consistently if you’re folding every shirt to the same width. A folding board makes that automatic. Three seconds per shirt, every fold identical, every shirt visible without moving anything.
The BoxLegend V3 has the steps printed on the board so there’s no learning curve. Folds down small for storage when not in use. Once you do one drawer this way you’ll do every drawer and wonder why you didn’t do it sooner.

Step 10: Handle Bags and Accessories
Handbags stored on shelves lose their shape and take up space that folded items need. Tote bags and everyday bags pile up on the floor. Command hooks on the closet wall or side panels let you hang bags by their handles — they stay shaped, you can see them, and you’re not wasting a single shelf on them.
The Command Medium Designer Hooks 50-set gives you enough to put hooks everywhere you need them and still have extras. They remove cleanly with zero wall damage, so if you put one in the wrong spot you just move it. Use them on the inside walls of your closet, the side panels, wherever you’d otherwise be hanging something from a rod that’s already full.

Step 11: Compress What You’re Not Wearing Right Now
Off-season items are the silent space killers. Winter coats in July and extra comforters year-round take up prime closet real estate that your current-season clothes need. Vacuum storage bags compress bulky items down to about 20% of their size so they can live on a high shelf, under a bed, or in a bin out of the way until you actually need them.
The Amazon Basics 12-pack comes in four sizes so you’re not guessing what fits where. Reusable, works with any vacuum or the included hand pump. Do this seasonal swap twice a year and your closet always has room for what you’re actually wearing.

Step 12: Label Everything
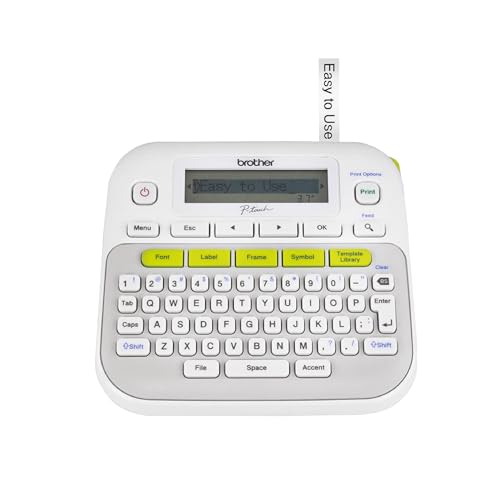
Last step, not first. Label your bins after they’re full so you know what actually goes in each one — not what you planned to put there. A label maker makes this fast and the labels look clean instead of like a temporary fix. Once everything is labeled, the system maintains itself because everyone in the household knows where things belong and where to put them back.
The Brother PT-D210 is the standard for home organization. Creates durable laminated labels in multiple fonts, works on bins, baskets, shelves, and drawers, and the one-touch keys mean you’re not hunting through menus. Buy it last so you’re labeling a finished system, not a work in progress.
The Complete Shopping List
In order from first to last — buy what you’re missing and work through the steps:
- Amazon Basics Velvet Hangers 50-Pack
- STORAGE MANIAC Hanging Rod Extender 2-Pack
- MAX Houser 6-Shelf Hanging Closet Organizer
- Gorilla Grip Over-Door Organizer 24-Pocket
- Stackable Clear Shoe Boxes with Magnetic Door 6-Pack
- BAUMFEUER Clear Acrylic Shelf Dividers 12-Pack
- Amazon Basics Collapsible Fabric Storage Bins 6-Pack
- Vtopmart Expandable Drawer Dividers 12-Pack
- BoxLegend V3 T-Shirt Folding Board
- Command Medium Designer Hooks 50-Set
- Amazon Basics Vacuum Storage Bags 12-Pack
- Brother PT-D210 Label Maker
This post contains affiliate links. As an Amazon Associate, I earn from qualifying purchases.
This website contains affiliate links. Some products are gifted by the brand to test. As an Amazon Associate, I earn from qualifying purchases. The content on this website was created with the help of AI.