This website contains affiliate links. Some products are gifted by the brand to test. As an Amazon Associate, I earn from qualifying purchases. The content on this website was created with the help of AI.
Creating your own macrame dreamcatcher is a beautiful way to blend creativity and calm. This beginner-friendly tutorial walks you through every step — from wrapping the hoop to weaving the web and adding those soft, boho-inspired macrame details. With just a few simple materials and a little patience, you’ll craft a handmade dreamcatcher that’s as meaningful as it is decorative. Whether you hang it above your bed or gift it to a friend, this piece will bring a touch of peace and artistry to any space.
Shopping List:
- Macrame cord 3mm cotton rope for wall hangings
- Metal dreamcatcher craft hoops set
- Wooden beads for macrame crafts
- Macrame feathers kit with cord and comb
- Embroidery scissors small craft scissors
- Mini hot glue gun with glue sticks
- Natural wood beads assorted sizes
- Boho feather charms for dreamcatchers
- Soft measuring tape for crafts
- Neutral macrame yarn or twine for wrapping hoops
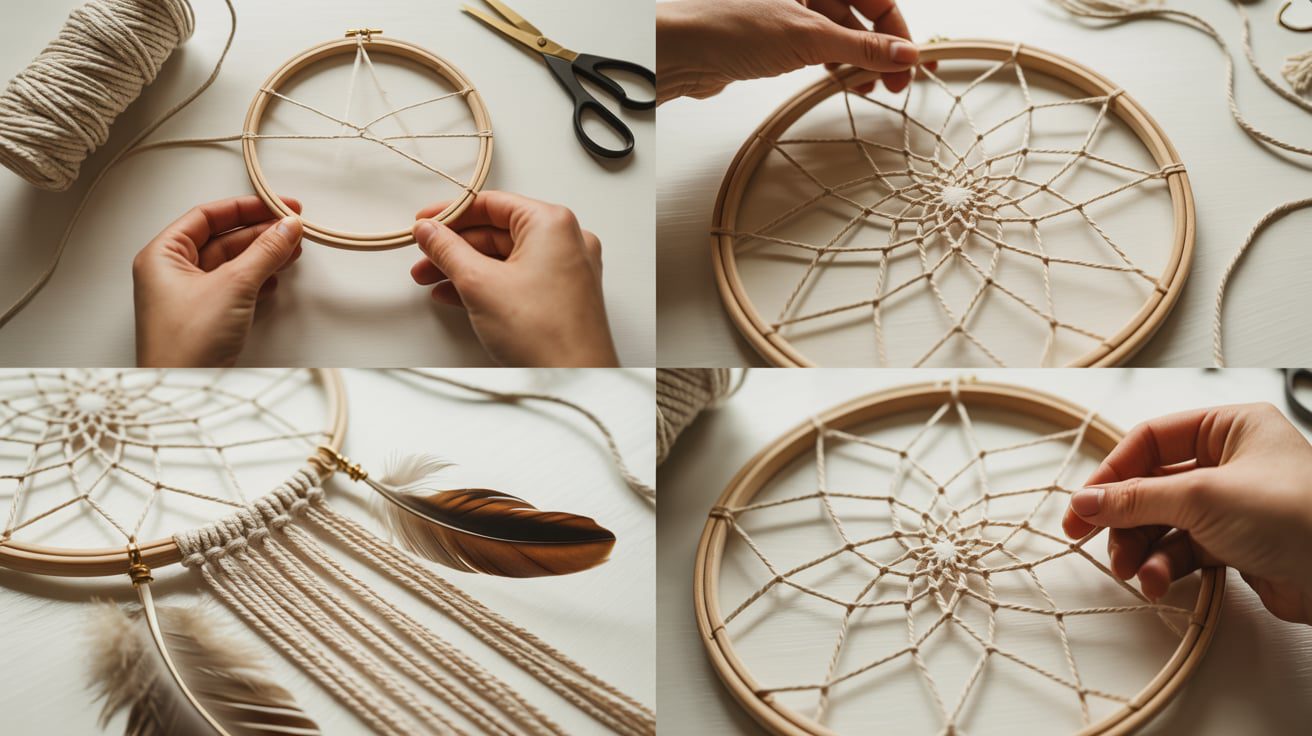
Step 1: Tie the First Knot
Get your small ball of string and tie a knot at one end. To make it extra secure, part the string into two sections and loop each side around the hoop before tying another tight knot. Slide it along the hoop to hold it in place.
Step 2: Wrap the Hoop
Wrap the rest of your string neatly around the hoop to cover it completely. If the string becomes loose, twist the hoop and wrap the other direction to tighten. Continue wrapping until the hoop is fully covered, then cut off the excess string.
Step 3: Secure the End of the Wrap
Take the end of the string, pull it through the last loop you made, and tie another tight knot. Don’t cut too close—leave a little bit of extra string so it doesn’t unravel.
Step 4: Start the Web
Tie the new piece of string to the side of the hoop with two or three knots. Move around the hoop, looping the string around evenly spaced sections. Go through each loop from the inside to create the web pattern. Keep the spacing consistent all the way around.
Step 5: Finish the Web
When you reach the center, pull your string through the final loop and toward the middle. Thread through a few of the inner loops, pulling tightly each time to secure the web. Cut the excess string, leaving a small tail so it doesn’t unravel.
Step 6: Prepare the Macrame Strings
Cut your long string into pieces about 120 cm each. Fold them in half and loop each one onto the bottom of the hoop using a lark’s head knot. The lengths should form a triangle shape as they hang.
Step 7: Arrange the Strings for Macrame
Make sure you have an even number of hanging strings (about 20). Separate four strings for each square knot—two center strings and two outer ones.
Step 8: Create the Square Knots
Bring the left outer string over the center two and through the loop on the right, then pull tight. Next, bring the right outer string over the center two and through the loop on the left. Repeat this alternating pattern to form the square knots.
Step 9: Add the Feathers
Use the pre-tied feathers and attach them to the inner two strings of the square knots. Tie each feather securely and adjust the height as desired.
Step 10: Finish Your Dreamcatcher
Trim any uneven strings, make sure all knots are tight, and your macrame dreamcatcher is complete—ready to hang and enjoy.
This website contains affiliate links. Some products are gifted by the brand to test. As an Amazon Associate, I earn from qualifying purchases. The content on this website was created with the help of AI.