This website contains affiliate links. Some products are gifted by the brand to test. As an Amazon Associate, I earn from qualifying purchases. The content on this website was created with the help of AI.
My jewelry kept ending up in a pile on the nightstand—rings tangled with earrings, bracelets sliding off the edge, something always rolling under the dresser. I finally got tired of it and made a stack of clay trinket dishes over one weekend. They cost almost nothing, they look like something from a boutique shop, and every single one is exactly the size and shape I actually needed. That is the thing about making your own: you stop buying storage that almost fits and start making storage that fits perfectly.
Each finished dish is approximately 4 inches in diameter and 3/4 inch deep with a gentle curved lip that keeps small items from rolling out. The base is flat enough to stack, the walls are about 1/4 inch thick, and the surface is smooth enough to take detail work with a fine-tipped paint pen. I made mine in a neutral off-white with thin gold rim detailing, but the same technique works for full painted coverage, two-tone designs, or a simple raw clay finish sealed with matte varnish.
What You Will Need
- Jovi Air Dry Clay — this 2.2 lb block is plenty for 6 to 8 dishes; it conditions easily, dries hard without cracking when rolled to 1/4 inch, and takes paint cleanly
- Clay roller with thickness rings — the guide rings snap onto the roller and hold a consistent 1/4 inch depth on every pass; without this your dishes will have uneven walls and uneven drying
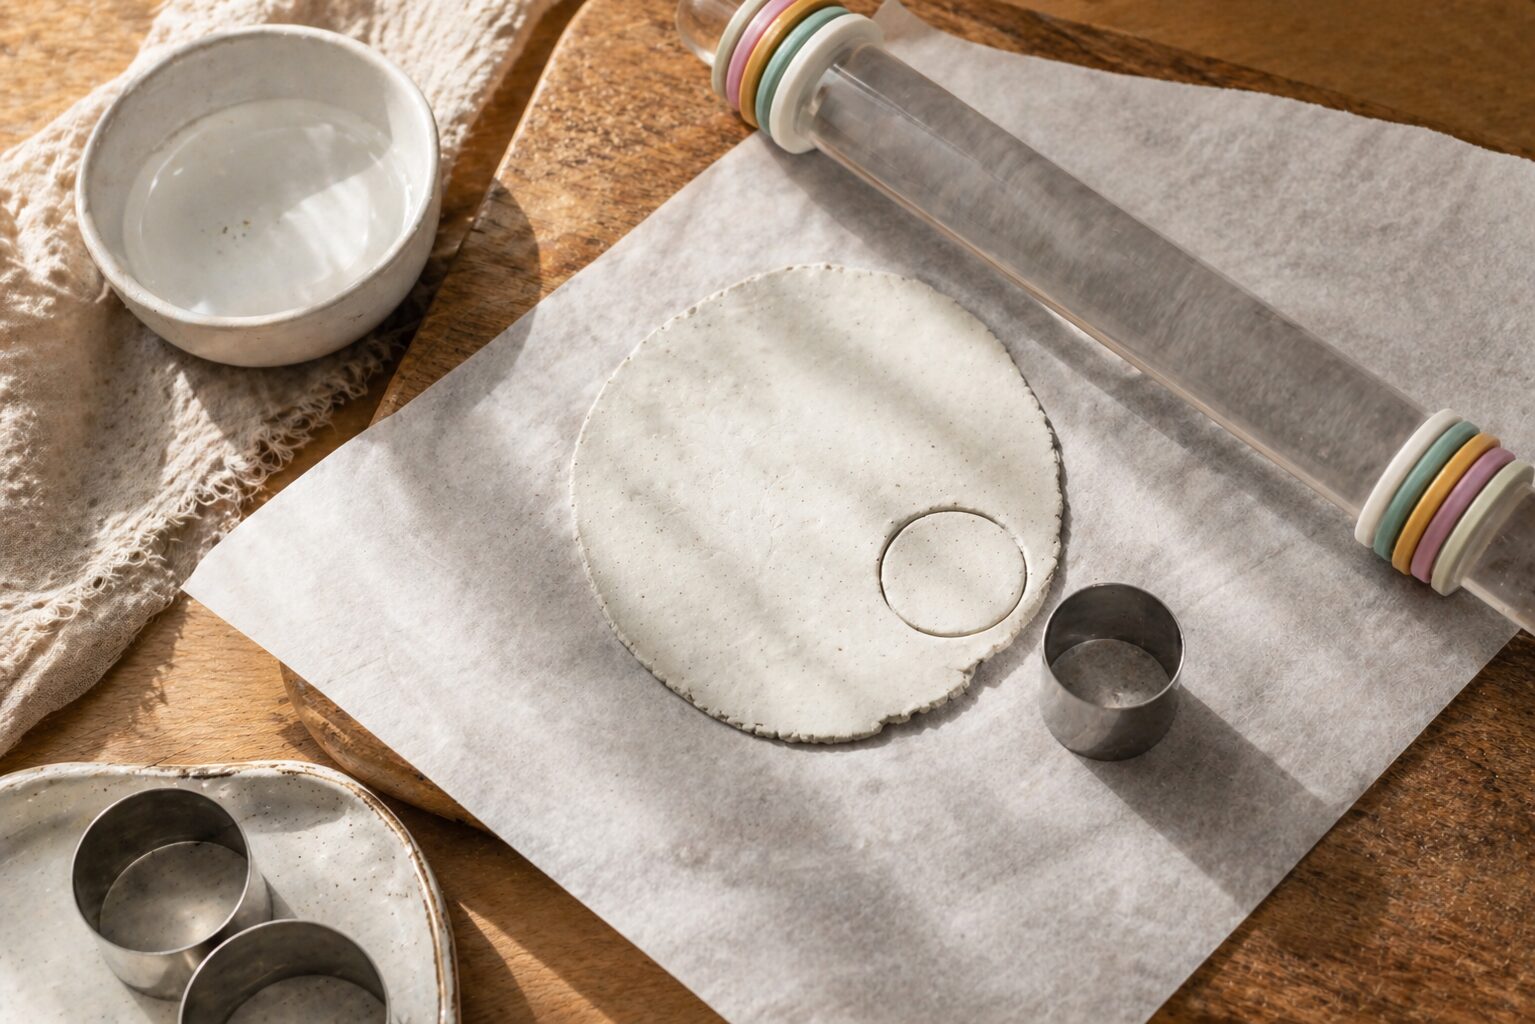
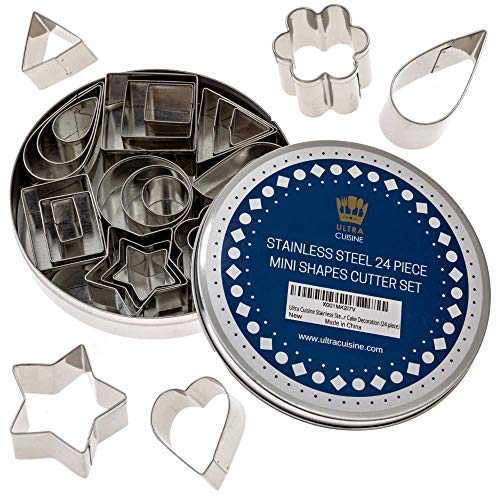
- Mini cookie cutters — the 24-piece set includes rounds from 1 to 3.5 inches; use the 4-inch round to cut the base and the smaller shapes to stamp or cut out decorative patterns in the rim
- Acrylic paint set, 24 colors — the full set means you can mix the exact neutral or muted tone you want; these paints adhere directly to sealed clay without primer
- Gold and silver paint pens — the fine tip gives you control for rim lines, dot patterns, and botanical details that would be nearly impossible with a brush at this scale
- A smooth ceramic ramekin or small bowl to drape the clay over — the outside of the bowl becomes the inside curve of your dish, so choose a shape you like
- Parchment paper for your work surface — prevents sticking and makes it easy to move the clay without warping it
- 220-grit sandpaper for smoothing dried edges
- Mod Podge Matte or a clear acrylic sealer spray — one coat before painting and one coat after protects the surface and prevents the paint from lifting
- A small bowl of water and a soft silicone sculpting tool or your fingertip for smoothing seams

Step 1: Set Up Your Work Surface
Lay a sheet of parchment paper on a flat, hard surface — a cutting board works better than a soft mat because soft surfaces compress unevenly under the roller. Set out your water bowl, roller, and cookie cutters before you open the clay. Air dry clay starts drying the moment it is exposed to air, so having everything within reach means you are not scrambling mid-project. Lightly dampen a corner of the parchment with water to keep it from shifting while you roll.
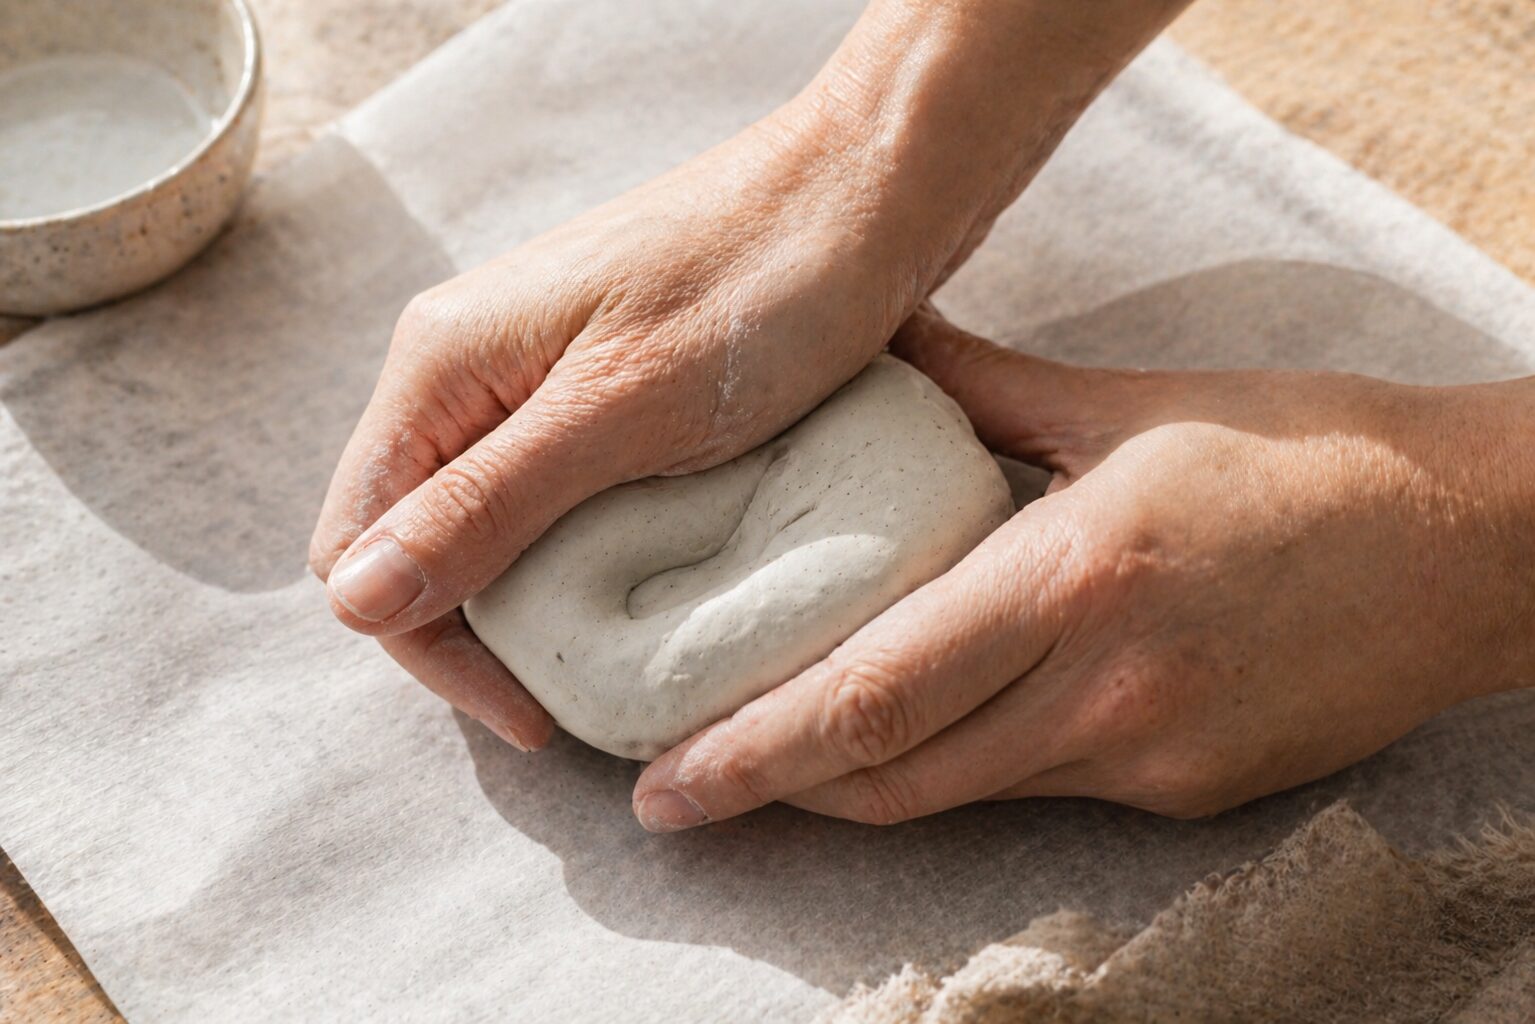
Step 2: Condition the Clay
Cut off a piece of clay about the size of a large orange — roughly 200 grams for one 4-inch dish. Work it between your palms for 2 to 3 minutes, folding and pressing until it feels uniformly soft with no firm spots or cracks. If the clay feels stiff, dip your fingertips in water and work the moisture in gradually — do not soak it. If it feels sticky, let it rest on the parchment for 30 seconds uncovered before continuing. Properly conditioned clay should hold a smooth ball shape without surface cracks.
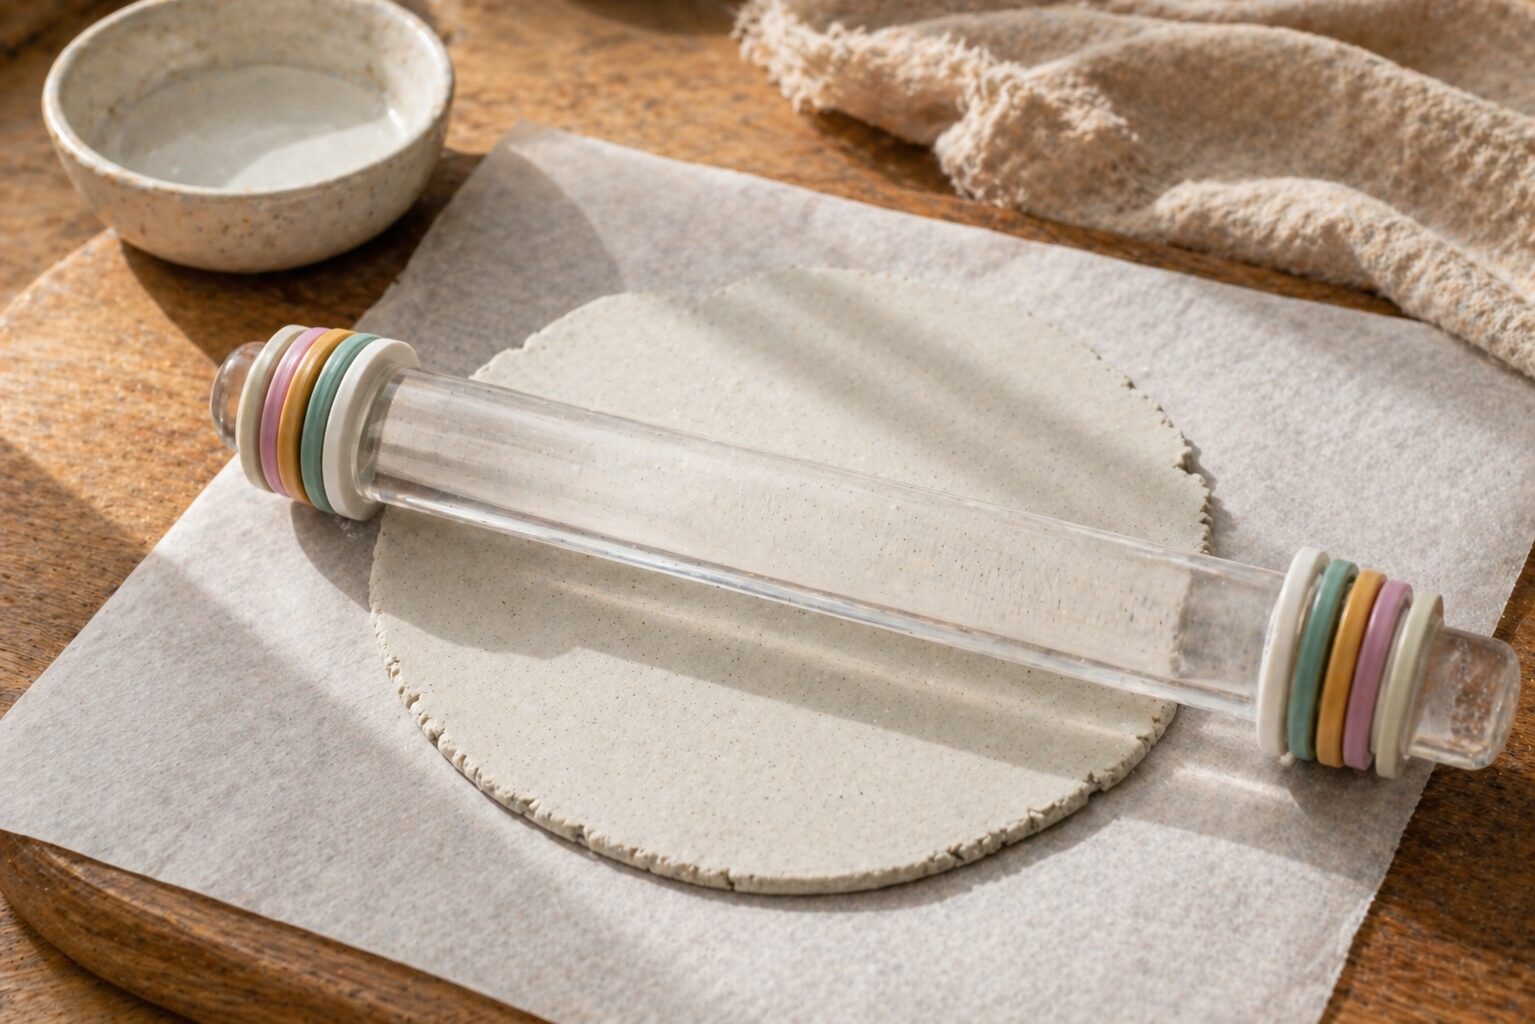
Step 3: Roll to Uniform Thickness
Attach the 1/4-inch guide rings to your roller. Place the conditioned clay ball in the center of the parchment and press it into a rough disk with your palm before rolling. Roll outward from the center in four directions — not back and forth in a line — rotating the parchment 90 degrees after each pass. You need a slab at least 5 inches wide to cut a 4-inch base with room to spare. The guide rings will stop the roller at exactly 1/4 inch; once the roller rides on the rings without pressing further, you are done. The surface should be smooth and even with no thick ridges.

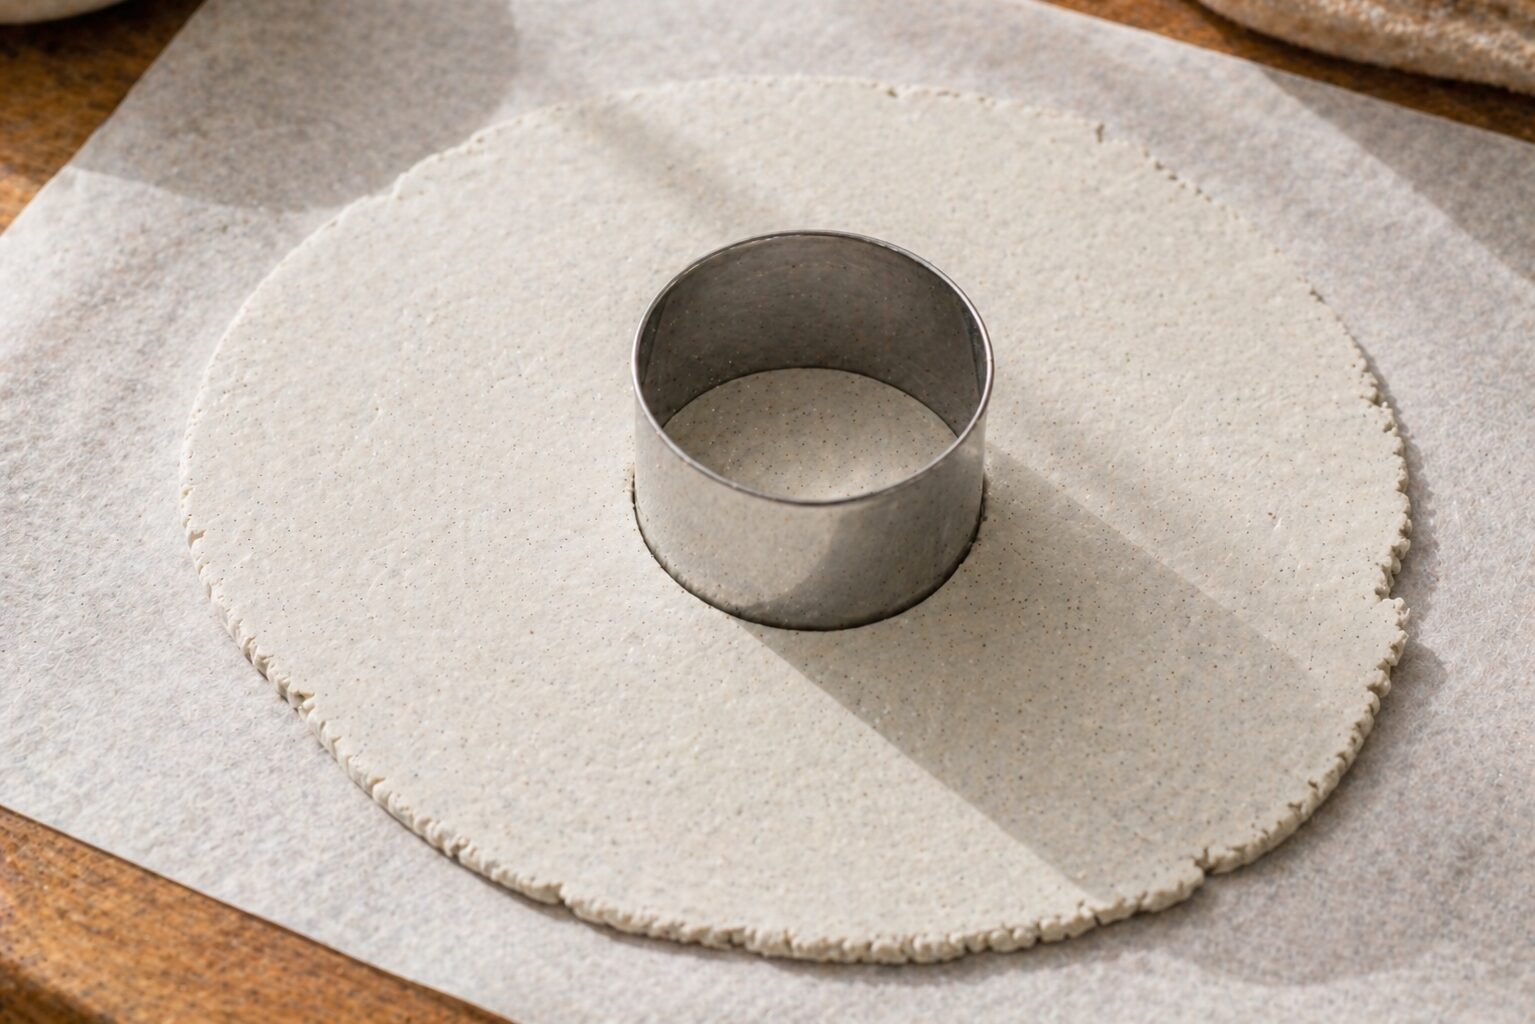
Step 4: Cut the Dish Base
Press the 4-inch round cookie cutter straight down into the slab with one firm, even push — do not rock or drag it. Lift the cutter straight up. You should see a clean circle. If the edges are slightly rough, wet your fingertip and smooth them now while the clay is still soft. Remove the scrap clay around the circle and set it aside covered in plastic wrap so it does not dry out. You can re-roll scraps between dishes. Leave the cut circle on the parchment — do not lift it yet.
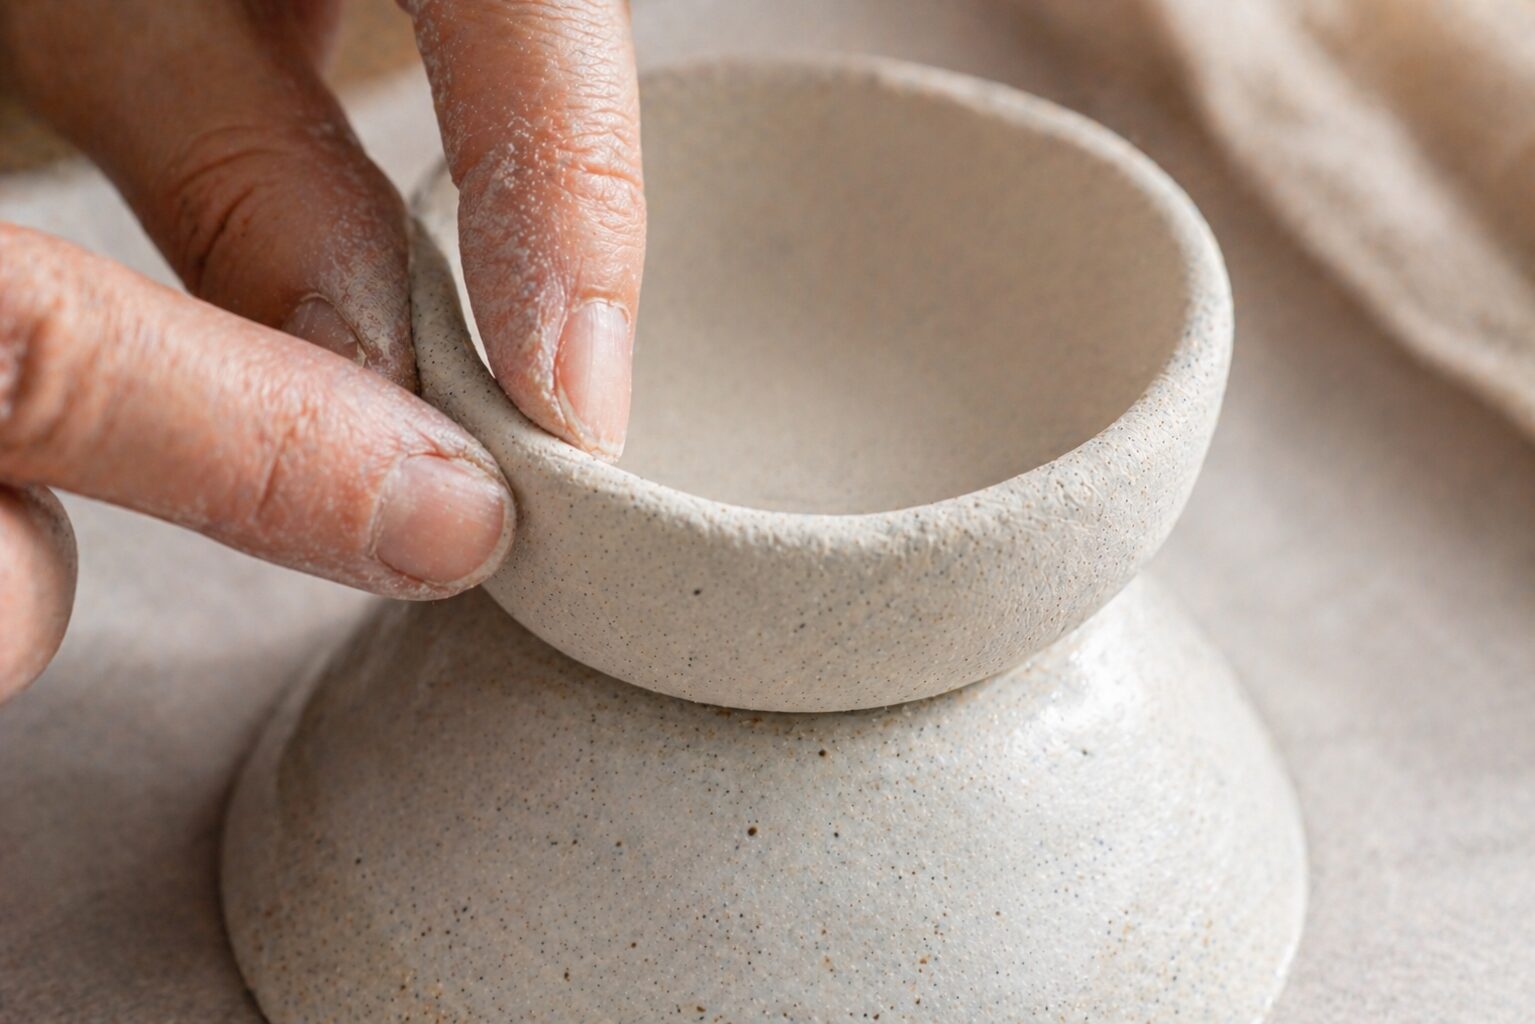
Step 5: Shape the Dish Over the Mold
Flip the ramekin or small bowl upside down and lightly mist the outside with water — this prevents the clay from bonding to the ceramic. Slide your fingers under the clay circle and parchment together and lift them as one unit onto the inverted bowl. Gently press the center of the clay down over the curve of the bowl, working outward toward the edges with light fingertip pressure. The rim will lift and curl upward naturally — that is the shape you want. Press along the edge to deepen the curve to about 3/4 inch of wall height. Use a wet fingertip to smooth any fingerprint marks or cracks in the walls immediately.

Step 6: Refine the Rim
Once the walls are shaped, work around the rim with two fingers — one inside and one outside — and pinch gently to even out any thick or thin spots. A consistent rim thickness of about 1/4 inch will dry without cracking or warping. If the rim looks uneven when viewed from above, press down on the high spots while supporting the underside. Use a damp fingertip to blend any surface irregularities on the lip. The goal is a rim that is smooth, even, and slightly rounded on top — not sharp-edged, which is more likely to chip after drying.
Step 7: Add Texture or Decorative Cutouts (Optional)
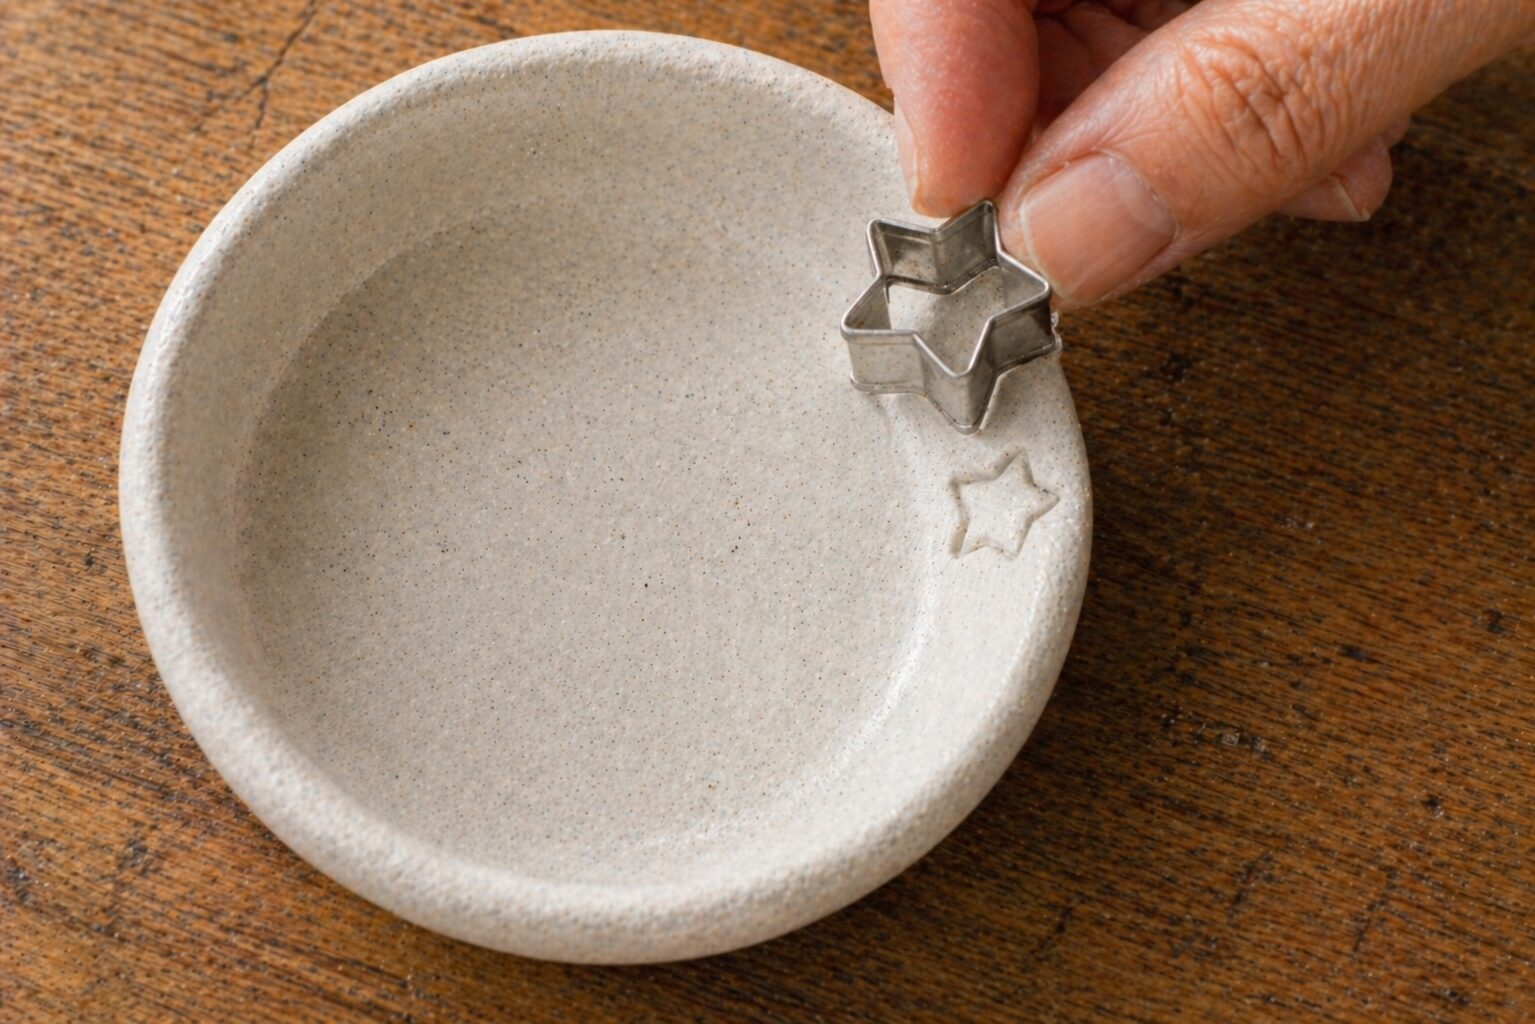
While the clay is still soft, press small cookie cutter shapes lightly into the rim of the dish to create stamped impressions — do not push all the way through, just 1/8 inch deep. Stars, circles, and simple geometric shapes work well at this scale. Alternatively, use a toothpick to scratch a fine line pattern around the rim, or press a piece of lace or textured fabric against the flat base for an all-over texture. If you want cutout windows in the rim, use the smallest cutter (1 inch or under) and push all the way through the wall at even intervals. Smooth the edges of any cutouts immediately with a damp fingertip.
Step 8: Dry for 24 to 48 Hours
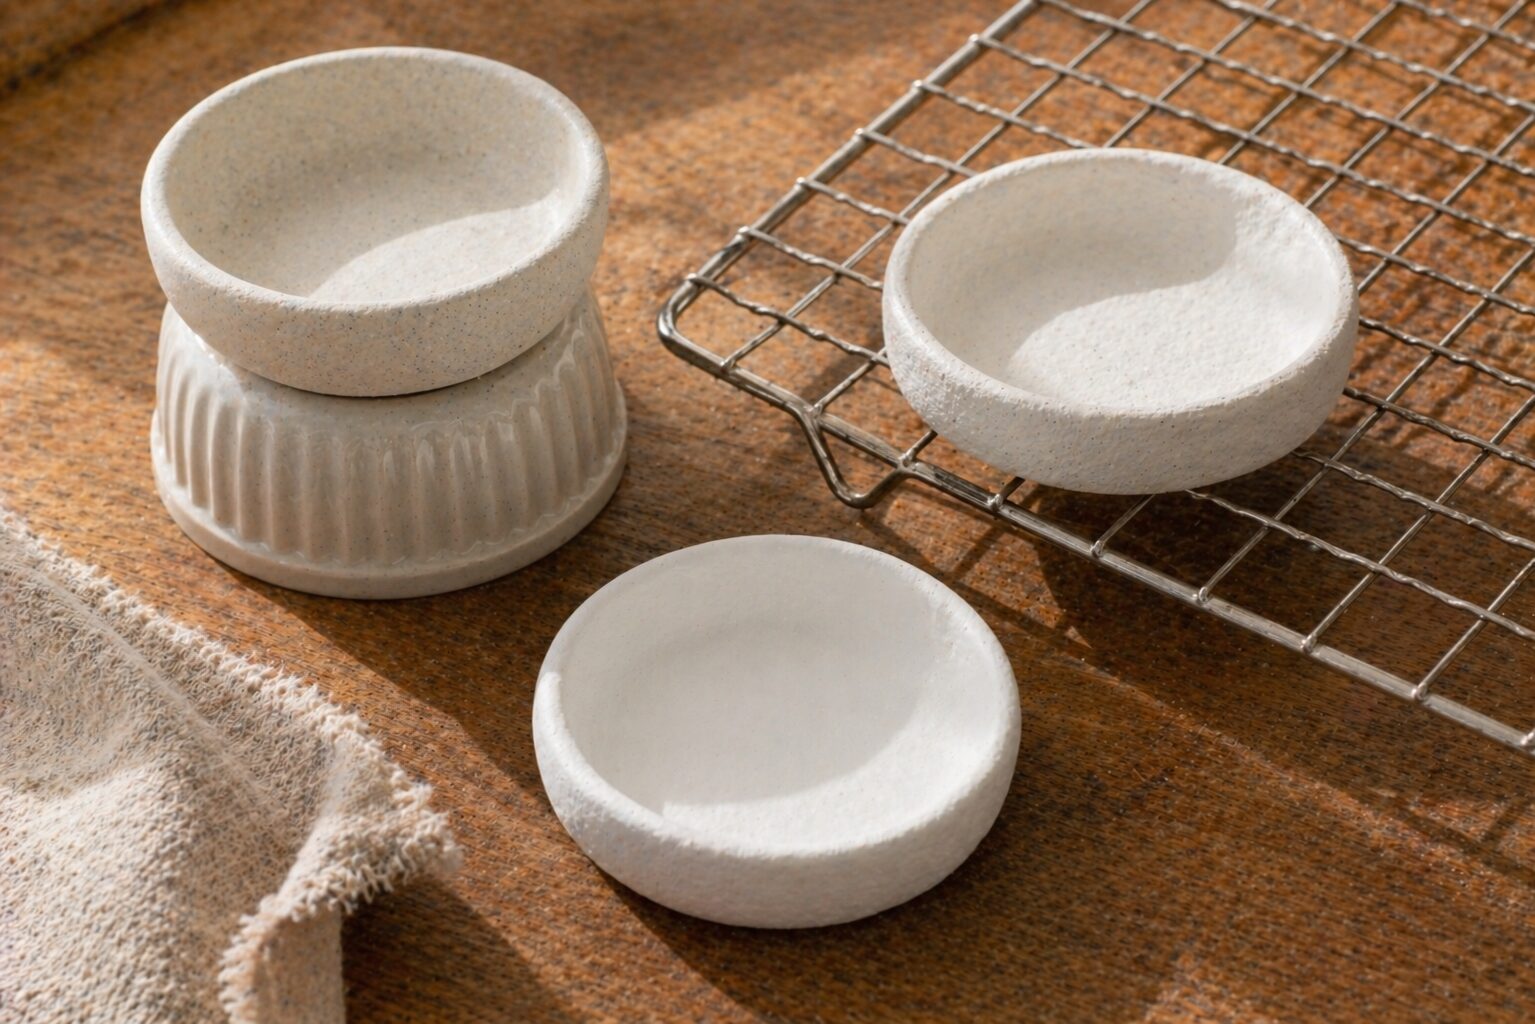
Leave the dish on the inverted bowl for the first 12 hours. Do not move it to a flat surface too soon — the shape needs to set before the clay can support its own weight. After 12 hours the walls will be firm enough to remove from the mold; gently lift the dish straight up off the bowl and set it right-side up on a wire rack. Air needs to circulate underneath or the base will dry slower than the walls, which causes warping. Let it dry for another 12 to 36 hours depending on humidity. The dish is fully dry when it has turned completely white or off-white with no cool or gray patches — cool patches mean moisture is still inside.
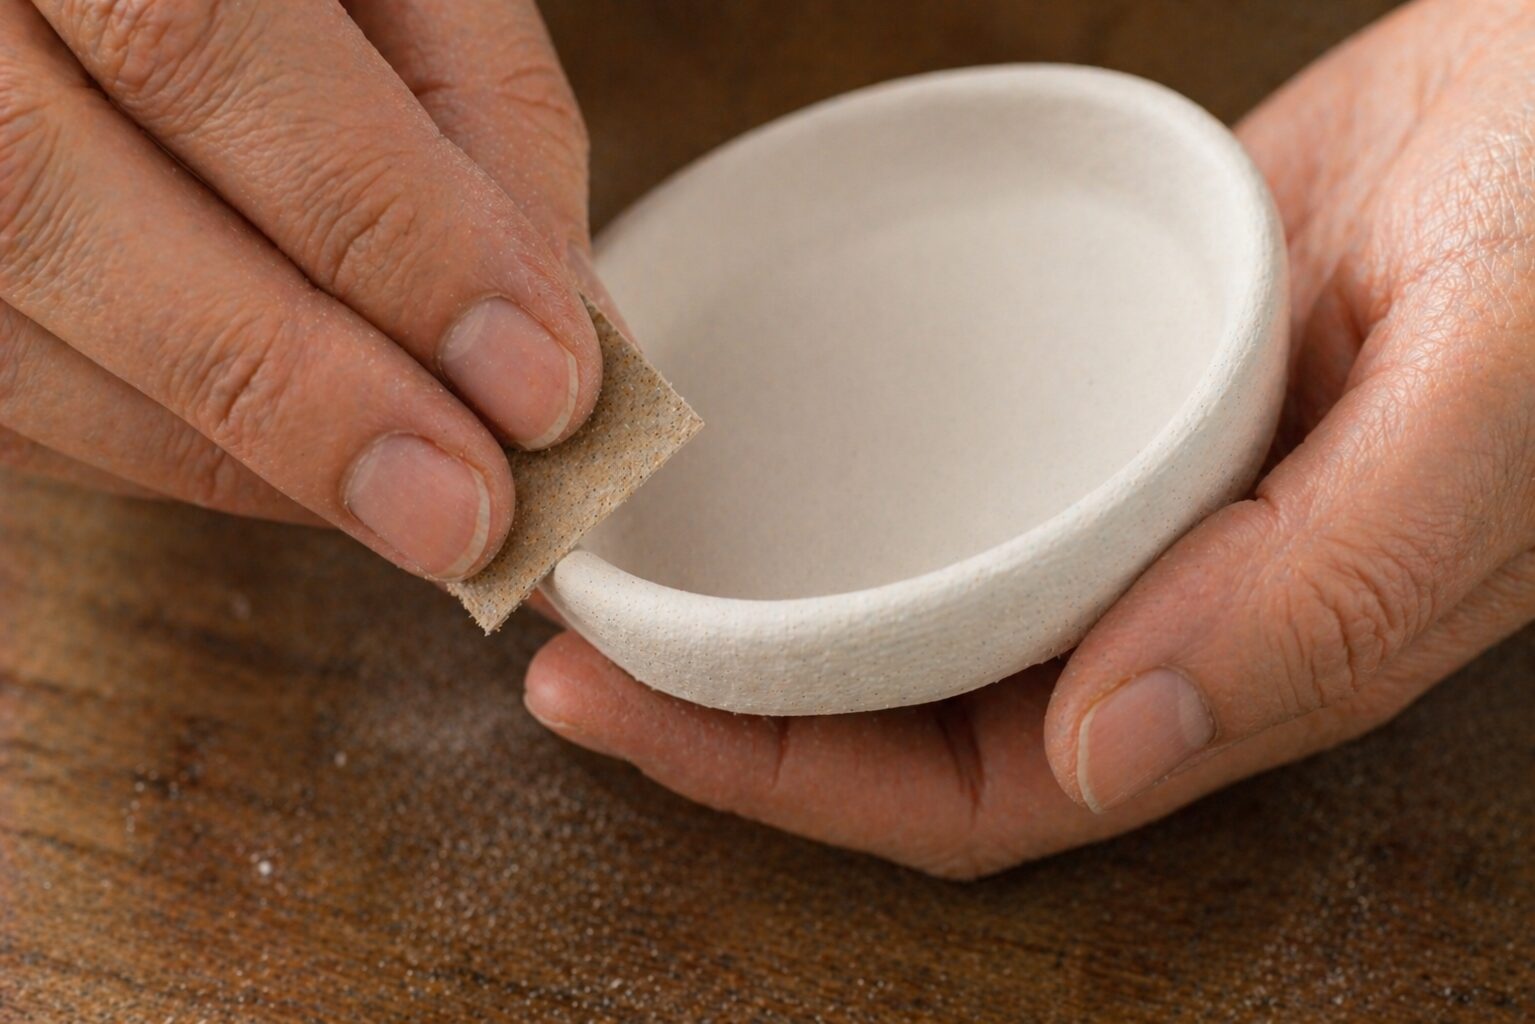
Step 9: Sand Any Rough Spots
Once fully dry, run your finger along the rim and base. Any rough edges, dried fingerprint ridges, or small bumps get addressed now with 220-grit sandpaper. Sand in small circular motions and work lightly — you are smoothing surface texture, not reshaping the dish. Wipe off the clay dust with a barely damp cloth and let the dish dry completely before the next step. Do not sand over cutout edges or stamped details unless they are sharp enough to snag on delicate jewelry.
Step 10: Apply a Sealer Base Coat
Brush a thin, even coat of Mod Podge Matte over the entire dish — inside, outside, and the rim. This seals the porous clay surface so paint applies evenly instead of soaking in unevenly in patches. Let it dry completely, about 20 to 30 minutes. You will see it go from white and milky to clear. A second sealer coat is optional but worth doing on any dish where you plan heavy paint coverage. Do not rush this step — painting over unsealed clay makes the paint look blotchy and shortens how long the finish lasts.

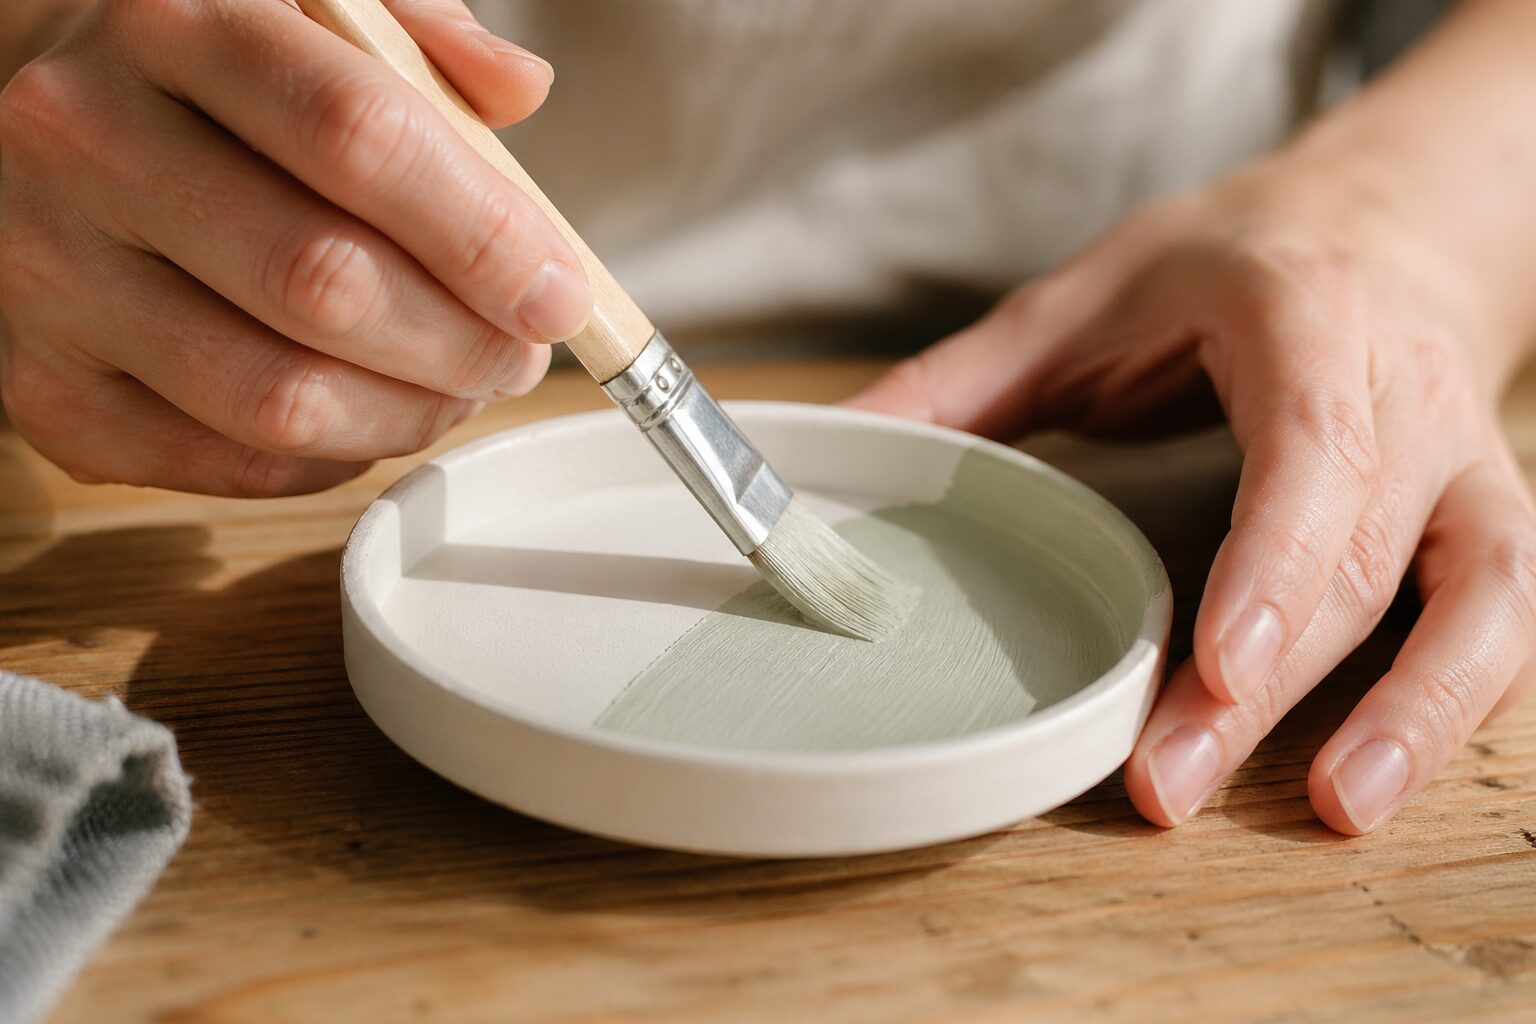
Step 11: Paint Your Design
Apply your base color with a flat brush in thin, even strokes — two thin coats will always look better than one thick coat. Let each coat dry fully before the next, about 15 minutes at room temperature. For the inside only, choose a solid neutral or a soft muted tone. For a two-tone effect, paint the outside a contrasting color and let the rim divide the two. Once the base coats are fully dry, mix any detail colors. Terracotta, sage, dusty rose, and warm white all work well for this style of dish and look cohesive together if you are making a set.

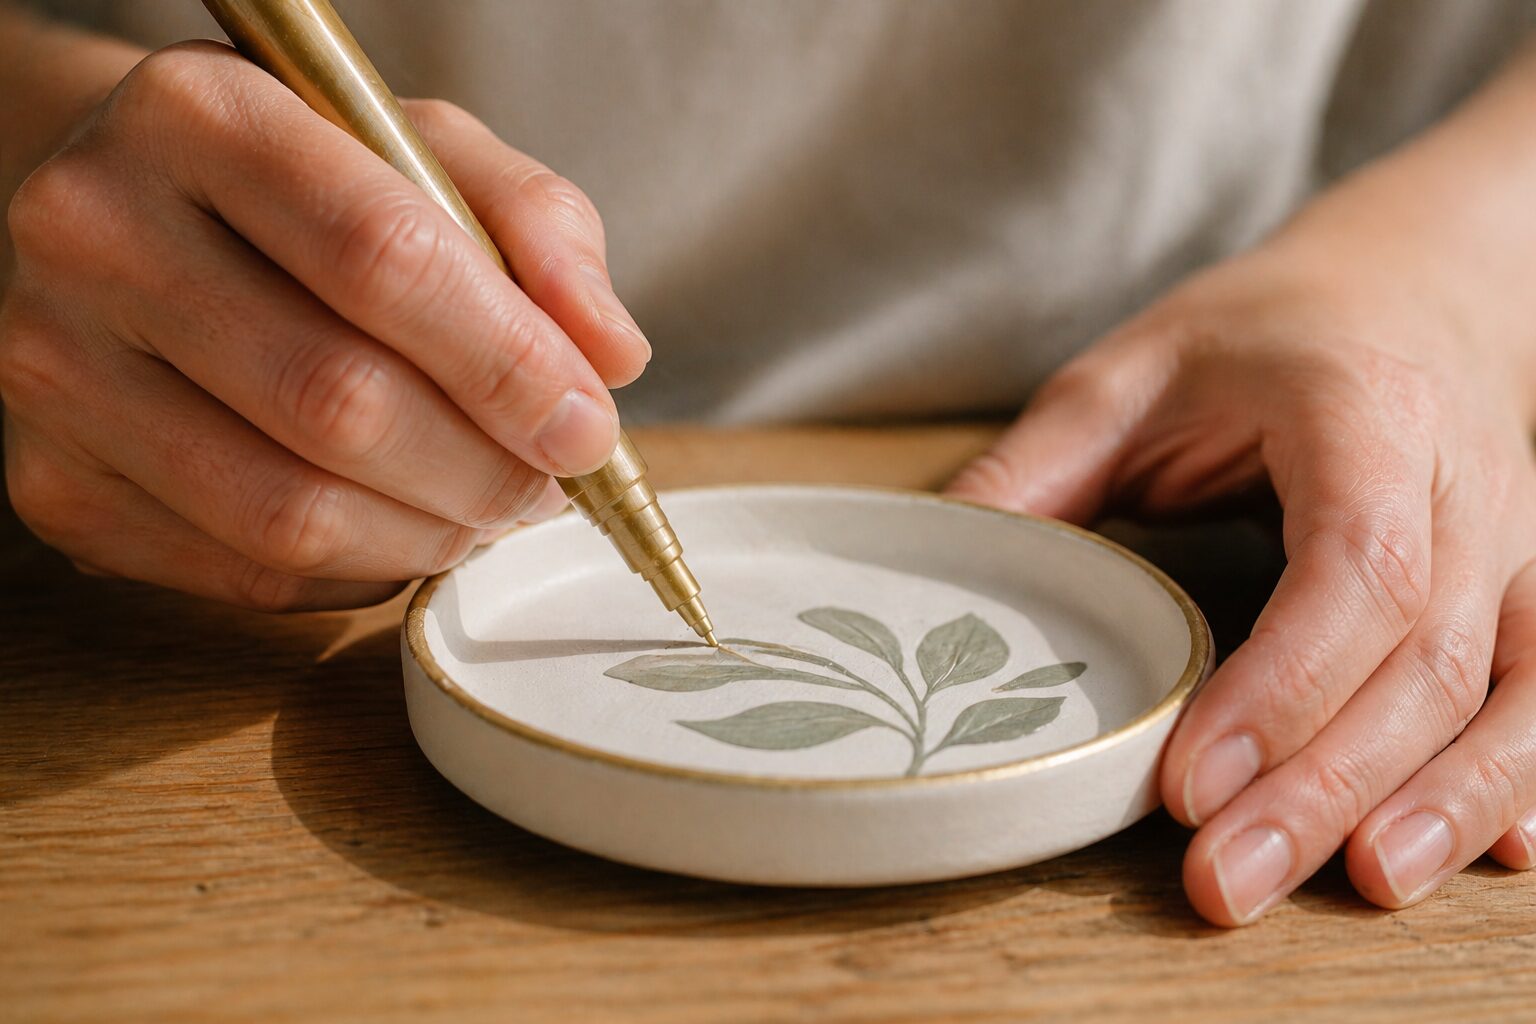
Step 12: Add Detail Work and Seal
This is the step that takes a simple painted dish to something that looks expensive. Shake the gold paint pen well, press the tip on scrap paper until ink flows, then draw a thin line along the inside rim of the dish. Keep your wrist resting on the work surface and rotate the dish slowly rather than moving your hand — you will get a much more even line. Add dot patterns in the base, small leaf shapes, or geometric lines as your design calls for. Let the pen ink dry for 5 minutes before touching. Once all detail work is done and dry, apply a final sealer coat over the entire dish. For dishes that will hold rings or earrings directly, use a glossy sealer rather than matte — the surface will be easier to wipe clean.

Variations
Rectangular or oval shapes. Skip the round cutter and cut a freehand shape instead. Use a knife or the end of a flat spatula to cut clean straight edges. Rectangular dishes work better on a dresser corner where a round one rolls.
Pinched sides. Instead of draping over a mold, form the walls by pinching upward from a flat base — the ancient pinch pot technique. The walls will be less uniform but will have more handmade character, and you can control the shape entirely by hand.
Nested set of three. Make the same dish in three sizes — 3 inch, 4 inch, and 5 inch — using different cutters from the same set. Paint them in matching tones so they look like a coordinated set on the nightstand.
Raw clay finish. Skip paint entirely. Seal with two coats of matte varnish and let the natural off-white clay color be the finish. Add a single gold rim line with the paint pen for contrast.
Monogram or word stamp. Press individual letter stamps from a craft store into the wet clay base before drying. A monogram in the center of the dish floor works especially well as a gift.
Frequently Asked Questions
How long does air dry clay take to dry completely?
At normal room temperature — around 70°F — a 1/4-inch-thick clay dish takes 24 to 48 hours to dry all the way through. Thicker walls or high humidity will push that toward 48 hours. You can speed things up by placing the dish near a fan on low setting, but avoid direct heat from an oven or heat gun, which causes the outer surface to dry faster than the inside and leads to cracking. The dish is fully dry when it has turned uniformly white with no cool or gray areas anywhere on the surface.
Do I need to seal air dry clay before painting?
Yes — always seal before painting. Air dry clay is highly porous, and without a sealer coat the acrylic paint will sink unevenly into the surface, leaving a blotchy finish and making it harder to control coverage. One thin coat of Mod Podge Matte, fully dry, is enough to give the paint an even surface to grab onto. If you skip this step you will end up applying three or four paint coats trying to even out what one sealer coat would have prevented.
Can air dry clay dishes hold water or jewelry cleaner?
No — even sealed air dry clay is not waterproof. If the dish gets wet, the moisture will eventually work through the sealer and start to soften the clay underneath. These dishes are best used for dry items: jewelry, hair clips, keys, coins, perfume bottles. Do not use them as a catch-all near the sink or as a soap dish. If you want a dish that can handle occasional moisture, fire-hardened ceramic or polymer clay (which cures in the oven) are better choices for that specific use.
Why is my clay dish cracking while it dries?
Cracks during drying almost always come from one of three causes: the clay dried too fast, the walls were uneven in thickness, or the clay was not conditioned enough before rolling. Drying too fast can be fixed by covering the dish loosely with a plastic bag for the first 12 hours to slow moisture loss. Uneven walls mean one part dries and contracts faster than another, creating stress — use the guide rings on your roller to prevent this. Underconditioned clay has spots that are still slightly dry before you even start, and those spots shrink differently from the rest as the dish dries.
What is the best brand of air dry clay for trinket dishes?
Jovi Air Dry Clay is one of the most consistent options for this type of project. It conditions easily, dries to a hard finish without brittleness, and has minimal cracking at 1/4-inch wall thickness. The dried surface sands cleanly and takes both acrylic paint and paint pen ink well. DAS Air Hardening Clay and Crayola Air Dry Clay are also widely available and work well, though both tend to dry slightly more brittle than Jovi at thin wall thicknesses. Avoid generic craft store clays without brand names — consistency varies significantly between batches.
This post contains affiliate links. As an Amazon Associate, I earn from qualifying purchases.
This website contains affiliate links. Some products are gifted by the brand to test. As an Amazon Associate, I earn from qualifying purchases. The content on this website was created with the help of AI.