This website contains affiliate links. Some products are gifted by the brand to test. As an Amazon Associate, I earn from qualifying purchases. The content on this website was created with the help of AI.
Make your space more interesting with DIY Boho Wall Decor! Bring in the bohemian style and put some handmade beauty on your walls. If you want to make bohemian wall art, macrame hangings, or basket decorations, you have plenty of options. Here are 10 easy DIY Boho wall decor ideas to explore.

Key Takeaways:
1) Boho Macrame Wall Hanging
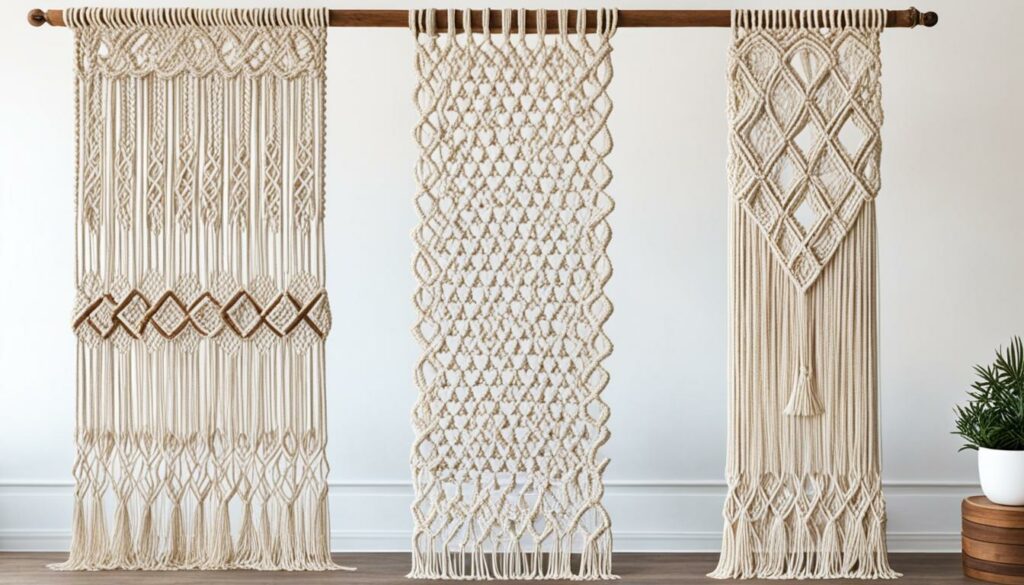
Add a boho vibe to your walls with DIY macrame wall hangings. You just need simple knots and natural materials like rope or yarn. Create beautiful designs that have a bohemian feel. Check out tutorials to learn various macrame techniques and make your own unique wall décor.
Macrame is versatile and offers many patterns, styles, and materials to play with. You can choose a big piece that stands out or go for a smaller one. Options include macrame feathers, dreamcatchers, and plant hangers with geometric shapes. There are many more.
Step-by-Step Guide to Crafting Your Own Macrame Wall Decor

Creating a piece of macrame wall decor is not only a rewarding DIY project but also a delightful way to add a touch of handmade charm to your space. Follow these step-by-step instructions to make your own unique macrame wall hanging.
What You’ll Need:
- Macrame cord or yarn (choose any color or thickness that speaks to you)
- Wooden dowel or metal hoop (this will be the frame from which your macrame hangs)
- Scissors (for trimming and shaping your work)
- Tape measure (to ensure your measurements are precise and consistent)
Step 1: Setting Up Your Work Area
- Prepare Your Supplies: Lay out all your materials in a clean, spacious area where you can work comfortably.
- Measure Your Cord: Depending on the size of the wall decor you envision, cut lengths of macrame cord accordingly. A good starting point is to cut pieces about four times the length of your intended final design.
Step 2: Attaching the Cord
- Secure the Cord: Take the first cord and fold it in half. Place the folded cord under the dowel or hoop, creating a loop on one side and the cord tails on the other.
- Tie a Lark’s Head Knot: Pull the tails over the dowel or hoop and through the loop. Pull it tight against the dowel or hoop. This is your lark’s head knot. Repeat with all the cords you’ve cut until the dowel or hoop is covered to your satisfaction.
Step 3: Create the Design with Knots
- Start with Square Knots: Pick four adjacent cords. Treat the left-most cord as the left working cord and the right-most cord as the right working cord. The two cords in the middle are filler cords. Place the left working cord over the filler cords and under the right working cord. Then, thread the right working cord under the filler cords and up through the loop created by the left cord. Pull to tighten at the base of your lark’s head knots. Reverse the process to complete the square knot.
- Experiment with Patterns: Keep creating square knots, switching between starting with the left and right cords, to form a nice, even pattern. Feel free to experiment with other knot types, such as spiral knots or half square knots, to introduce different textures and patterns into your design.
Step 4: Finishing Touches
- Trim and Add Details: Once you’ve reached the desired length and design, trim any excess cord to create a clean, even finish. Consider adding embellishments like tassels, fringe, wooden beads, or feathers for a personalized touch.
- Hang Your Masterpiece: Use a decorative hook or nail to hang your new macrame wall decor. The dowel or hoop makes it easy to display your work anywhere you’d like.
Additional Tips:
- Practice Makes Perfect: Don’t worry if your first few attempts aren’t perfect. Macrame is an art that gets easier with practice.
- Personalize Your Design: As you get more comfortable with the basics, start experimenting with different knotting patterns, cord colors, and embellishments to create pieces that reflect your personal style.
Congratulations, you’ve just created a beautiful piece of macrame wall decor! Display it proudly and let it inspire your next DIY project.
By adding depth and texture, macrame makes your walls more interesting. The materials, like cotton rope and jute twine, give a cozy feel. A macrame wall hanging fits well in a bedroom or living room. It can also work as a focal point above a mantel or entryway.
| Benefits of DIY Macrame Wall Hangings | How to Use Macrame in Your Decor |
|---|---|
| 1. Handmade Appeal | 1. Statement Piece: Hang a large macrame wall hanging as a focal point in your room. |
| 2. Customizable | 2. Gallery Wall: Combine multiple smaller macrame pieces with other wall decor for a boho-inspired gallery wall. |
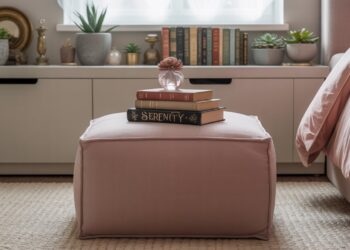
| 3. Affordable | 3. Bedroom Accents: Add macrame plant hangers or small macrame wall hangings to your bedroom for a cozy boho vibe. |
| 4. Versatile | 4. Entryway Decor: Welcome guests with a macrame wall hanging near your front door. |
| 5. Creative Outlet | 5. Cozy Nook: Create a boho-inspired reading or meditation corner with a macrame wall hanging as a backdrop. |
With DIY macrame wall hangings, your space can get the bohemian charm. Let yourself be creative. The process of making unique wall decor is rewarding and shows off your style.
2) Boho Basket Wall Hanging

Creating a boho basket wall decor is a fantastic way to add a touch of rustic charm and personal flair to your living space. Here’s a step-by-step guide to help you transform ordinary baskets into stunning wall decorations:
Step 1: Gather Your Materials
To start, you’ll need:
- Baskets: Search for a variety of baskets in different shapes, sizes, and textures. Thrift stores, flea markets, and craft stores are great places to find unique baskets at a low cost.
- Decorative materials: Consider items like paint, feathers, beads, ribbons, or fabric to embellish your baskets.
- Hanging supplies: Depending on your wall and basket type, you might need nails, hooks, or adhesive wall strips.
Step 2: Select Your Baskets
- Spend some time choosing baskets that appeal to your aesthetic. Look for diverse patterns and weaves to add interest and depth to your arrangement.
- Mix and match different sizes and shapes to create a dynamic display.
Step 3: Design Your Layout
- Before hanging, lay your baskets on the floor to decide on an arrangement. Play with various configurations until you find one that feels balanced and pleasing.
- Take a picture of your final layout to refer back to when you start hanging them.
Step 4: Customize Your Baskets
- Unleash your creativity to personalize the baskets. You might want to paint some in earthy tones or natural colors to enhance the boho vibe.
- Attach decorative elements like beads or feathers. You can use a glue gun for a firm hold.
Step 5: Prepare for Hanging
- Ensure each basket has a method for hanging. Some baskets can hang from their own weaves, while others might need a loop of ribbon or string.
- Consider the wall and basket weight when choosing your hanging method. For heavier baskets, use hooks or nails. Lighter ones might hang securely with adhesive strips.
Step 6: Hang Your Baskets
- Start with the largest basket or the one you want as the focal point. Hang it first and then arrange the others around it according to your layout.
- Use your floor layout photo as a guide to achieve your desired wall display.
Step 7: Adjust and Admire
- Step back and look at your creation, adjusting any baskets as needed to perfect the display.
- Enjoy the boho charm it adds to your room!
Additional Tips:
- Seasonal Updates: Switch out or add new elements to your baskets for different seasons or holidays.
- Room Coordination: Consider the overall decor of your room. Choose basket colors and decorations that complement your existing interior design.
This project not only beautifies your space but also allows you to express your creativity through handcrafted decor. Enjoy the process and the unique touch it adds to your home!
3) Yarn Wall Hanging

Creating a DIY yarn wall hanging is a delightful way to add warmth, texture, and personal expression to your space. Here’s a detailed, step-by-step tutorial to guide you through making your own yarn wall hanging, from gathering materials to the final touches:
Step 1: Gather Your Materials
To get started, you’ll need:
- Yarn: Choose a variety of colors and textures. Wool, cotton, and acrylic yarns are great options.
- Dowel, branch, or driftwood: This will serve as the base from which your yarn will hang.
- Scissors: For cutting yarn to the desired length.
- Decorative elements (optional): Beads, feathers, and tassels can add unique touches.
- Ruler or tape measure: To measure yarn lengths.
Step 2: Prepare the Yarn
- Cut several strands of yarn, keeping in mind that they will fold over the dowel, so they should be twice the length of your desired final hanging length.
- A good starting point could be strands about one meter long, which will hang about 50 cm down from the dowel when folded.
Step 3: Attach Yarn to the Dowel
- Fold each yarn strand in half, creating a loop at one end.
- Place the loop over the dowel, then pull the loose ends through the loop. This is known as a lark’s head knot.
- Repeat this process, lining up the yarn close together along the dowel until it is as full as you’d like.
Step 4: Add Textures and Patterns
- Experiment with different knots and braids. Macramé knots, such as square knots or spiral knots, can add intricate patterns.
- Braid some of the strands or twist them together for varied textures.
Step 5: Decorate Your Yarn Hanging
- Integrate beads, feathers, or tassels by threading them onto individual yarn strands or attaching them at the bottom of the strands.
- You can also weave in sparkly threads or ribbons to add a pop of color or shine.
Step 6: Trim and Finish
- Once all elements are in place, check for any uneven strands and trim the bottom of the hanging to your desired shape and length—straight across, in a V-shape, or staggered lengths.
- Ensure all decorations are secure, and knots are tight.
Step 7: Hang Your Masterpiece
- Choose the perfect spot on your wall for your new creation.
- Secure the dowel to the wall with nails, wall hooks, or a hanging cord tied to both ends of the dowel.
Additional Tips:
- Personalization: Reflect your style through your choice of colors and materials. Whether it’s calm neutrals or vibrant hues, your wall hanging should resonate with your personal aesthetic.
- Sizing: Consider the wall space where you intend to hang your creation. A larger dowel and longer strands can fill a bigger space, while a smaller one suits a cozy corner.
This project not only enhances your room but also gives you a satisfying sense of creativity and accomplishment. Enjoy making your yarn wall hanging and the personal touch it adds to your home!
4) Boho Room Divider Macrame
Creating a DIY boho room divider using macramé is a stylish and functional project that can add privacy and a decorative touch to any room. Macramé, with its intricate knotting techniques, lends a chic, handmade feel that’s perfect for a boho-inspired space. Here’s a detailed step-by-step guide to help you craft your own macramé room divider:
Step 1: Gather Your Materials
To get started, you’ll need the following:
- Macramé Cord: Choose a natural fiber like cotton for ease of knotting. You’ll need quite a lot, so consider how large you want your divider to be.
- Wooden Dowels or a Curtain Rod: This will serve as the top from which your macramé design will hang.
- Measuring Tape
- Scissors
- Hooks or a Curtain Rod Bracket: For mounting the rod on your ceiling or wall.
Step 2: Cut the Macramé Cords
- Decide on the length of your room divider. A common length might be from ceiling to floor.
- Cut each piece of cord about four times the length of your finished desired length, as macramé knotting shortens the cords significantly. For example, if your finished length is 2 meters, cut each cord to be 8 meters long.
Step 3: Attach the Cords to the Dowel
- Fold each cord in half to find the midpoint and create a loop.
- Use a lark’s head knot to attach each cord to the dowel. To do this, place the loop over the dowel, pull the ends through the loop, and tighten.
- Continue until the entire dowel is covered with cords, leaving little to no space between them.
Step 4: Start Knotting
- Basic Square Knot: This knot is fundamental in macramé and can be used to create a wide variety of patterns.
- Take four cords, tie the left two over the middle two and under the right two.
- Next, tie the right two over the middle two and under the left two. Tighten both knots to complete the square knot.
- Alternating Square Knots: For a fuller design, create rows of alternating square knots.
- Start the second row with the third cord, and use cords three, four, five, and six to make the first square knot of the second row.
- Continue knotting in the desired pattern until you’ve reached the required length.
Step 5: Add Decorative Touches
- Incorporate beads, crystals, or colored threads by threading them onto individual cords and securing them with knots.
- You can add feathers or other decorative elements at the ends or within the pattern for additional boho flair.
Step 6: Trim and Finalize
- Once your knotting is complete, trim the bottom of the cords to ensure they are even or in a pattern you like (e.g., a V-shape).
- Ensure all knots are secure and trim any stray ends.
Step 7: Mount the Room Divider
- Install hooks or brackets in your ceiling or wall where you want to hang the divider.
- Place the dowel onto the hooks or brackets. Ensure it’s secure and evenly balanced.
Additional Tips:
- Practice Makes Perfect: Consider practicing the knots on a smaller scale before starting on the room divider to ensure consistency and confidence.
- Design Variations: Look up different macramé patterns and knot types to customize your design beyond basic square knots.
This project not only acts as a functional room divider but also serves as a stunning piece of art that reflects your creative abilities and adds a boho touch to your decor. Enjoy crafting your macramé room divider!
5) DIY Boho Wall Art with Natural Elements

Creating DIY boho wall art using natural elements is a beautiful way to bring a touch of nature and personal style into your home. This project is ideal for those who love the earthy, organic qualities of bohemian decor. Here’s a detailed step-by-step guide to help you craft your own boho wall art:
Step 1: Gather Your Materials
For this project, you’ll need:
- Natural Elements: Collect items like dried flowers, leaves, twigs, feathers, and shells. You can also use wooden beads or stones.
- Base Material: Choose a canvas, large piece of wood, or even a piece of sturdy fabric like burlap or canvas.
- Glue or Mod Podge: To securely attach your materials.
- Paint and Brushes: If you want to add a painted background or embellishments.
- Picture Frame or Hanging Hardware: Depending on how you choose to display your artwork.
Step 2: Prepare Your Base
- If using wood or canvas, you may choose to paint it first to create a colored background that complements your natural elements. Allow it to dry completely.
- If you opt for fabric, stretch and secure it over a frame to create a tight work surface.
Step 3: Layout Your Design
- Before gluing anything down, lay out your natural elements on the base to experiment with different designs. Consider creating patterns or a mosaic with smaller pieces like shells or beads.
- Take a photo of your final layout for reference.
Step 4: Attach the Elements
- Using glue or Mod Podge, start attaching your elements from the center outwards or in another systematic way to keep your design balanced.
- Apply a thin coat of Mod Podge over fragile items like dried flowers to seal them and prevent damage.
Step 5: Add Details and Textures
- Incorporate additional textures by adding layers to your design. For instance, layer leaves under twigs or arrange stones around feathers.
- Paint small details or use metallic markers to add shimmering highlights that catch the light.
Step 6: Final Touches
- Once all elements are securely attached and the glue has dried, apply a final coat of Mod Podge over the entire piece to seal and protect it. Be gentle to avoid damaging any delicate pieces.
- If your base is fabric, consider adding a border with fabric trim or embroidery to enhance the boho vibe.
Step 7: Frame or Mount Your Artwork
- If you’re using a canvas or wood, you may choose to frame it for a polished look. Ensure the frame complements the natural style of the artwork.
- For fabric pieces, install hanging hardware at the back or attach dowels at the top and bottom to hang your artwork tapestry-style.
Additional Tips:
- Seasonal Themes: Adapt your materials to reflect the current season for timely decor updates.
- Personal Touches: Embed personal items or found objects from nature walks to make the artwork uniquely yours.
This DIY boho wall art project decorates your space and provides a therapeutic crafting experience as you work with natural materials. Enjoy the creative process and the beautiful, personalized result!
6) Boho Tapestry Wall Art
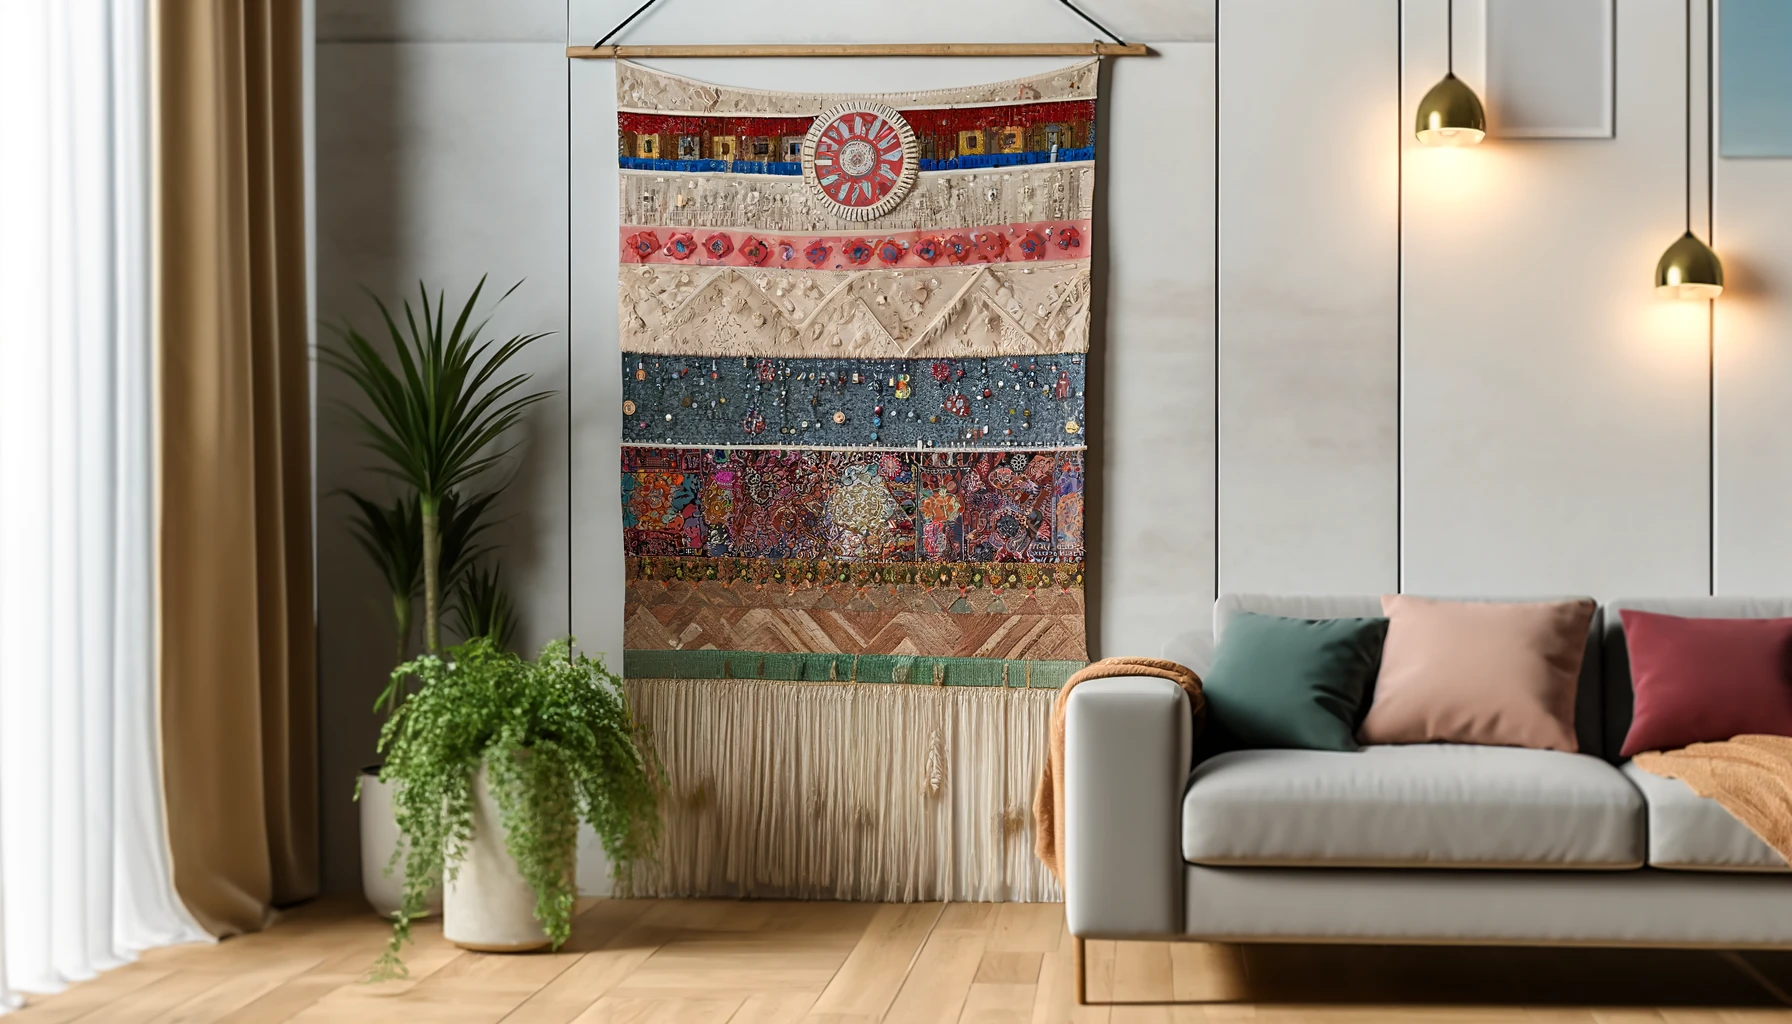
Creating a DIY boho tapestry wall art is a wonderful way to infuse your living space with warmth, texture, and a personal touch. This type of project is particularly satisfying because it allows for immense creativity in both design and execution. Here’s how you can create your own boho tapestry wall art from start to finish:
Step 1: Gather Your Materials
To create your tapestry, you’ll need:
- Fabric or Canvas: Choose a large piece of fabric that suits your design needs. Natural fibers like cotton or linen work well and provide a good base for painting or attaching elements.
- Yarn, Thread, and Needles: For adding embroidered details or textile embellishments.
- Decorative Elements: This can include beads, feathers, sequins, patches, or any other decorative items that align with the boho style.
- Paint and Brushes: If you decide to add a painted design.
- Dowel Rod or Curtain Rod: For hanging the tapestry.
- Scissors and Glue: For crafting and assembling your design elements.
Step 2: Prepare Your Base
- If you’re using fabric, you may want to iron it first to eliminate any wrinkles. This will give you a smooth surface to work on.
- Stretch and secure your fabric on a frame if necessary to keep it taut while working on it.
Step 3: Design Your Layout
- Sketch your design on paper or directly on the fabric with a pencil. This might include geometric patterns, floral designs, abstract shapes, or any imagery that speaks to you.
- Arrange any large decorative elements on the fabric to see how they complement your painted or embroidered design.
Step 4: Paint the Background (Optional)
- If your design includes painting, apply your base colors first. Acrylic paints or fabric paints are both suitable for this.
- Allow the paint to dry completely before proceeding to the next steps.
Step 5: Add Textile Embellishments
- Use yarn or thread to add embroidered details. Techniques like French knots, chain stitches, or satin stitches can add beautiful textures.
- Attach your decorative elements such as beads, feathers, or sequins using fabric glue or sew them on for added durability.
Step 6: Final Details and Assembly
- Once all paint and glue have dried, remove the tapestry from the frame if it was mounted.
- Trim any excess material and tidy up the back of the tapestry by securing loose ends and threads.
Step 7: Prepare for Hanging
- Attach the dowel rod or curtain rod to the top of the tapestry. You can sew a fabric tube at the top edge of the tapestry and slide the rod through, or you can directly attach the tapestry to the rod with loops of yarn or string.
- Ensure the rod has hooks or a hanging mechanism that can support the weight of the tapestry.
Step 8: Hang and Enjoy
- Choose the perfect spot on your wall for your new creation. Make sure it’s visible and complements the room’s decor.
- Hang the tapestry using appropriate wall anchors and hooks to ensure it is secure.
Additional Tips:
- Layering: Consider layering different materials and textures for a more dynamic piece.
- Personal Touch: Incorporate elements that have personal significance, such as fabric from old clothing, for a piece that truly represents you.
This DIY project not only adds a unique piece of art to your walls but also allows you to engage in a creative and relaxing activity. Enjoy making your boho tapestry wall art, and take pride in displaying your handmade masterpiece!
7) DIY Boho Vintage Frame
Repurposing vintage frames is a fantastic DIY project that not only breathes new life into old items but also adds a personalized touch to your home decor. Whether you aim to achieve a modern look with bright colors or maintain a rustic charm with distressed wood, here’s a step-by-step guide to help you transform vintage frames into eye-catching pieces:
Step 1: Gather Your Materials
To start, you’ll need:
- Vintage Frames: Search for old frames at thrift stores, yard sales, or in your own attic.
- Sandpaper: For smoothing and preparing the frame surface.
- Paint and Brushes: Choose colors that match your decor or go for something bold like teal or mustard.
- Paint Primer (optional): Helps paint adhere better and last longer.
- Protective Finish: A clear coat spray or brush-on sealer.
- Decorative Elements: Think macramé, fabric, wallpaper samples, or even mirrors.
- Glue or Adhesive (if attaching fabric or other materials inside the frame).
- Hanging Hardware: If the frame needs updated hooks or wire for mounting.
Step 2: Prepare the Frame
- Remove any old artwork or glass from the frame. Set the glass aside if you plan to reuse it.
- Clean the frame thoroughly to remove dust and grime.
- Sand the frame lightly to create a smooth surface that will help the new paint adhere. If you want a rustic look, sand more aggressively in areas to allow the original wood to peek through.
Step 3: Prime and Paint
- Apply a coat of primer if you’re using a lighter color over a dark frame or if the original frame has a glossy finish. Let it dry according to the manufacturer’s instructions.
- Paint the frame in your chosen color. Apply several thin coats, letting each coat dry thoroughly before applying the next.
- For a distressed look, lightly sand the edges and details of the frame after painting to expose some of the wood beneath.
Step 4: Add a Protective Finish
- Once the final coat of paint is dry, apply a clear protective finish to seal the paint and add durability. This is especially useful if the frame will be handled frequently or exposed to sunlight.
Step 5: Customize the Frame
- Depending on your intended use, you can now customize the frame:
- For Macramé or Fabric Backgrounds: Cut the fabric or macramé to the size of the frame and secure it using glue or by stapling it to the back of the frame.
- For Art or Photos: If you plan to use the frame traditionally for art or photos, consider having glass cut to size if the original glass does not fit or was damaged.
- Creative Backdrops: You can also use wallpaper or decorative paper as a background. Secure it inside the frame, behind the glass for protection.
Step 6: Update the Hardware
- Attach new hanging hardware if necessary. Make sure it’s suitable for the weight and size of the frame, especially if you’ve added glass or other heavy elements.
Step 7: Display Your Frame
- Hang or place your newly repurposed frame in a spot where it complements your decor and can be admired by visitors.
Additional Tips:
- Color Ideas: Don’t be afraid to use metallic paints for a touch of glam or neon colors for a pop-art vibe.
- Multiple Frames: Consider creating a gallery wall of repurposed frames for a cohesive look.
- Seasonal Updates: Swap out the contents of the frames with seasonal decor items, like autumn leaves or holiday-themed prints, for a year-round changing display.
Repurposing vintage frames is not just about decorating; it’s about reimagining the old into something new and uniquely yours. Enjoy the process of turning these old frames into stunning pieces of art!
Give old frames a modern twist. Paint them in bright colors like teal or mustard. Or keep them rustic with a bit of worn wood showing. Use these as backgrounds for macrame or as frames for cool fabrics. You’re only limited by your imagination.
8) Reviving Thrifted Mirrors

Reviving thrifted mirrors to create DIY wall art is a great way to add charm and character to your living space. With a few simple steps, you can transform an old mirror into a stunning piece of art. Here’s how you can create easy and stylish wall art by repurposing thrifted mirrors:
Step 1: Gather Your Materials
For this project, you will need:
- Thrifted Mirrors: Look for mirrors of different sizes and shapes to add variety to your wall art.
- Paint: Choose acrylic or spray paint in your desired colors. Metallic paints can add a glamorous touch.
- Painter’s Tape: For creating designs or protecting areas you don’t want to paint.
- Sandpaper: If the mirror frame is wooden and you wish to distress it.
- Adhesive Spray or Glue: If you plan to add decorative elements.
- Decorative Elements (optional): Such as stickers, fabric, beads, or sequins.
- Hanging Hardware: Ensure you have the appropriate hardware for mounting your mirrors.
Step 2: Prepare Your Workspace
- Lay down newspapers or a drop cloth to protect your workspace.
- Clean the mirror and frame thoroughly to remove dust and grime. This will help the paint adhere better.
Step 3: Sand and Tape the Frame
- If the frame is wooden and you want a distressed look, lightly sand the frame to remove the glossy finish. This will help the new paint stick better.
- Use painter’s tape to cover the mirror itself and any parts of the frame you do not wish to paint.
Step 4: Paint the Frame
- Apply a coat of primer if the original frame has a dark or uneven color.
- Once the primer is dry, apply your chosen paint. Spray paint works well for an even coat, but brush-on paint can be used for a thicker, more textured effect.
- Apply several thin coats, allowing the paint to dry between each coat.
- For a distressed look, gently sand some areas of the frame after painting to let the original finish show through.
Step 5: Add Decorative Elements
- Once the paint is dry, you can enhance the frame with decorative elements. Use adhesive spray or glue to attach fabric patches, beads, or any other embellishments you like.
Step 6: Remove the Tape
- Carefully remove the painter’s tape from the mirror. Clean off any paint smudges on the glass with a razor blade or glass cleaner.
Step 7: Attach Hanging Hardware
- Attach the appropriate hanging hardware to the back of the mirror frame, considering the size and weight of the mirror for security.
Step 8: Display Your Art
- Plan where you want to hang your revived mirrors. Hanging multiple mirrors in a group can make for an attractive display.
- Use a level to ensure the mirrors are hung straight.
Additional Tips:
- Personalize Your Design: Use stencils to paint designs onto the mirror itself for added creativity.
- Safety First: Wear gloves and safety glasses when handling broken glass or sharp tools.
- Grouping Mirrors: Arrange mirrors of different shapes and sizes to create a visually interesting wall display.
This DIY project not only recycles old mirrors but also provides a custom decoration for your home, reflecting your personal style and enhancing your interior with unique, handcrafted art. Enjoy the process and the beautiful outcome!
9) Embellishing Fabric Scraps
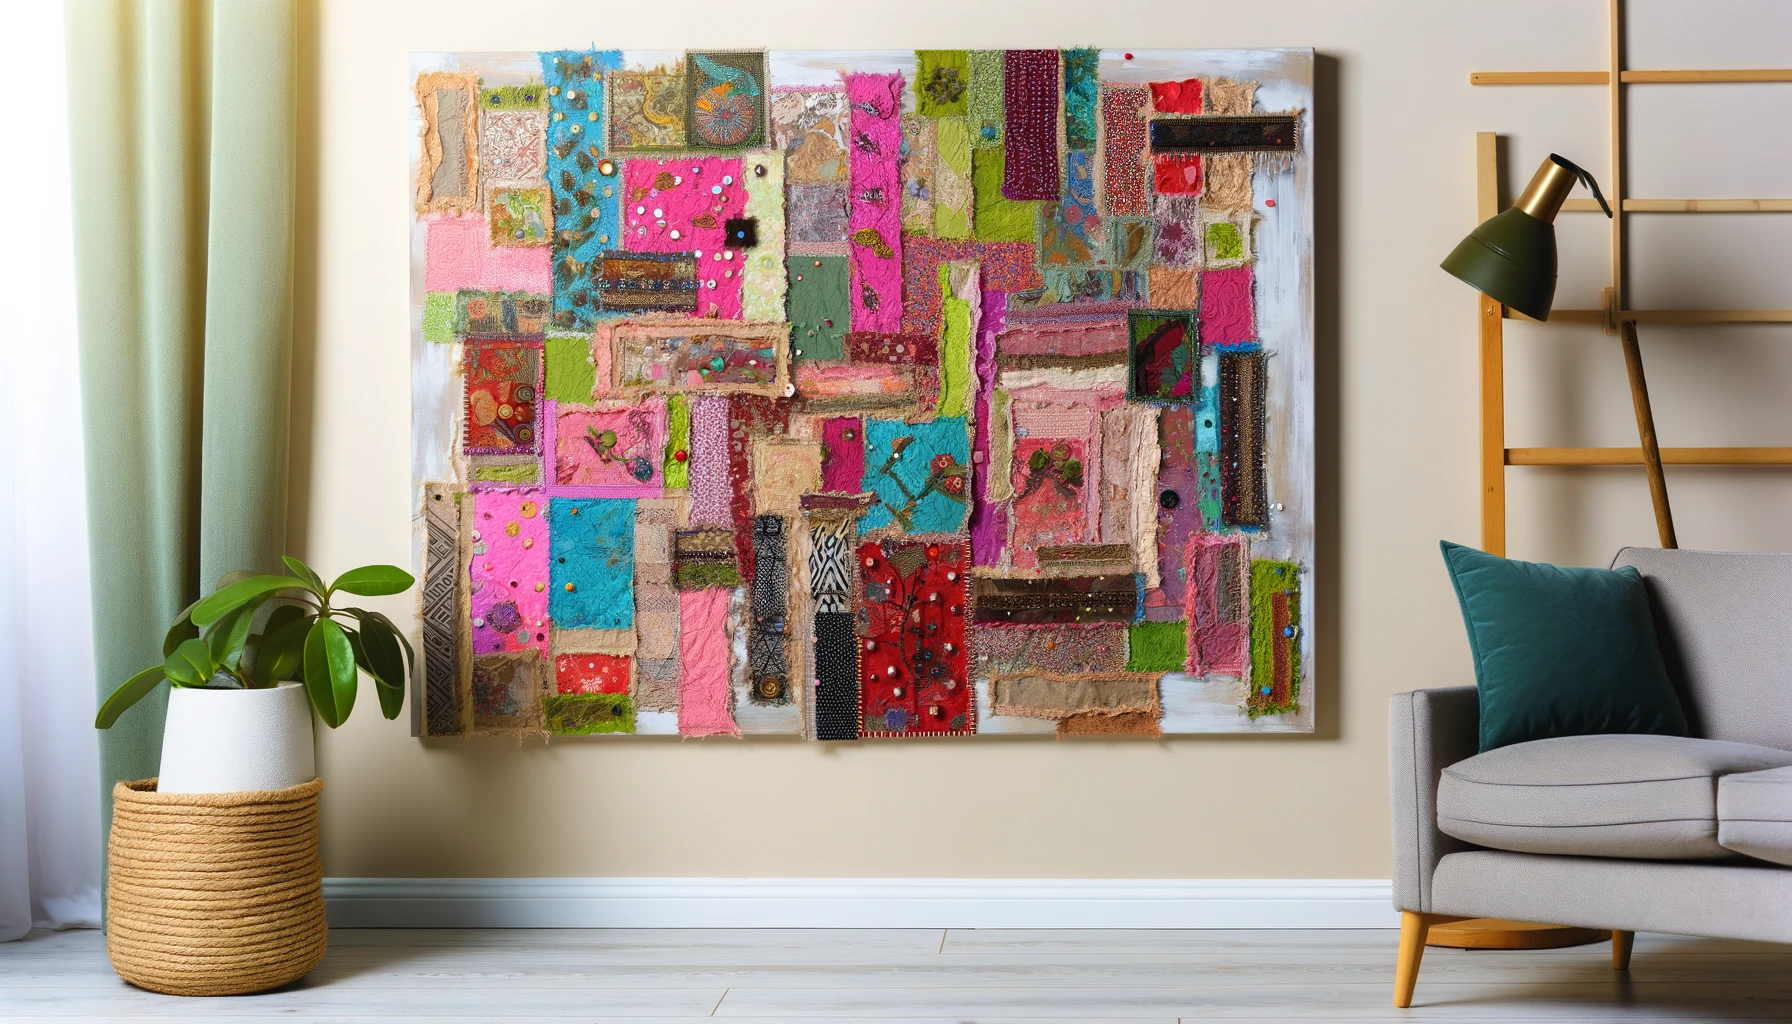
Creating DIY boho wall art using fabric scraps is a fantastic way to recycle leftover materials while adding a unique and personal touch to your home decor. This project is not only simple but also highly customizable, allowing you to experiment with various colors and textures. Here’s an easy step-by-step guide to making your own boho wall art by embellishing fabric scraps:
Step 1: Gather Your Materials
To start, you’ll need:
- Fabric Scraps: Collect various fabric pieces in different patterns, textures, and colors.
- Canvas or Large Piece of Fabric: As the backdrop for your artwork.
- Scissors: For cutting fabric into desired shapes.
- Fabric Glue or Hot Glue Gun: To attach fabric pieces securely.
- Embroidery Thread and Needle (optional): For adding decorative stitches.
- Decorative Elements: Such as beads, buttons, sequins, or feathers.
- Frame (optional): If you want to frame your finished piece.
Step 2: Prepare the Base
- If using a canvas, make sure it’s clean and smooth.
- If you choose a large piece of fabric, consider stretching it over a frame to keep it taut while you work.
Step 3: Design Your Layout
- Lay out your fabric scraps on the canvas or fabric base to create a pleasing arrangement. Play with overlapping pieces, contrasting textures, and complementary colors.
- Once you’re happy with the design, take a photo for reference.
Step 4: Attach Fabric Pieces
- Start gluing your fabric scraps onto the base. Apply fabric glue or use a hot glue gun for a more secure hold. Work from one corner to the other or start from the center outwards, depending on your design.
- Press down each piece firmly to ensure it adheres well.
Step 5: Add Embellishments
- Sew or glue on decorative elements like beads, buttons, or sequins to enhance the texture and visual interest of your artwork.
- Consider adding embroidery to some of the fabric pieces for added detail. Simple stitches like running stitch, chain stitch, or French knots can be very effective.
Step 6: Final Touches
- Once all pieces are securely attached and any stitching is complete, trim any loose threads or edges that may need cleaning up.
- If you used a free fabric base, you might want to sew or glue a border or backing to give the piece a finished look.
Step 7: Display Your Art
- If you prepared your artwork on a canvas, it’s ready to hang as is.
- If using fabric, you may choose to hang it tapestry-style with a dowel and string, or place it in a frame for a more structured look.
Additional Tips:
- Theme and Color: Choose a color scheme or theme that matches the rest of your room’s decor or go bold with contrasting and bright colors for a statement piece.
- Size and Scale: Consider the size of your wall when choosing how big to make your artwork. A larger piece can serve as a focal point, while smaller artworks can be grouped together.
This DIY project not only provides a creative outlet but also helps in reducing waste by repurposing fabric scraps into beautiful boho wall art. Enjoy the process and the satisfaction of creating something truly one-of-a-kind for your home!
10) Boho Accent Wallpaper
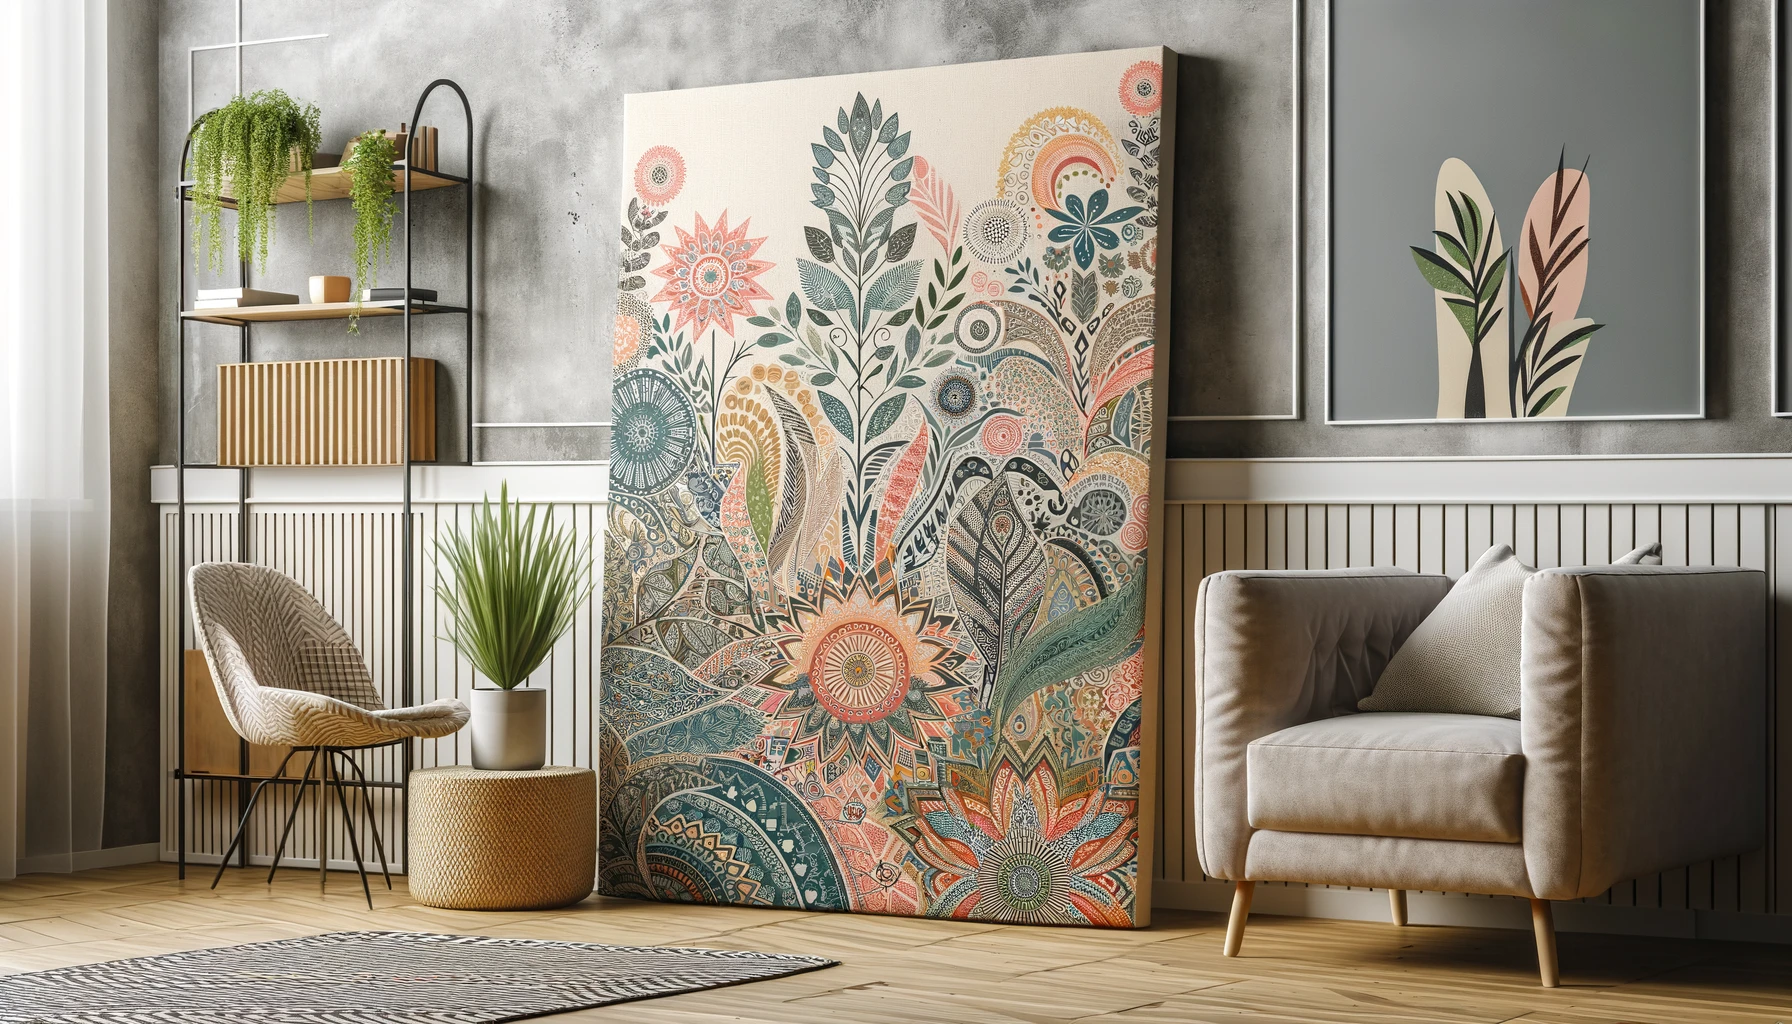
Creating DIY boho wall art using accent wallpaper is an easy and impactful way to bring a burst of bohemian style to any room. This project is great for those who want to add a splash of pattern or color without committing to wallpapering an entire room. Here’s how you can create your own boho wall art using accent wallpaper:
Step 1: Gather Your Materials
You will need:
- Accent Wallpaper: Choose a wallpaper with a boho pattern, such as botanical prints, geometric patterns, or mandala designs.
- Canvas or Large Wooden Board: Depending on the size of wall art you want.
- Mod Podge or Wallpaper Paste: To adhere the wallpaper to the base.
- Brush or Roller: For applying the adhesive smoothly.
- Scissors or a Utility Knife: For cutting the wallpaper.
- Ruler or Measuring Tape: To measure wallpaper and the base.
- Frame (optional): To give your artwork a finished look.
Step 2: Prepare the Base
- Measure and cut your canvas or wooden board to the desired size of your wall art.
- If you’re using wood, you might want to sand it lightly to ensure a smooth surface.
Step 3: Measure and Cut the Wallpaper
- Measure the surface of your canvas or board and cut the wallpaper to size, leaving a little extra around the edges if needed.
- It’s a good idea to lay the wallpaper on the base first without glue to ensure it fits and you like the placement.
Step 4: Apply the Adhesive
- If using Mod Podge, apply a generous layer directly to the canvas or board. If using wallpaper paste, follow the instructions on the product for best results.
- Smoothly and evenly spread the adhesive with a brush or roller.
Step 5: Place the Wallpaper
- Carefully lay the wallpaper on the adhesive-covered base. Start from one side and slowly work your way to the other to avoid air bubbles.
- Use a flat tool like a ruler or a smoothing brush to press down the wallpaper and ensure it adheres well and is smooth.
Step 6: Trim Excess Wallpaper
- Once the wallpaper is firmly in place and the adhesive has dried, use scissors or a utility knife to trim any excess wallpaper from the edges.
Step 7: Seal the Wallpaper
- Apply a thin layer of Mod Podge over the wallpaper to seal it and protect the surface. This step is especially important if you used a paper-based wallpaper that could be prone to damage.
Step 8: Frame Your Artwork (Optional)
- If you want a more polished look, frame your newly created boho wall art. Choose a frame that complements the design and color of the wallpaper.
Step 9: Hang Your Artwork
- Attach hanging hardware to the back of the canvas or frame.
- Choose the perfect spot on your wall to display your DIY boho wall art.
Additional Tips:
- Lighting: Consider the lighting in the room where you’ll hang your art. Good lighting will enhance the patterns and colors of your wallpaper.
- Combining Patterns: Don’t be afraid to mix different patterns within the same color scheme for a vibrant, eclectic look.
This DIY boho wall art project is a simple yet effective way to personalize your space with minimal effort and maximum style impact. Enjoy the creative process and the transformation it brings to your room!
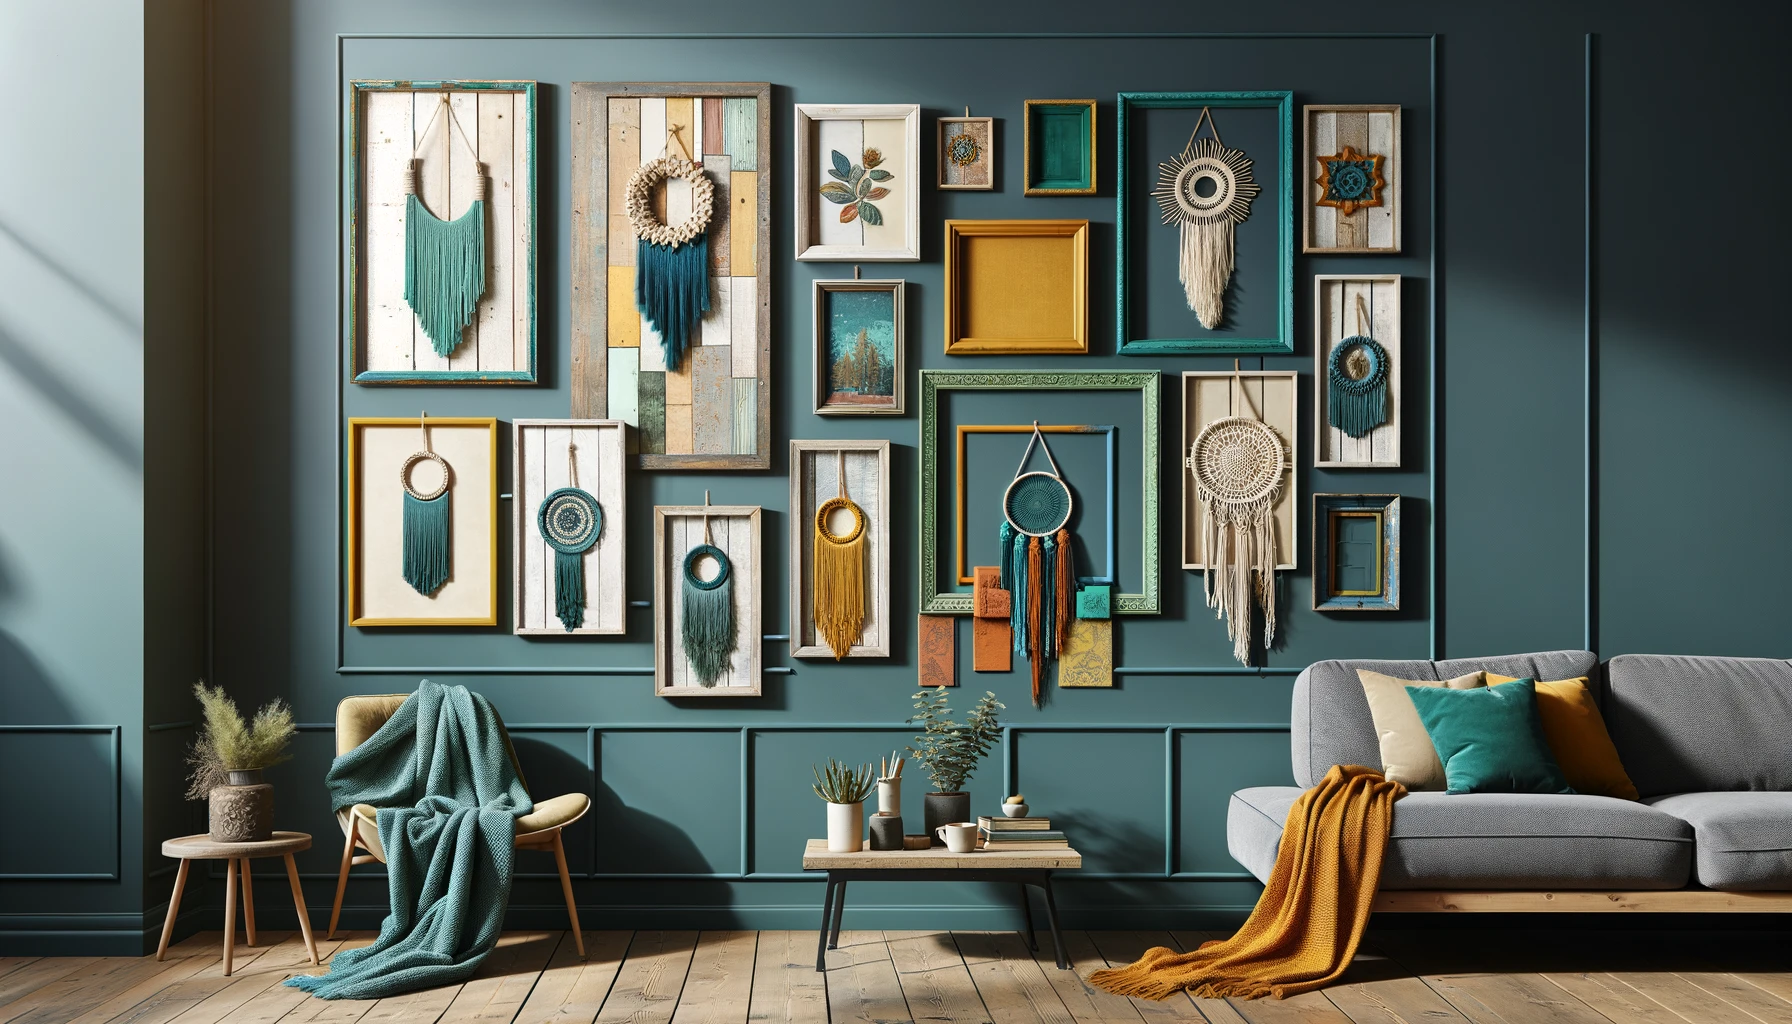
DIY Wall Decor Ideas for a Boho-Inspired Gallery Wall
Add personality to your walls with DIY decor ideas for a boho gallery wall. Use handmade wall hangings, thrifted art, and boho pieces. This way, your wall art will show your style and look great.
Try out different setups, use various frames, and change the sizes. This will make your gallery wall stand out. Mix boho art with your own style. Let your creativity shine.
Handmade Wall Hangings
Handmade wall hangings are perfect for a boho wall. Use macrame, weaving, or other textile methods. Pick natural fibers for a great look. These will bring a boho vibe to your wall and show off your crafting skills.
Thrifted Artwork
Add thrifted art for a boho touch. Look for unique pieces at thrift stores or online. Don’t worry about mixing different art styles and ages. It will make your wall more unique and interesting.
Bohemian-Inspired Pieces
Finish your boho wall with dreamcatchers, macrame plant hangers, or vintage mirrors. These extras will make your wall more interesting and magical.
Create a stunning boho wall with your DIY skills. Combine wall hangings, thrifted art, and boho elements. Your creativity will make a beautiful and unique wall in any room.
Conclusion
Adding DIY boho wall decor to your space is a fantastic idea. It brings the charm and creativity of the bohemian style home. Handmade wall pieces, natural materials, and bargain discoveries are key.
Considering boho wall art, macrame, or basket decor opens many doors. You can easily add a boho vibe to your decor. These DIY projects help you express your creativity and style.
Don’t wait to begin. Dive into DIY boho wall decor to unleash creativity. Making your own wall hangings and mixing in rustic elements is exciting. It makes your home truly reflect your unique style. So start your adventure into the boho world today!
Looking for more ideas? Check out the Etsy marketplace. There, you can find handmade treasures. They add a whimsical touch to any space.
FAQ
What is DIY boho wall decor?
DIY boho wall decor is making your own wall art with a bohemian style. You use things like macrame, yarn, and natural items. You might also find cool stuff at thrift shops to make your walls look boho.
What are some easy boho DIY projects for home decor?
Easy boho DIY projects include macrame wall hangings and using baskets for decor. You might also like yarn wall hangings and turning old items into boho art. These projects are fun ways to decorate your home with a boho vibe.
How can I create bohemian wall art?
For bohemian wall art, mix handmade touches with nature and unique patterns. You can learn macrame or use yarn and beads. Try adding driftwood and feathers for a boho feel. Let your creativity run wild with these ideas.
Source Links
- https://songbirdblog.com/bohemian-decorating-ideas-diy/
- https://www.pinterest.com/pin/super-easy-diy-boho-wall-decor-art-ideas-the-budget-decorator–148407750212799385/
- https://www.pinterest.com/pin/416090453075406489/
This website contains affiliate links. Some products are gifted by the brand to test. As an Amazon Associate, I earn from qualifying purchases. The content on this website was created with the help of AI.