This website contains affiliate links. Some products are gifted by the brand to test. As an Amazon Associate, I earn from qualifying purchases. The content on this website was created with the help of AI.
Make a Scarecrow That Looks Like It Walked Off a Farmhouse Porch
Burlap, straw, flannel, and five simple steps — no sewing machine, no fuss, and it costs less than a store-bought decoration that looks half as good.
Shop the Scarecrow Supply List →
Affiliate links · As an Amazon Associate I earn from qualifying purchases.

Picture this: your porch, five simple steps from now, looking like it belongs on the cover of a farmhouse magazine.
Your fall porch has the pumpkins, the mums, maybe even a string of lights — but it’s still missing the one detail that makes a stranger slow their car down. A store-bought scarecrow runs $40 to $80 and still looks like it came out of a plastic bag. The homemade version, built right, reads instantly rustic: real wood, real burlap, real straw peeking out of a worn flannel cuff. Here is exactly how to build one from a bare wooden frame to a fully styled fall display, in five steps.
Everything your scarecrow needs, at a glance
Sturdy Rustic Frame
Wooden stakes and jute rope give it a farmhouse backbone that holds its shape all season.
Flannel & Denim Wardrobe
A faded plaid shirt and rolled overalls do more for the look than anything else on this list.
Burlap, Straw & Character
Straw stuffing, burlap wraps, and mismatched buttons turn a plain frame into a face.
Styled Fall Display
Hay bales, lanterns, and pumpkins turn one scarecrow into a full porch scene.
Picture this: you glance out the window at dusk and for half a second forget you built the thing standing in your yard.
Grab the whole supply list in one place
Everything from the wooden stakes to the pumpkin pail lives in one search, so you’re not hunting through five different tabs to build one scarecrow.
Picture this: one tab open, one cart, one trip to checkout — and five steps of building left to actually enjoy.
Build your scarecrow, step by step
A frame sturdy enough to hold its shape all season
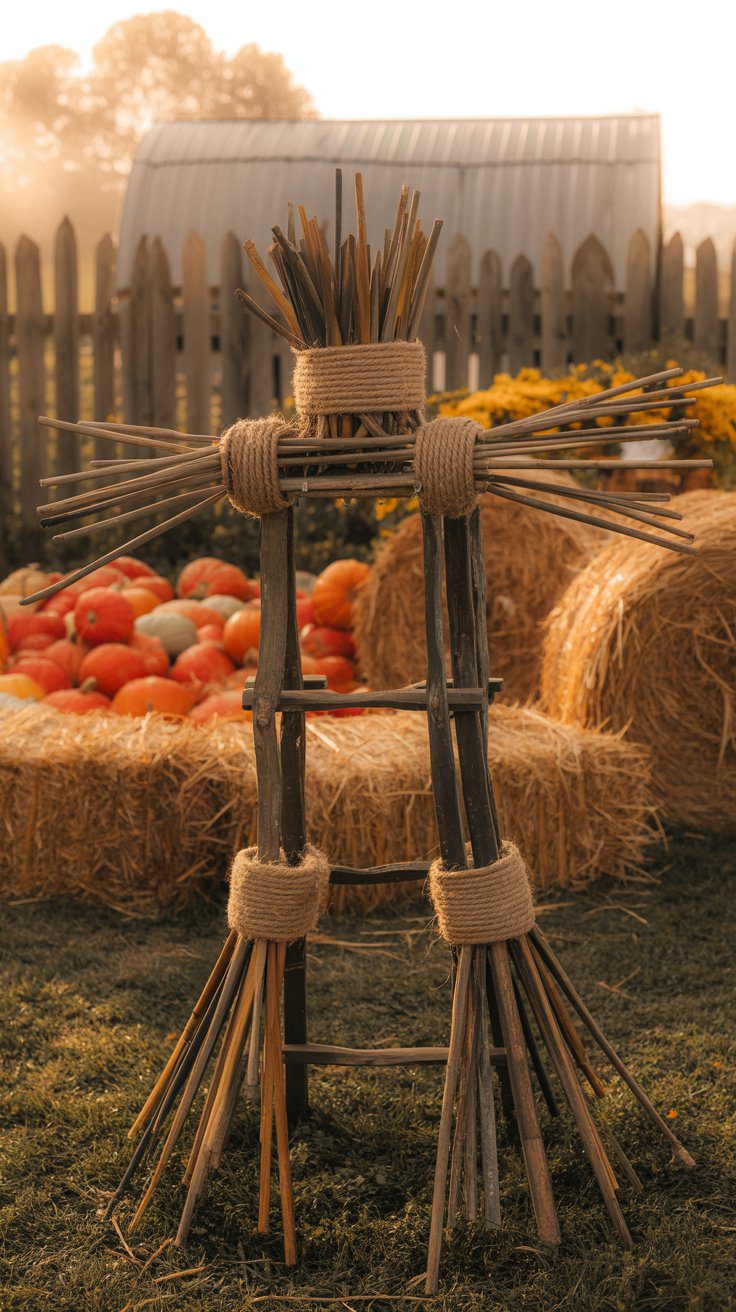
Use sturdy wooden garden stakes as your scarecrow’s backbone. The natural wood adds an authentic farmhouse feel against a backdrop of golden hay and weathered pumpkins. Tie the pieces with jute rope for texture and stability, and think proportion — keep the shoulders broad enough to balance a flannel shirt naturally.
- Keep the height around 6 ft for realism.
- Use untreated wood so it ages naturally.
- Don’t over-tighten the ropes — you want flexibility.
- Don’t skip the gloves; they complete the look.
💡 Tip: keep the shoulders broad enough to balance a flannel shirt naturally — that’s what sells the illusion from the sidewalk.
A flannel-and-denim wardrobe that looks worn-in, not fake
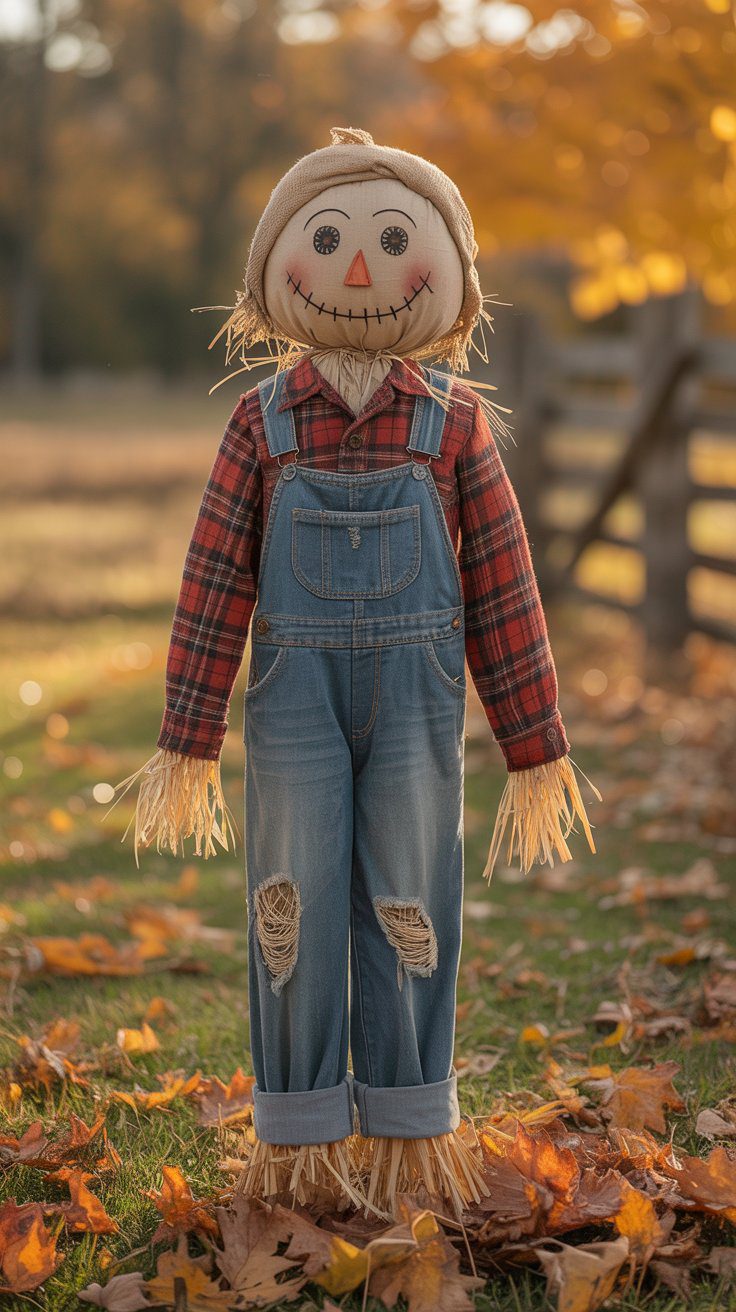
Go classic Americana with a faded red or brown plaid flannel and worn denim overalls. Roll up the sleeves and pant legs to expose straw for that authentic handmade vibe, and stick to natural fibers — they photograph beautifully under golden light.
- Mix patterns — rustic style is all about charm.
- Layer lightweight fabrics for depth.
- Don’t use synthetics; they fade fast outdoors.
- Don’t forget to stuff clothes evenly for shape.
💡 Tip: roll the cuffs before you stuff — it’s much harder to expose straw evenly after the sleeves are already full.
Burlap and straw give it real texture
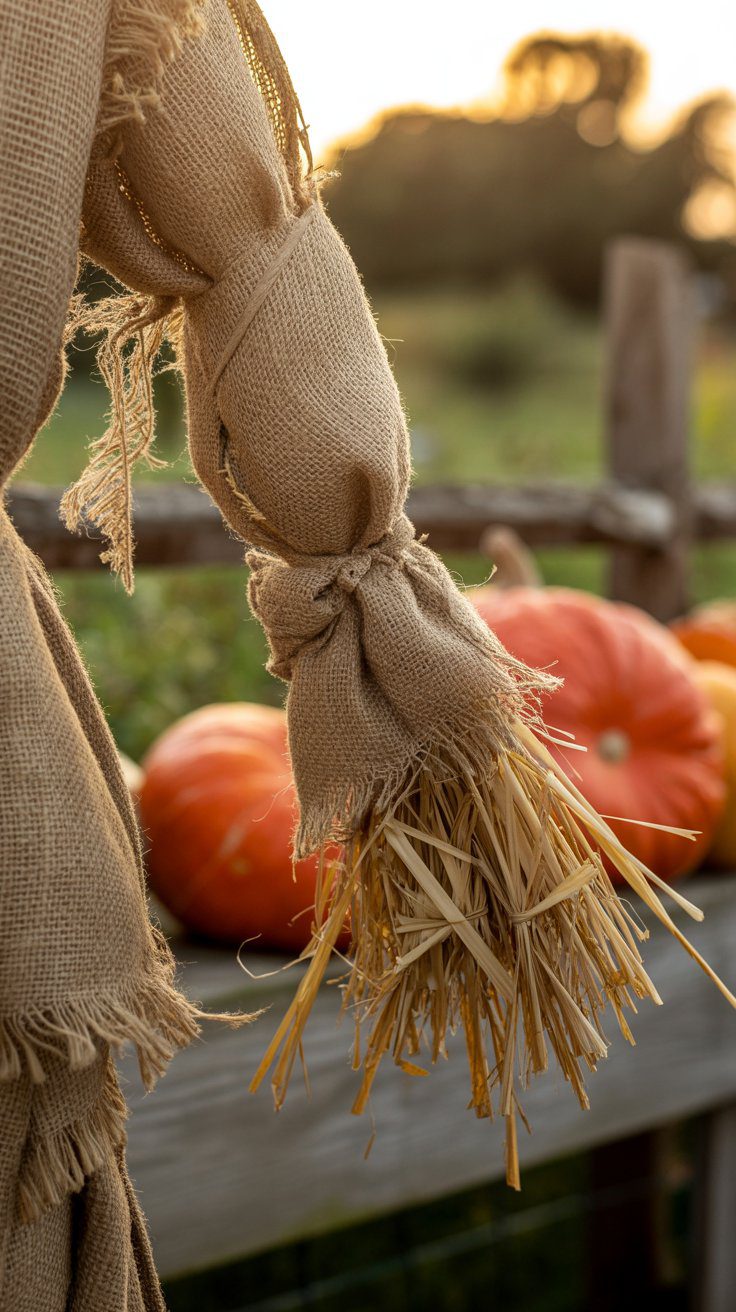
Stuff your scarecrow with straw bales or shredded raffia for fullness, wrapping key areas in burlap to keep everything contained. Burlap brings the perfect neutral base tone that complements the flannel’s color warmth.
- Leave straw peeking from cuffs and collar.
- Wrap burlap loosely for texture.
- Don’t overstuff — it loses its shape.
- Don’t skip layering for depth and warmth.
💡 Tip: stuff firm at the core and loose at the edges — that’s what makes straw look like it’s escaping naturally instead of just spilling out.
Character details that make it look handmade on purpose

Top it with a floppy straw hat, add mismatched buttons for eyes, and maybe even a pumpkin pail head for whimsy. Stick to harvest hues — rust, golden yellow, olive, and deep brown — these warm tones pop beautifully in outdoor fall lighting.
- Lean into imperfections — that’s the charm.
- Use a scarf or patch for personality.
- Don’t make it symmetrical; rustic looks lived-in.
- Don’t skip sealing fabrics for weather resistance.
💡 Tip: set the buttons slightly uneven on purpose — a perfectly symmetrical face reads store-bought instantly.
Style it into a full fall display

Position your scarecrow near hay bales, pumpkins, and cornstalks. Add lanterns or fairy lights for evening glow, and keep the palette earthy — tan burlap, amber straw, rusty reds, and deep greens — so it blends naturally into the season’s landscape.
Shop the look
- Group textures — metal, straw, fabric, and wood.
- Vary height for a layered display.
- Don’t overcrowd the scene.
- Don’t forget to anchor it against wind.
💡 Tip: light it from below with a lantern or two — that’s what turns a daytime porch prop into an evening focal point.
Picture this: a neighbor walking their dog pauses mid-stride and pulls out their phone to snap a photo, because for a second they genuinely can’t tell if your scarecrow is store-bought or a hundred years old.
Four ways to change up your scarecrow
A kid-friendly, no-sharp-tools version
Build the frame’s core from pool noodles instead of raw wood, swap fabric paint for buttons, and use safety pins instead of a hot glue gun so younger helpers can build right alongside you.
💡 Takeaway: the softer materials trade a little durability for a project the whole family can actually do together.
A budget version
Skip the straw bale and stuff with shredded paper or dry leaves raked straight from your own yard. A thrifted flannel shirt does exactly the same job as a new one — nobody will know the difference from the sidewalk.
💡 Takeaway: the frame and the wardrobe are what sell the look — the filler is invisible once it’s stuffed.
A spookier version
Swap the friendly button eyes for a plain burlap sack head, add a few cobweb accents, and lean into browns and blacks instead of the harvest palette for a Halloween-forward look.
💡 Takeaway: the same frame carries a cheerful harvest look or a spookier Halloween one — only the wardrobe and face need to change.
What it can and can’t do
This scarecrow is built for looks, not for actually scaring birds off a working garden bed — the frame isn’t reinforced for high wind, and burlap and straw will mildew if left out through a rainy stretch, so plan to bring it in or cover it during storms.
💡 Takeaway: treat it as seasonal porch decor, not permanent outdoor furniture, and it’ll look good for the whole season.
Picture this: the same wooden frame doing double duty as a cheerful harvest greeter in October and, with a fresh outfit next year, a whole new look without buying new stakes.
Loved this? Pin it.
Hover or tap the image below and hit Save so you can find this scarecrow tutorial again when you’re ready to build.

Picture this: next September, you open this exact pin again and have your scarecrow built again before the pumpkins even arrive.
Build your scarecrow this weekend
Five steps, one supply list, and a porch that finally looks as good as the ones you’ve been pinning.
Picture this: Saturday afternoon, a coffee, some jute rope, and a scarecrow standing on your porch before dinner.
This website contains affiliate links. Some products are gifted by the brand to test. As an Amazon Associate, I earn from qualifying purchases. The content on this website was created with the help of AI.
This website contains affiliate links. Some products are gifted by the brand to test. As an Amazon Associate, I earn from qualifying purchases. The content on this website was created with the help of AI.
