
This website contains affiliate links. Some products are gifted by the brand to test. As an Amazon Associate, I earn from qualifying purchases. The content on this website was created with the help of AI.
Flowers have this magical way of transforming any space—bringing in color, life, and joy. But sometimes, fresh blooms just won’t last long enough, or maybe you’re craving a little more creativity. That’s where DIY flower projects come in! Whether you’re crafting with fresh flowers, dried petals, or even paper blooms, these projects will brighten your home and spark your creative side.
So grab your glue gun and your favorite flowers, and let’s get to crafting some seriously stunning flower decor!
1. DIY Flower Hoop Wreath
A flower hoop wreath combines modern minimalism with boho charm. Whether you choose an embroidery hoop or a sleek gold metal ring, this project can bring the outdoors inside. The greenery and pops of color from fresh or faux flowers create an elegant, lush look.
Instructions:
- Lay out your flowers and greenery before gluing to plan placement.
- Use floral wire to secure greenery first, wrapping it along one half or one side of the hoop.
- Attach your flowers next, starting with the largest blooms and filling in with smaller pieces.
- Add ribbon or twine to hang. For extra polish, finish the back with small felt pads to prevent wall scratches.
Shop the Look:
- Embroidery Hoop (10–14 inch)
- Gold Metal Ring (12–18 inch)
- Artificial Eucalyptus Stems
- Blush Faux Peonies
Dos & Don’ts:
Do layer greenery first for depth.
Do balance color across both sides.
Don’t use oversized flowers on small hoops.
Don’t overfill — negative space keeps it modern.

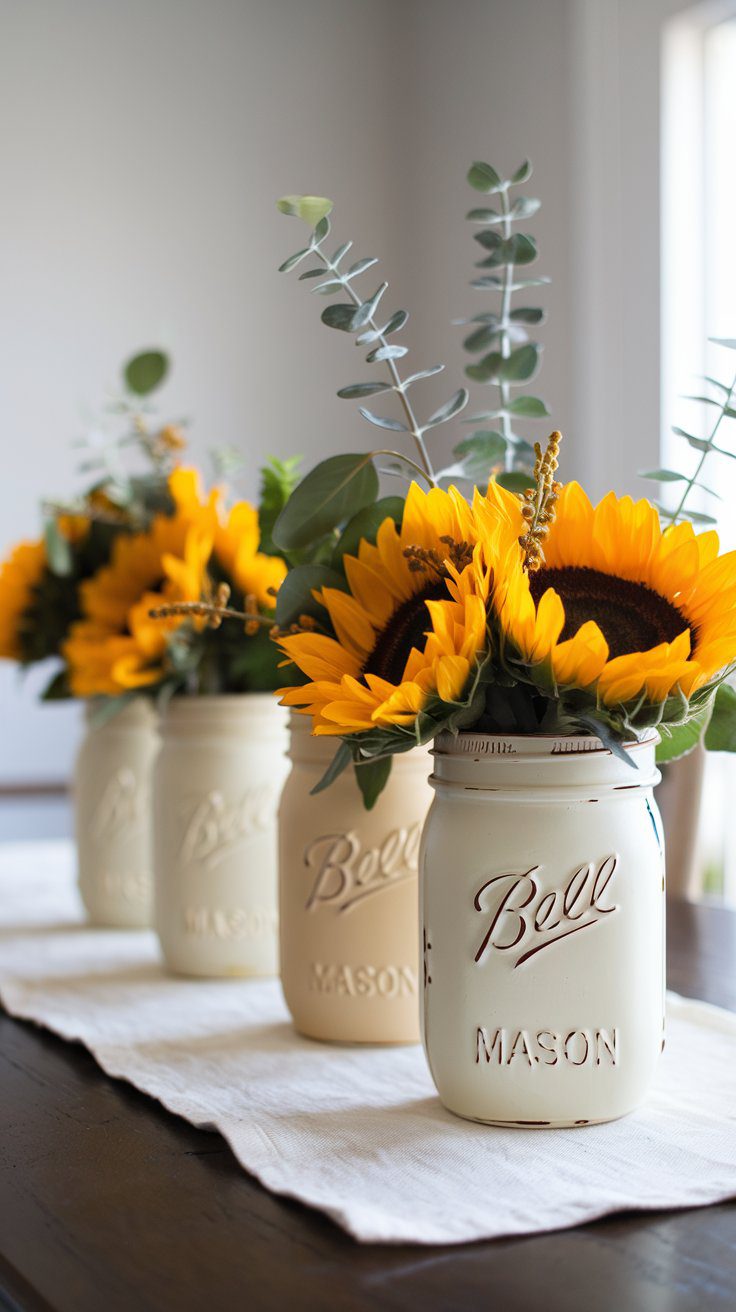
2. Mason Jar Flower Arrangements
There’s nothing easier—or more charming—than transforming plain mason jars into rustic floral displays. The beauty of this project is its flexibility—you can use jars of any size, from mini 8 oz jars for windowsills to large 32 oz jars for statement centerpieces.
Instructions:
- Clean your jars thoroughly and let them dry.
- Paint the outside with chalk paint in soft tones like cream, sage, or pale pink. Two coats create a smoother matte finish.
- Let them dry completely for at least an hour between coats.
- Fill each jar with faux or fresh flowers, trimming stems to different heights for visual balance.
- Wrap the neck of each jar with twine or ribbon. Optional: tie on a wooden tag or charm for extra personality.
- Group 3–5 jars together on a tray or down the center of a table for a cozy farmhouse look.
Shop the Look:
Dos & Don’ts:
Do mix flower heights for dimension.
Do stick to two coordinating jar colors.
Don’t skip primer if paint chips easily.
Don’t overcrowd—negative space feels intentional.
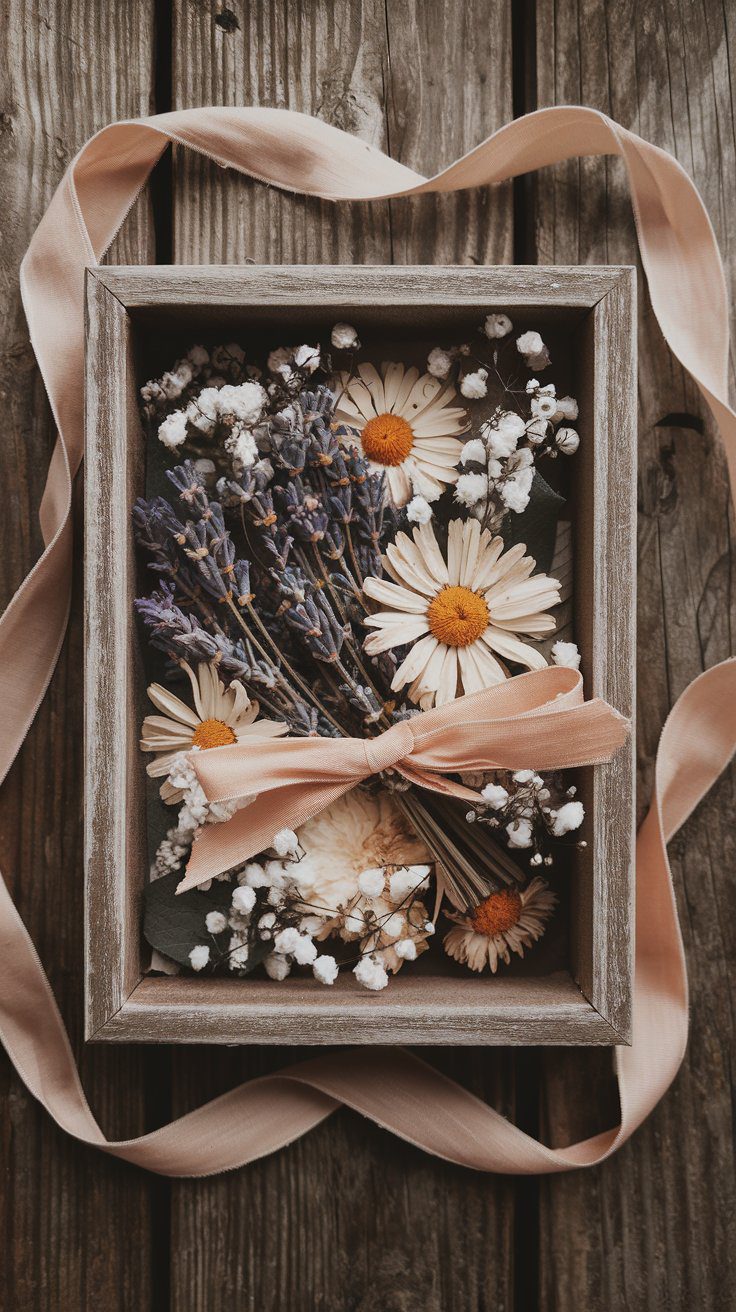
3. Dried Flower Shadow Box
Turn your favorite blooms into forever keepsakes with a dried flower shadow box. It’s part craft, part memory capsule — perfect for preserving special bouquets or seasonal flowers.
Instructions:
- Choose flowers that dry well, like lavender, roses, daisies, or baby’s breath.
- Press small flowers between heavy books for 7–10 days, or hang larger blooms upside down in a dry, dark room for about 2 weeks.
- Select a shadow box (8×10 or 11×14 inches) depending on your wall space.
- Arrange your dried flowers inside the box on acid-free paper or fabric. Test placement before gluing.
- Use clear-drying craft glue or double-sided tape to secure each bloom.
- Close and seal the frame, then hang or display it on a shelf away from sunlight.
Shop the Look:
Dos & Don’ts:
Do use flowers with natural color contrast.
Do test your layout before gluing.
Don’t overload the background.
Don’t hang in direct light — it fades quickly. wall, filled with dried lavender, pressed daisies, and sprigs of baby’s breath. This DIY Flower Projects creation is timeless, sentimental, and absolutely stunning.
4. DIY Floral Monogram Letter
A floral monogram is one of those simple crafts that instantly looks custom and elevated. It’s perfect for gifting, nursery decor, or adding personality to your gallery wall.

Instructions:
- Choose a wooden or cardboard letter (10–18 inches tall) depending on where you’ll display it.
- Cut a piece of floral foam to fit the front face of the letter and glue it down firmly for depth and structure.
- Trim faux flower stems to about 1–2 inches long so they can nest into the foam without sticking out.
- Start with your largest blooms first—roses or hydrangeas—and then fill in with smaller flowers and greenery.
- Use hot glue to secure everything in place and check from all angles for even coverage.
- Finish with optional accents like pearl pins or a soft satin ribbon loop if you want to hang it.
Shop the Look:
Dos & Don’ts:
Do layer big blooms first to anchor the look.
Do mix small textures—greenery, filler flowers—for dimension.
Don’t leave blank edges or uneven sides.
Don’t overload with heavy florals—light layers photograph best.
5. Paper Flower Bouquets
Paper flower bouquets are ideal when you want beauty that lasts. They’re lightweight, customizable, and easy to tailor for any season or color palette — from soft neutrals to vibrant spring hues.

Instructions:
- Choose tissue paper (20×30 inches) or lightweight craft paper for each bloom. For fuller flowers, use 6–8 layers per color.
- Cut large petal shapes—about 4–6 inches long for medium blooms or 8–10 inches for oversized peonies.
- Gently curl the petal edges with a pencil to add shape.
- Stack and layer the petals, offsetting them slightly, then secure the center with floral wire or pipe cleaner.
- Wrap the stem with floral tape to cover the wire.
- Repeat with coordinating colors, then bundle 5–7 blooms for a balanced bouquet. Display in a vase or gift wrap in brown kraft paper for a handmade touch.
Shop the Look:
Dos & Don’ts:
Do curl edges for a lifelike look.
Do mix two complementary shades per bloom.
Don’t use thick paper—it won’t shape easily.
Don’t overcrowd the bouquet; give each bloom room to open visually.
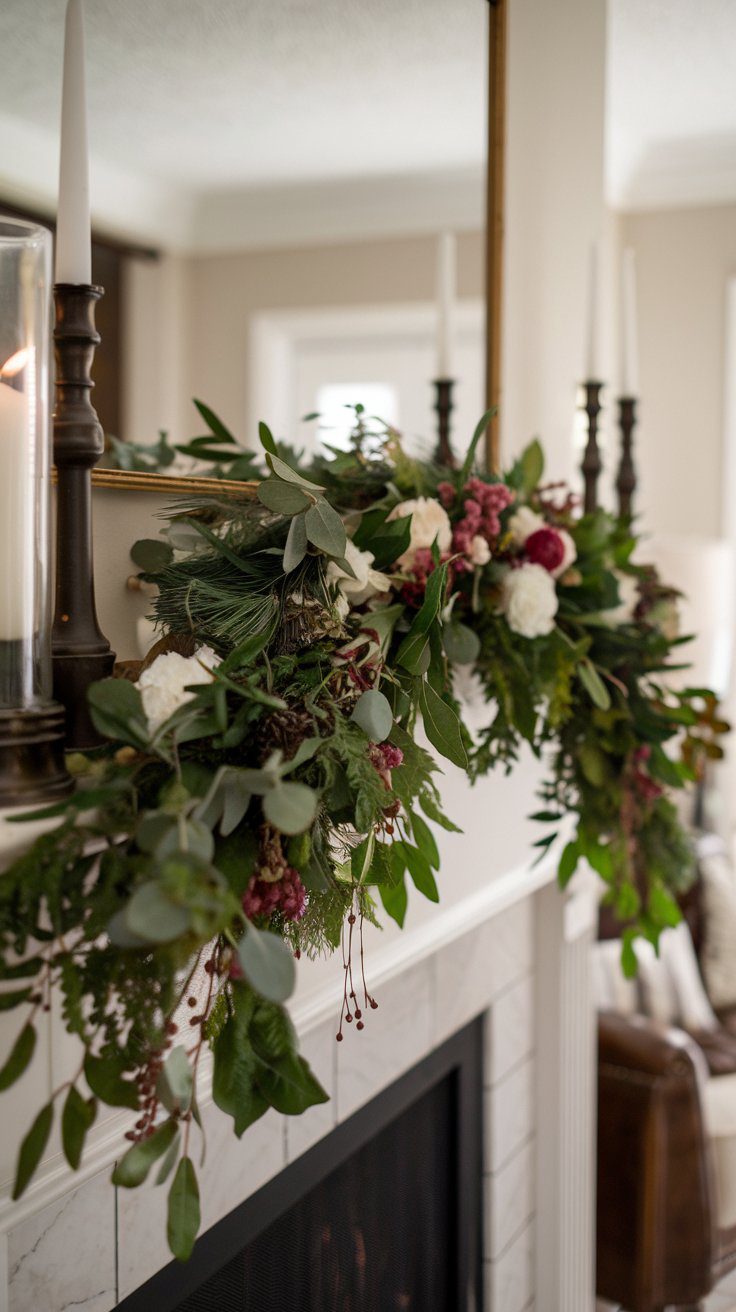
6. Floral Garland for Mantels
A floral garland instantly softens any room — perfect for mantels, dining tables, or shelves. It adds a lush, romantic touch whether you’re decorating for a season or simply refreshing your space.
Instructions:
- Start with a wire base (6–8 feet) or natural jute rope as your foundation.
- Layer faux greenery like eucalyptus or ivy, securing it with floral wire along the full length.
- Add flowers in clusters every 12–18 inches, using a mix of large and small blooms for balance.
- Incorporate filler accents such as baby’s breath or small buds to create volume and texture.
- Drape across your mantel, dining table, or stair railing, adjusting the fall for a natural cascade.
- Optional: weave in fairy lights or ribbon for added dimension and glow.
Shop the Look:
Dos & Don’ts:
Do layer greenery first before florals.
Do vary bloom sizes for a natural look.
Don’t make it perfectly symmetrical—imperfection feels organic.
Don’t skip testing the drape before securing ends.
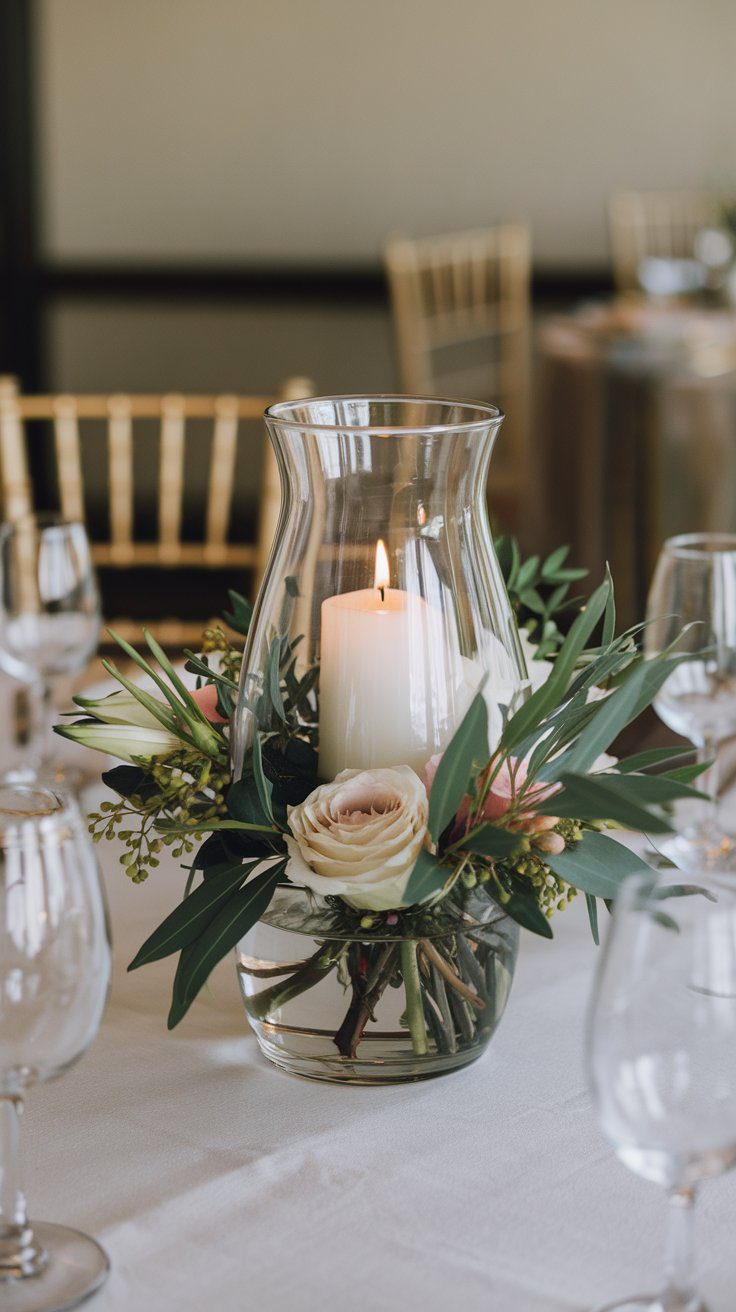
7. Floral Candle Centerpieces
Candlelight paired with florals is the easiest way to make any setting feel elegant. These centerpieces work for dinner parties, holidays, or cozy nights at home — and they’re simple to assemble.
Instructions:
- Choose glass hurricane vases or wide candle holders (6–10 inches tall) for the base.
- Place a pillar candle (3–4 inches wide) or LED candle in the center for safety.
- Arrange faux greenery around the base, securing with floral tape or hot glue if needed.
- Layer in small blooms like hydrangeas, roses, or peonies, mixing sizes for dimension.
- For a soft glow, tuck in battery-operated fairy lights among the flowers.
- Display 2–3 centerpieces in varying heights for a professional tablescape look.
Shop the Look:
Dos & Don’ts:
Do vary centerpiece heights for visual balance.
Do use LED candles for long events.
Don’t crowd flowers too close to open flames.
Don’t skip testing the view from all angles before final placement.
8. DIY Flower Wall Art
This is where craft meets wall decor — turning simple flowers into art you’ll actually want to hang. A floral wall piece adds softness and charm while giving you full creative freedom over size, color, and style.

Instructions:
- Start with a canvas or wooden board (16×20 or 18×24 inches) depending on your wall space.
- Lay out your floral pattern — a heart, initial, or abstract cluster — before gluing anything down.
- Use a mix of large blooms (3–5 inches) and smaller filler flowers for depth.
- Attach each piece with hot glue, starting from the center and working outward.
- Fill gaps with greenery, dried petals, or tiny buds to blend the edges seamlessly.
- Once dry, add hanging hardware to the back or lean the piece on a shelf for a more relaxed vibe.
Shop the Look:
Dos & Don’ts:
Do plan your layout before gluing.
Do mix flower sizes for visual texture.
Don’t overload one section—keep balance.
Don’t skip greenery; it ties the design together.
Affiliate Disclosure: This website contains affiliate links. As an Amazon Associate, I earn from qualifying purchases.
Let’s Get Crafting!
With these 8 DIY Flower Projects, you can add charm, color, and creativity to any space in your home. From simple hoop wreaths to stunning centerpieces and long-lasting paper blooms, there’s something for every style and skill level. So grab those flowers and get crafting—your home is about to bloom with beauty and personality!
While you’re in the mood to craft, check out this list of 12 Vintage-Inspired DIY Projects that bring serious nostalgic charm to any space: https://ballenblogger.com/diy-projects-nostalgia/
This website contains affiliate links. Some products are gifted by the brand to test. As an Amazon Associate, I earn from qualifying purchases. The content on this website was created with the help of AI.
