
This website contains affiliate links. Some products are gifted by the brand to test. As an Amazon Associate, I earn from qualifying purchases. The content on this website was created with the help of AI.
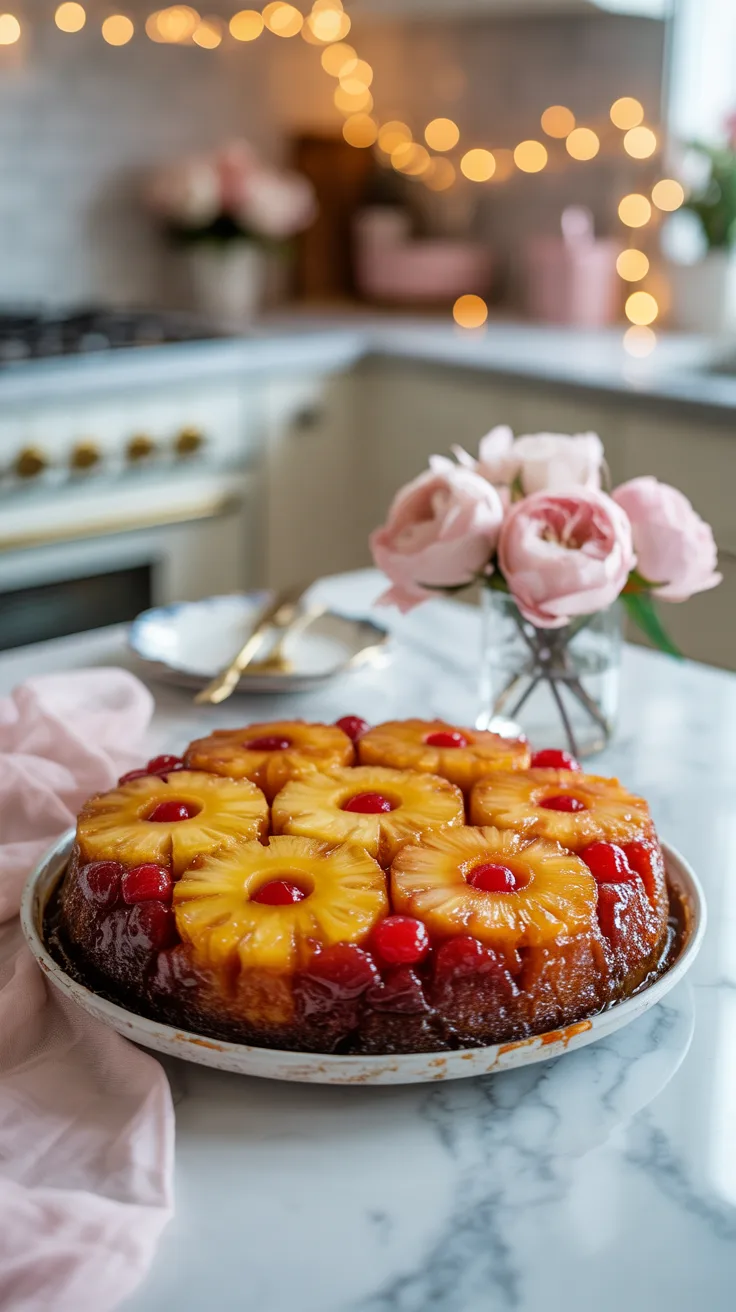
If you’ve ever pulled a pineapple upside down cake from the oven and flipped it to reveal that gorgeous, glossy caramelized topping, you already know the magic. This crushed pineapple upside down cake takes that nostalgia to a whole new level — using crushed pineapple instead of rings means every single bite is packed with sweet, juicy pineapple flavor. The result? A cake that’s impossibly moist, deeply caramelized, and absolutely irresistible.
Whether you’re making it for a weekend gathering, a potluck, or just because you have a can of pineapple in the pantry, this recipe is simple enough for a beginner and impressive enough to earn the “you made this from scratch?” reaction every time.
Why Crushed Pineapple Makes All the Difference
Traditional pineapple upside down cakes use pineapple rings, which create that classic polka-dot presentation. But crushed pineapple? It’s a total game changer. Here’s why:
- More pineapple in every bite. No missing the ring — crushed pineapple spreads evenly across the entire topping layer.
- Extra moisture. The juice from the crushed pineapple seeps into the cake as it bakes, keeping it tender and moist for days.
- Better caramelization. The small pieces of pineapple caramelize beautifully with brown sugar and butter, creating a deep, rich topping.
- Easier to serve. No wrestling with slicing around a big ring — this cake cuts cleanly and beautifully every time.
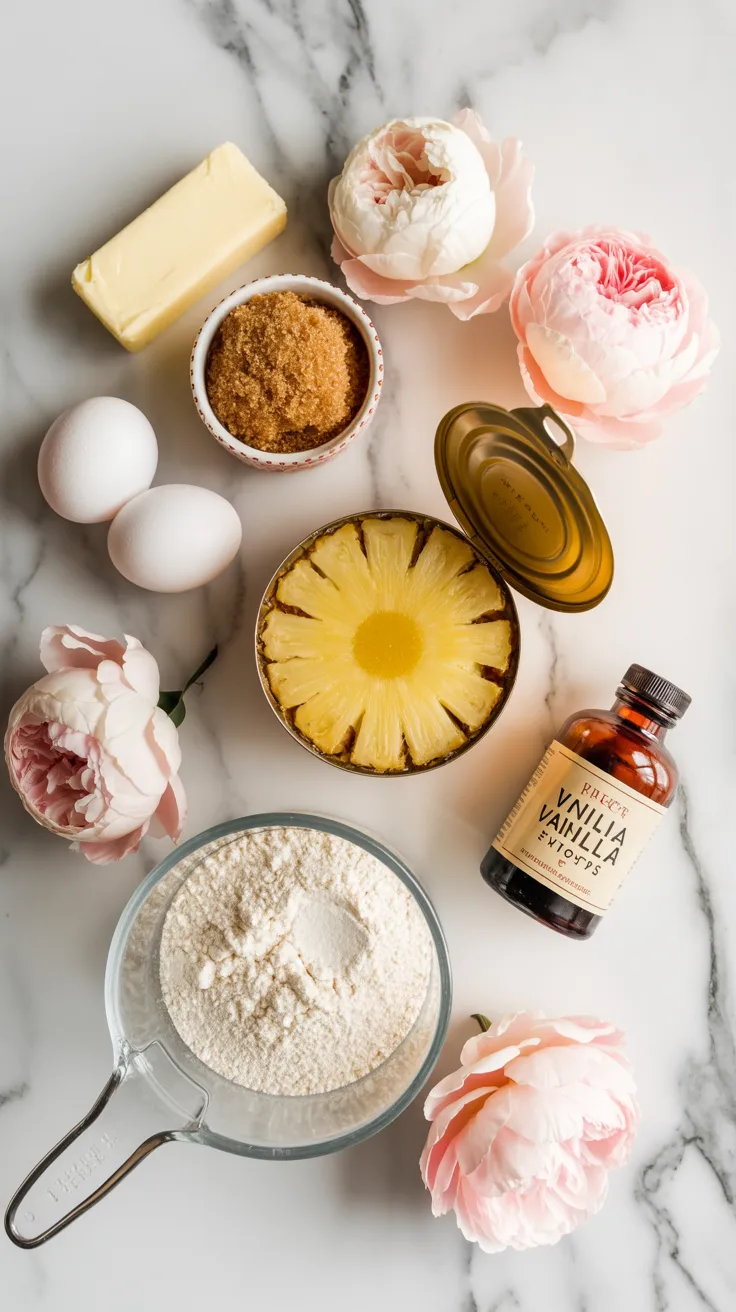
Ingredients You’ll Need
One of the best things about this cake is how pantry-friendly it is. Here’s everything you need:
For the Caramel Pineapple Topping
- 4 tablespoons unsalted butter
- ¾ cup packed light brown sugar
- 1 can (20 oz) crushed pineapple, well drained (reserve juice)
- Maraschino cherries, optional — grab a jar here
For the Cake Batter
- 1½ cups all-purpose flour
- 1½ teaspoons baking powder
- ¼ teaspoon salt
- ½ cup (1 stick) unsalted butter, softened to room temperature
- ¾ cup granulated sugar
- 2 large eggs, room temperature
- 1 teaspoon pure vanilla extract
- ½ cup reserved pineapple juice (or whole milk if not enough juice)
Equipment tip: A good 9-inch round cake pan is essential here — you want something with solid, even heat distribution so the caramel doesn’t burn on the edges. If you want an extra-rich crust, a 10-inch cast iron skillet works beautifully too.
How to Make Crushed Pineapple Upside Down Cake
This recipe comes together in about an hour, start to finish. Follow these steps carefully for the best results.
Step 1: Prep Your Pan and Oven
Preheat your oven to 350°F (175°C). Grease a 9-inch round cake pan — and don’t skip this step! A well-greased pan ensures the caramelized topping releases cleanly when you flip the cake.
Step 2: Make the Caramel Topping
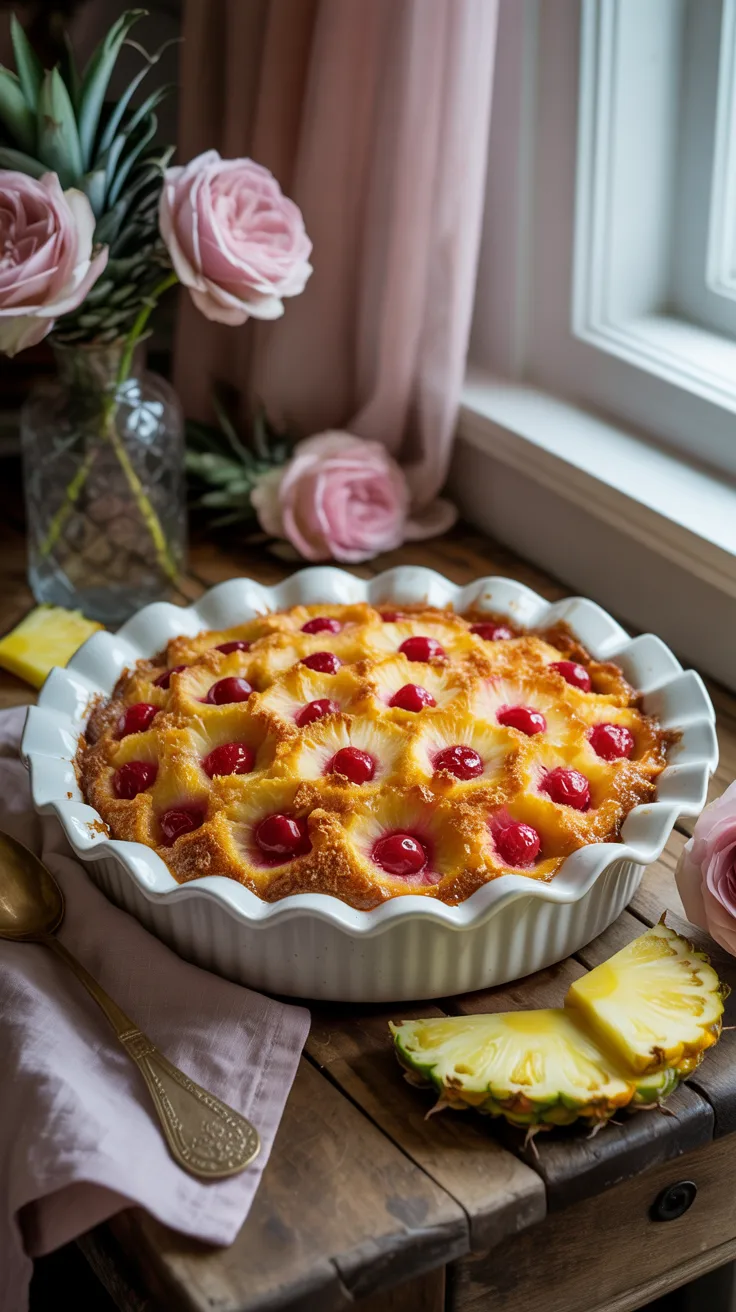
Melt 4 tablespoons of butter directly in the cake pan by placing it in the preheating oven for 2–3 minutes. Once melted, carefully remove and sprinkle ¾ cup of packed brown sugar evenly over the melted butter. Spread the well-drained crushed pineapple in an even layer on top of the brown sugar. If using maraschino cherries, press them into the pineapple layer now — they add gorgeous pops of color and a sweet contrast.
Step 3: Make the Cake Batter
In a medium bowl, whisk together the flour, baking powder, and salt. Set aside.
In a large bowl (or the bowl of your stand mixer), beat the softened butter and granulated sugar together on medium-high speed for 3–4 minutes until the mixture is pale, fluffy, and almost doubled in volume. This step is important — properly creamed butter and sugar create a lighter, more tender crumb.
Add the eggs one at a time, beating well after each addition. Mix in the vanilla extract. Reduce mixer speed to low and add the flour mixture in three additions, alternating with the pineapple juice (starting and ending with the flour). Mix just until combined — overmixing leads to a dense, tough cake.
Step 4: Assemble and Bake
Gently spoon the batter over the pineapple topping in the pan. Use an offset spatula or the back of a spoon to spread it evenly to the edges without disturbing the fruit layer underneath.
Bake at 350°F for 40–45 minutes, or until a toothpick inserted in the center of the cake comes out clean and the top is golden brown. If the top is browning too quickly, loosely tent with foil after 30 minutes.
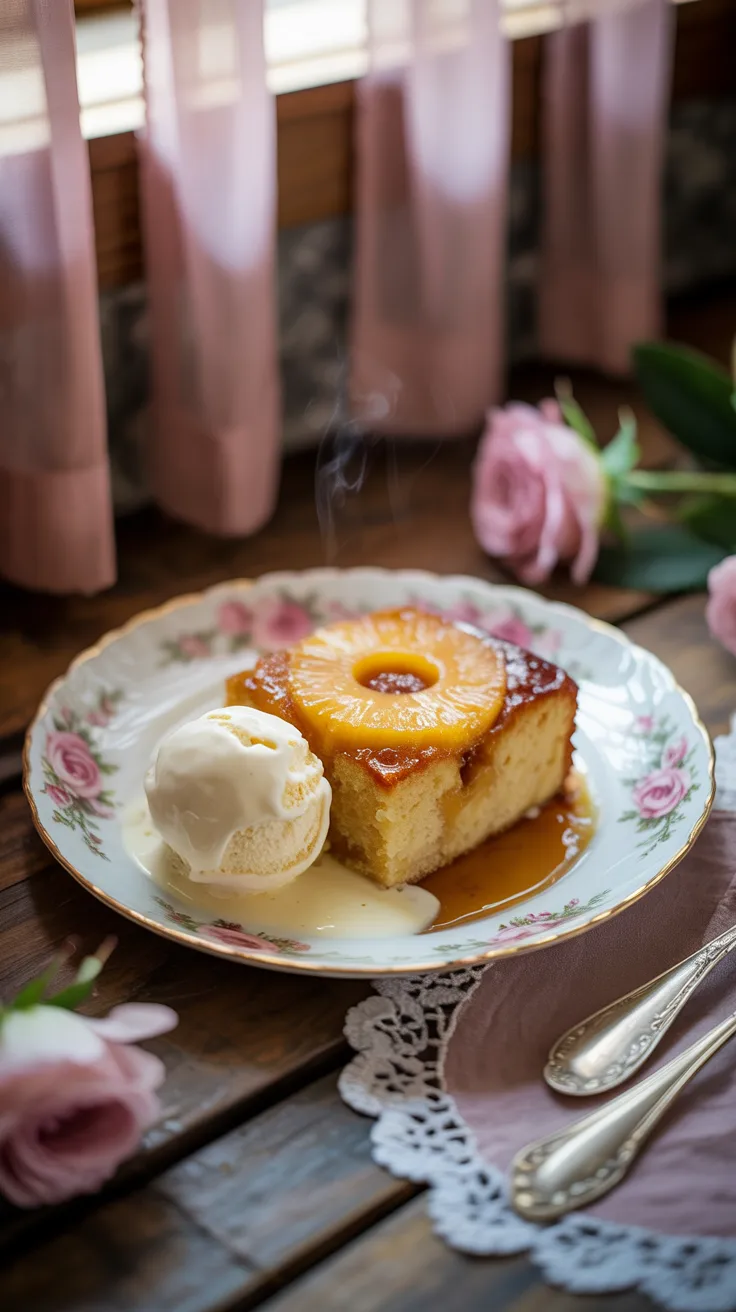
Step 5: The Big Flip
This is the moment everyone waits for! Let the cake cool in the pan for exactly 10 minutes — no more, no less. Too little time and the caramel won’t have set; too long and it will stick to the pan.
Run a thin knife around the edges of the pan to loosen any sticky spots. Place a large plate or cake stand upside down on top of the pan. Holding both firmly together, flip in one confident motion. Leave the pan in place for about 30 seconds to allow all the caramel to drizzle down, then lift away. Any bits of pineapple can be gently pressed back into place.
Tips for the Perfect Pineapple Upside Down Cake
- Drain the pineapple very well. Excess moisture can prevent proper caramelization and make the cake soggy. Press crushed pineapple in a fine mesh strainer before using.
- Room temperature ingredients matter. Cold butter and eggs don’t cream or emulsify properly. Pull them out 30 minutes before you start.
- Don’t skip the creaming step. Beating butter and sugar until truly fluffy is what gives this cake its lovely light texture.
- Use the reserved pineapple juice. It has more flavor than milk and adds extra pineapple punch to the cake itself.
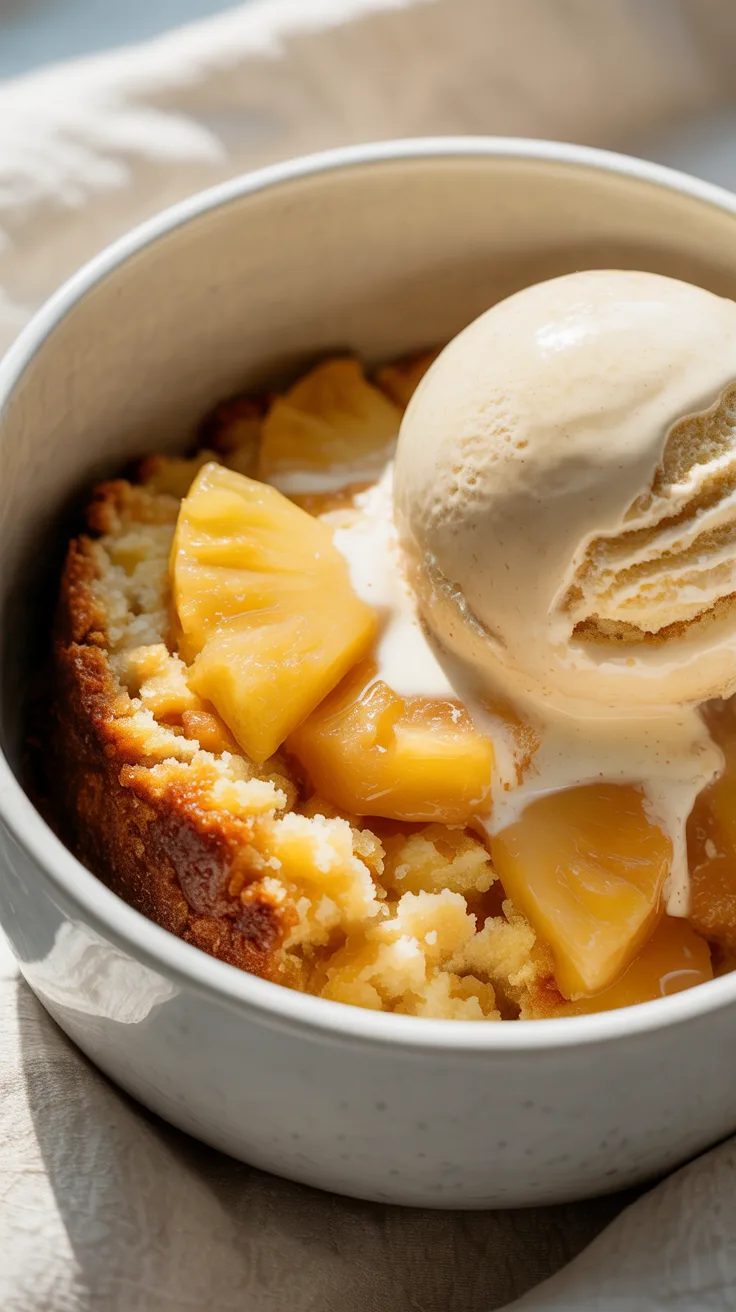
- Serve it warm. This cake is at its absolute best served warm, when the caramel is still a little gooey.
Delicious Variations to Try
Coconut Pineapple Upside Down Cake
Mix sweetened shredded coconut into the batter and swap the juice for coconut milk. The result is a tropical dream with layers of flavor.
Rum-Kissed Caramel Topping
Add 1–2 tablespoons of dark rum to the caramel layer with the butter and brown sugar before adding the pineapple. It cooks off in the oven but leaves behind a rich, complex depth of flavor.
Brown Butter Version
Brown the butter in a saucepan until nutty and fragrant before adding it to the pan. This adds incredible caramel-like depth to the topping.
Pineapple Upside Down Cupcakes
Use a muffin tin with a small amount of butter, brown sugar, and crushed pineapple in each cup, then fill with batter. Bake 20–22 minutes. Perfect for parties!
Make-Ahead and Storage Tips
- Room temperature: Cover loosely and keep at room temperature for up to 2 days.
- Refrigerator: Store covered for up to 5 days. Warm individual slices in the microwave for 20–30 seconds.
- Freezer: Freeze wrapped slices for up to 3 months. Thaw overnight and warm before serving.
- Make-ahead tip: Prepare the topping layer and dry ingredients the night before, then mix and bake fresh the next day.
Serving Suggestions
- A generous scoop of vanilla bean ice cream alongside a warm slice is simply heavenly.
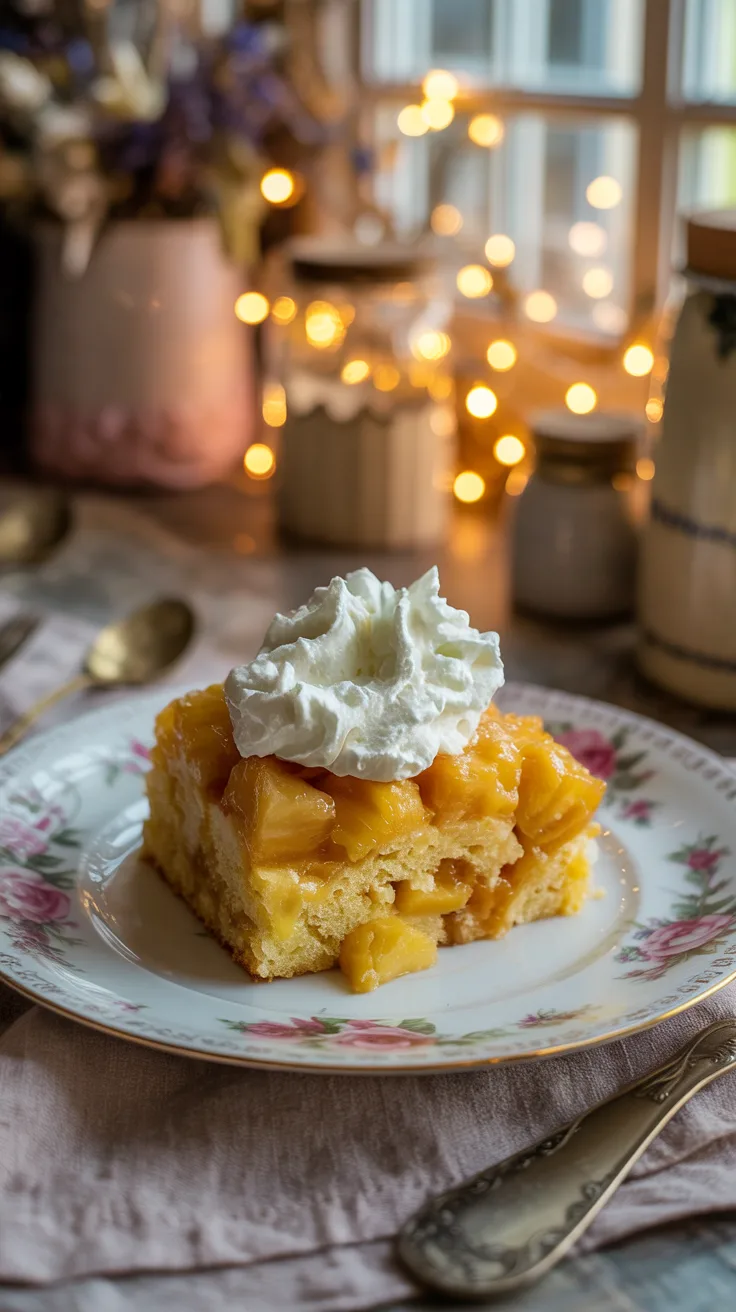
- A dollop of freshly whipped cream adds a light, airy contrast to the dense, caramelized cake.
- For a brunch spread, serve at room temperature alongside fresh fruit and coffee.
- Drizzle with a little extra caramel sauce for special occasions.
Frequently Asked Questions
Can I use fresh pineapple instead of canned?
Yes! Fresh pineapple works beautifully and gives an even brighter flavor. Finely chop it into small pieces and drain any excess juice before using.
Why did my cake stick to the pan?
This usually happens because the pan wasn’t greased well enough, or the cake sat in the pan too long before flipping. Make sure to grease thoroughly and flip at exactly the 10-minute mark.
Can I make this in a cast iron skillet?
Absolutely — a 10-inch cast iron skillet is actually one of the best pans for this recipe. It distributes heat evenly and creates an especially deep, rich caramel.
Is there a gluten-free version?
Yes! Substitute the all-purpose flour with a 1:1 gluten-free baking flour blend. The texture will be slightly more dense, but the flavor is still wonderful.
Quick Recipe Summary
Prep time: 20 minutes | Bake time: 40–45 minutes | Serves: 8–10
- Preheat oven to 350°F. Melt butter in a 9-inch round cake pan in the oven (2–3 min).
- Sprinkle brown sugar evenly over melted butter. Add drained crushed pineapple in an even layer. Press in cherries if using.
- Whisk flour, baking powder, and salt in a bowl. Set aside.
- Beat softened butter and granulated sugar until pale and fluffy, 3–4 minutes. Add eggs one at a time, then vanilla.
- Alternate adding flour mixture and pineapple juice in three additions, starting and ending with flour. Mix just until combined.
- Spoon batter gently over pineapple topping; spread to edges.
- Bake 40–45 minutes until golden and a toothpick comes out clean.
- Cool in pan exactly 10 minutes. Run knife around edges, then flip onto a serving plate. Rest pan 30 seconds before lifting.
- Serve warm, with ice cream or whipped cream if desired.
This crushed pineapple upside down cake is the kind of dessert that earns its place in your recipe rotation permanently. Once you make it with crushed pineapple, you’ll never go back to rings. Save this recipe, share it with someone who loves to bake, and tag us when you make it!
This website contains affiliate links. Some products are gifted by the brand to test. As an Amazon Associate, I earn from qualifying purchases. The content on this website was created with the help of AI.
