This website contains affiliate links. Some products are gifted by the brand to test. As an Amazon Associate, I earn from qualifying purchases. The content on this website was created with the help of AI.
Picture this: you finally get your dream craft room—the one with all the storage bins, color-coded supplies, and that Pinterest-perfect pegboard wall—and then… you realize half of it doesn’t actually work the way you thought it would. Sound familiar? You’re not alone. After years of creating in everything from a dining room corner to a full-blown studio, I’ve learned exactly what I’d do differently if I were designing my space all over again. So before you drop hundreds on matching containers or that giant desk you’ve been eyeing, grab your coffee, pull up your notes app, and let’s talk about what really matters when setting up a craft room that actually works for you.
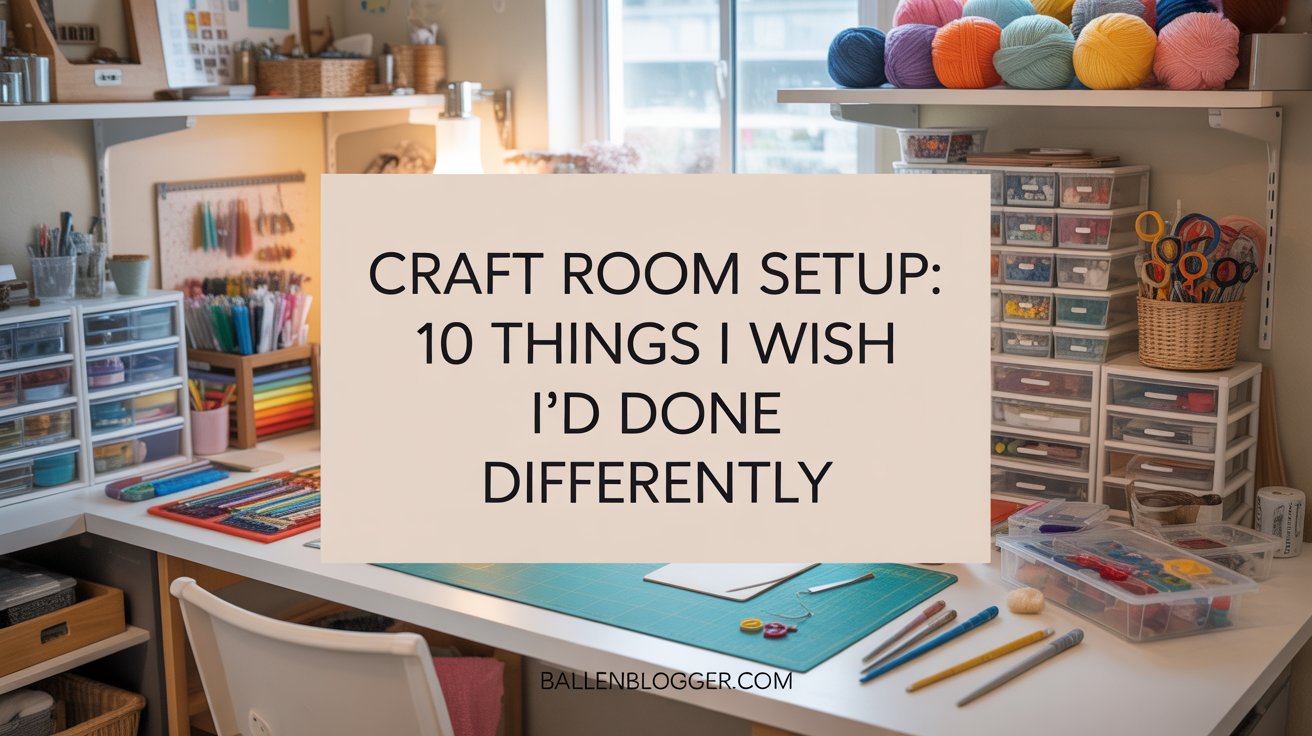
Here’s a List of Items for your Craft Room
. Clear Storage is a Game-Changer
Listen up—if you’re anything like me, you’ve spent years storing your craft supplies in opaque containers, convinced you were organizing them perfectly. But trust me, nothing beats the clarity of clear storage bins. I’m talking about those bins where you can actually see what’s inside, without having to open every single one to find your washi tape. Not only does it make your supplies more accessible, but it also adds a level of aesthetic beauty to your space. Your craft room should inspire you, and seeing all your colorful supplies neatly organized in clear bins? Instant creativity boost.
Need storage solutions? Check out these must-haves on Amazon:
2. Label Everything—Seriously, Everything
You may think, “Oh, I’ll remember where I put my glitter pens.” Spoiler: You won’t. This is why labeling is a non-negotiable. Labeling keeps you sane and ensures that even when your space evolves over time (trust me, it will), you can quickly spot what you need. It’s a simple habit, but it’s going to save you hours spent digging around for that one tool you swear you just saw.
Need a label maker? Grab one here:
3. Group Like Items Together
I learned the hard way that grouping like items together isn’t just a suggestion—it’s essential for an efficient craft room. If you’re into paper crafting, have a designated paper zone. Stickers? Get a specific spot. No more tossing random supplies into any available drawer. It’s all about the zones, people. These will be your lifesavers when you’re in the middle of a creative frenzy and can’t afford to waste time hunting down tools. Plus, it makes the room feel organized, even when you’ve got half-finished projects scattered everywhere.
Need storage to keep your items grouped and organized? Check out these options:
4. Bigger Isn’t Always Better with Drawers
I had dreams of large, expansive drawers where I could throw everything—big mistake. While I thought large drawers would help me keep things neatly stored, they quickly became catch-alls. Instead of having organized zones, everything just became a jumbled mess that I had to sift through every time I needed something. Smaller, segmented drawers keep things in their place and are much easier to navigate. Trust me—this is one lesson I’ll apply next time. Go for function over size, and you’ll thank me later.
Looking for furniture that fits your space? Check out these options:
5. Keep Supplies Visible—Out of Sight = Out of Mind
I wanted my mixed media supplies tucked away behind closed doors for a neat, minimal look. Big regret. I found myself reaching for the same basic supplies and completely forgetting about the supplies I couldn’t see. Your brain naturally defaults to what’s in front of you, and if you hide your supplies, they’re just as good as forgotten. For my next craft room, I’ll be incorporating some open shelving or at least clear fronts on cabinets to give me a visual cue to use everything I own.
6. Slow Down Before You Buy Storage Solutions
This one is big: don’t rush out and buy every storage bin or shelf you think you’ll need before you even start organizing. I made the mistake of over-purchasing storage before figuring out what would actually fit and work in my room. Spoiler: I ended up with a ton of bins that weren’t the right size or didn’t fit the space as well as I thought. Instead, take your time. Use what you already have, and add storage as you go. It’s all about flexibility. You’ll avoid buying things that aren’t the right size and save yourself from regret later on.
Looking for storage that works for your needs? Check out these options:
7. Plan for Future Growth
You know that feeling when you’ve just finished setting everything up and you think it’s perfect, only to realize a few months later that your hobby has expanded? I didn’t plan for my craft collection to grow as much as it did. As I started adding new supplies, I quickly ran out of space. The lesson here: always leave room to expand. Whether it’s for more stickers, tools, or whatever new crafting passion you pick up, leave yourself some wiggle room in the layout.
8. Don’t Forget to Factor in Lighting
When designing your craft space, don’t overlook the importance of good lighting. It’s not just about being able to see what you’re working on—it’s about creating the right atmosphere. I made the mistake of assuming that one overhead light would be enough. Big mistake! It’s worth investing in task lighting and even some ambient lighting to create a space that feels energizing yet cozy. Your eyes will thank you, and your projects will look better too!
Need good lighting for your craft room? Check out these options:
9. Keep It Flexible
I’m all for having a dream craft space, but I’ve learned that things change. What works for me now might not work six months from now. That’s why it’s important to design a space that’s flexible. Use adjustable shelving or furniture that can be moved around easily. Don’t lock yourself into a rigid layout—let your craft room grow with your creative journey.
Looking for flexible storage? Check out these options:
10. Aesthetics Matter—But So Does Function
This one’s for my fellow design lovers: while it’s important for your space to be visually inspiring, never sacrifice functionality for aesthetics. Sure, a cute desk might look great, but if it doesn’t support your workflow, it’s not worth it. Prioritize functionality first, then add aesthetic touches that inspire creativity. It’s the balance between the two that creates a space where you can both work and feel at home.
This website contains affiliate links. Some products are gifted by the brand to test. As an Amazon Associate, I earn from qualifying purchases. The content on this website was created with the help of AI.
