This website contains affiliate links. Some products are gifted by the brand to test. As an Amazon Associate, I earn from qualifying purchases. The content on this website was created with the help of AI.
It started as a dare I made to myself after I spent eighty dollars at a craft store and came home with things I was absolutely certain I needed, then never touched. I had a whole room full of supplies, a guilty conscience, and zero finished projects. So I made a rule: thirty days, no craft store runs, no Amazon craft orders. Whatever I made had to come from inside the house.
What followed was the most creative month I have had in years. Turns out, constraints are more useful than abundance when it comes to making things. Every single project on this list costs nothing if you already live in a house. Which you do.
1. Melted Crayon Bookmarks on Watercolor Paper
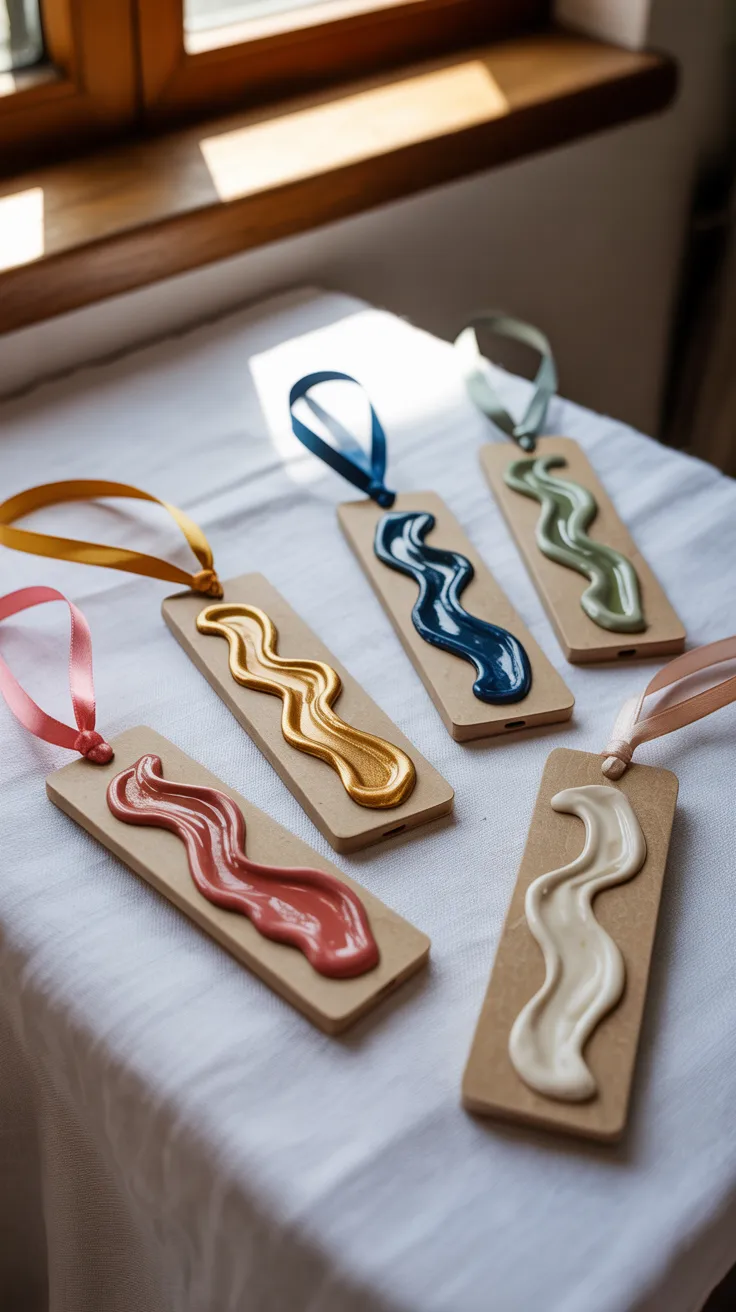
There is a drawer in almost every house that has broken crayons in it. Not enough of any one color to use for anything, too many to throw away without guilt. This project uses all of them. You peel, melt, and drip them onto heavy paper to make bookmarks that look like tiny abstract paintings. The colors blend in ways you cannot predict and cannot replicate, which makes every single one genuinely unique.
What You Need From Around the House
- Broken crayon pieces, peeled
- Heavy paper or cardstock cut into bookmark strips, roughly 2 by 7 inches
- An old muffin tin or aluminum foil shaped into small cups for melting
- Your oven set to 250F
- A hole punch and any ribbon or string from a gift bag
How to Make It
- Sort your crayon pieces loosely by color family into your foil cups or muffin tin. You do not need to be precise — unexpected color combinations are the whole point.
- Place in the oven at 250F for about 15 minutes until fully melted. Do not stir.
- Remove carefully and let cool for just 2 to 3 minutes until the wax is thick but still pourable, like a loose syrup.
- Lay your cardstock strips on a protected surface. Drip or pour the melted wax in loose stripes across each strip. Work fast — the wax sets quickly.
- Let cool completely and harden, about 20 minutes at room temperature.
- Punch a hole at the top and thread with ribbon from any gift bag you have saved. Trim to about 4 inches.
Tip: The wax drips will be slightly raised and textured when dry, which makes them feel intentionally crafted rather than accidental. If the wax hardens too fast before you can drip it, place the tin back in the warm oven for 60 seconds.
Picture this: a set of five bookmarks spread on a white surface, each one a different abstract river of color — coral into gold into cream, navy into sage — made entirely from the crayon graveyard in your junk drawer. You made those. From trash.
2. Coffee Ground and Glue Texture Art
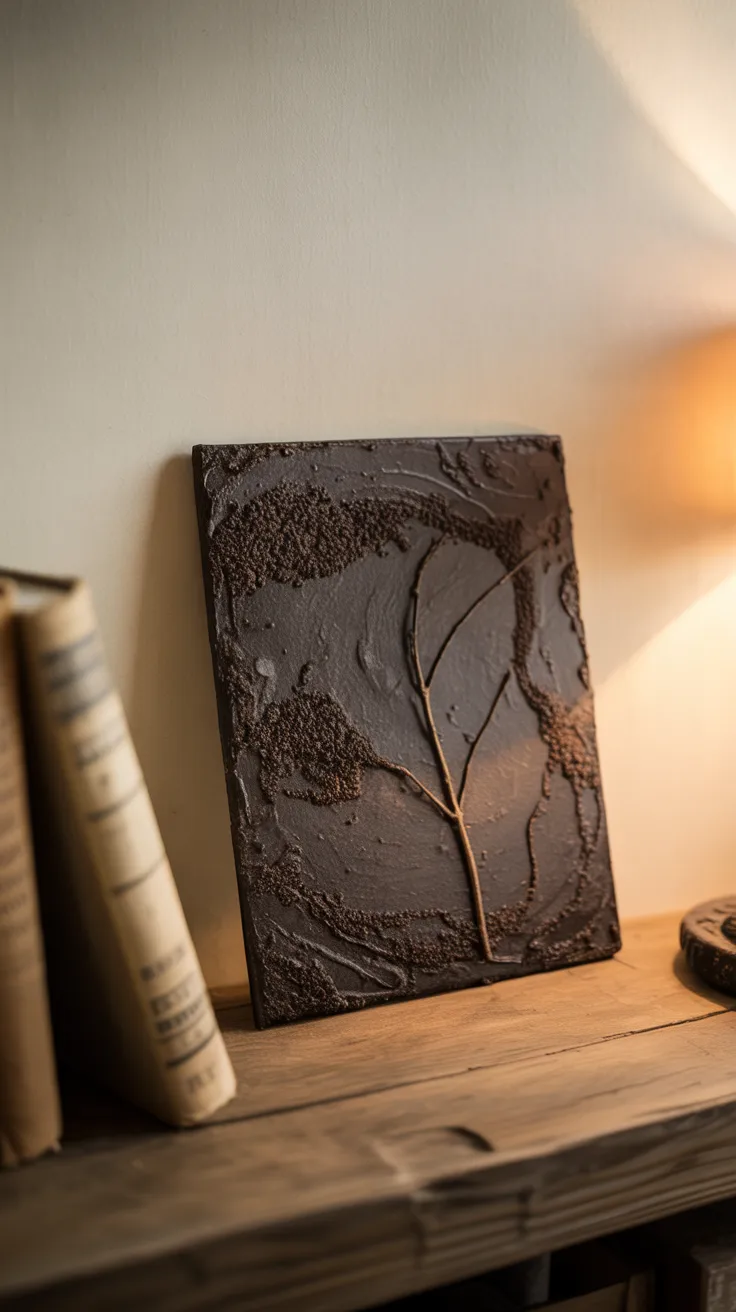
Used coffee grounds mixed with white glue make a dark, earthy paste that dries into the most satisfying matte texture you have ever touched. Spread it onto cardboard cut from a cereal box, shape it into a landscape or abstract form, let it dry, and seal it with whatever clear nail polish or old varnish you have. The result looks like sculptural mixed media art and smells faintly like espresso, which is an unexpectedly good quality in wall decor.
What You Need From Around the House
- Used coffee grounds, dried out on a paper towel overnight
- White school glue or any craft glue you have
- Cardboard from a cereal box, tissue box, or shipping box
- An old butter knife or popsicle stick for spreading
- Clear nail polish or any old varnish for sealing
- Twine from a package or picture hanging hardware from another frame
How to Make It
- Cut your cardboard into whatever shape you want — square, rectangle, or an irregular organic shape all work. Two pieces glued together give you more rigidity.
- Mix dried coffee grounds with white glue in roughly a 2 to 1 ratio — two parts grounds to one part glue. The paste should be thick and spreadable but not soupy. Add more grounds if needed.
- Spread the paste onto the cardboard using your knife or stick. You can spread it in smooth waves for a landscape feel, press it into ridges and peaks for a more abstract texture, or keep it relatively flat with just a little variation.
- Let dry completely — at least 24 hours. The paste will shrink slightly and darken as it dries.
- Once fully dry, seal the entire surface with two coats of clear nail polish or varnish, letting each coat dry between applications.
- Attach hanging hardware to the back or simply prop it on a shelf or lean it against the wall.
Tip: You can press small objects into the paste before it dries — a dried leaf, a small twig, a piece of string — to add dimension. These will be permanently embedded once the glue sets.
Picture this: a dark textured square piece leaning against the wall on a shelf between two books. It looks like something from a gallery with a very long name. You made it from yesterday’s coffee and a granola bar box.
3. Wine Cork Trivet or Wall Art Grid
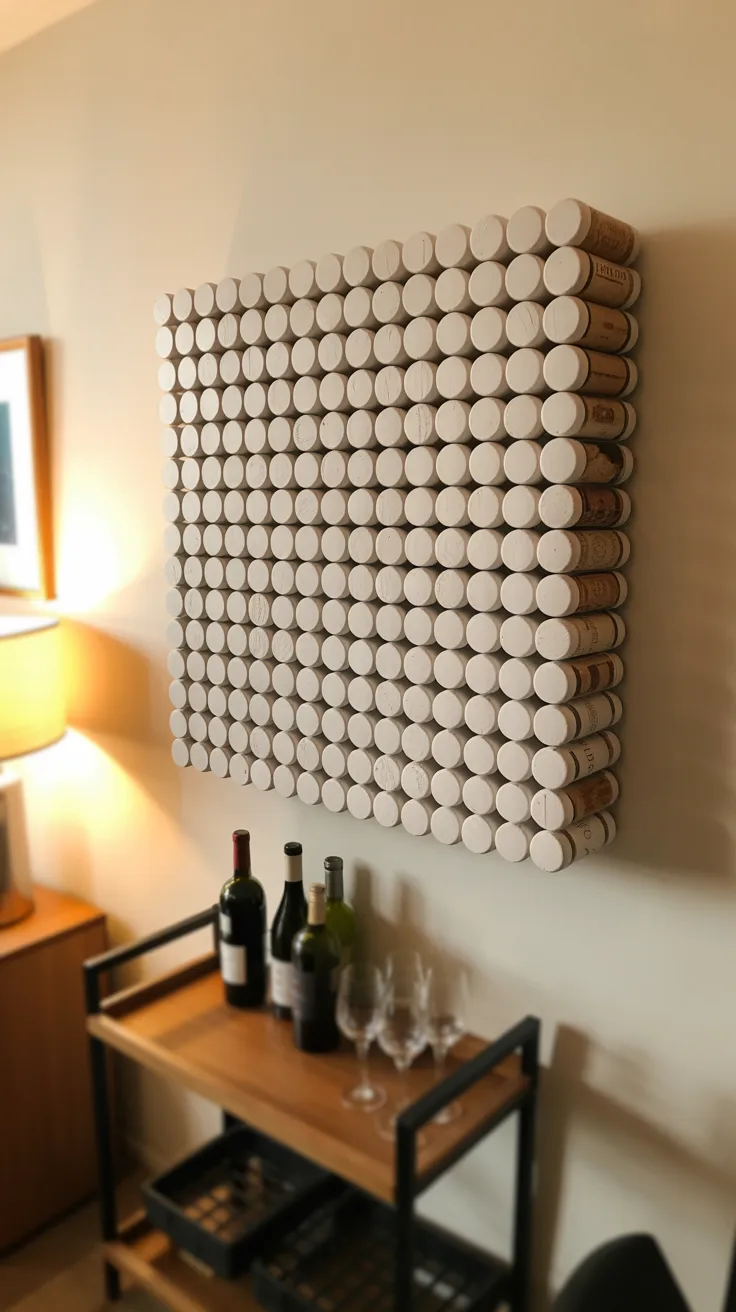
If you drink wine with any regularity you have a bag of corks somewhere. This is what that bag has been waiting for. Arrange them in a tight grid pattern glued to a piece of cardboard, and you have either a trivet for hot dishes or a small piece of wall art, depending entirely on how you frame it. The difference between a trivet and art is mostly confidence and a coat of paint.
What You Need From Around the House
- Wine corks — at least 20 for a small trivet, 35 or more for a larger piece
- A sturdy piece of cardboard cut to your desired size
- Hot glue gun if you have one, or any strong household adhesive like super glue or E6000 if you have it
- Leftover paint in any color for an optional painted version
- A rubber band or binder clip to hold the arrangement while the glue sets
How to Make It
- Cut your cardboard base to the size you want. For a trivet, roughly 7 by 7 inches works well. For wall art, go larger.
- Lay all your corks out in rows on the cardboard first without gluing, so you can see how many you need and plan the arrangement. They can all face the same direction for a uniform look, or alternate directions for a herringbone pattern.
- Working one cork at a time from the center outward, apply glue to the flat bottom of each cork and press firmly onto the cardboard. Hold each one for 15 seconds before moving to the next.
- Let the entire piece cure for at least one hour before moving.
- For a painted version, apply one coat of leftover paint over the entire cork surface with an old brush. One color across all corks gives it a sculptural, intentional look rather than a repurposed feel.
- Add picture hanging hardware to the back for wall display, or leave as is for a trivet.
Tip: If you do not have enough corks for a full grid, arrange them in a looser pattern with intentional gaps — it looks more designed than a complete grid and uses far fewer corks.
Picture this: a square grid of wine corks painted matte white hanging on the wall above a small bar cart. It looks like a piece someone bought at a home goods market. It is made of cork and cardboard and the paint you had left over from the bathroom.
4. Old T-Shirt Braided Rug or Bowl
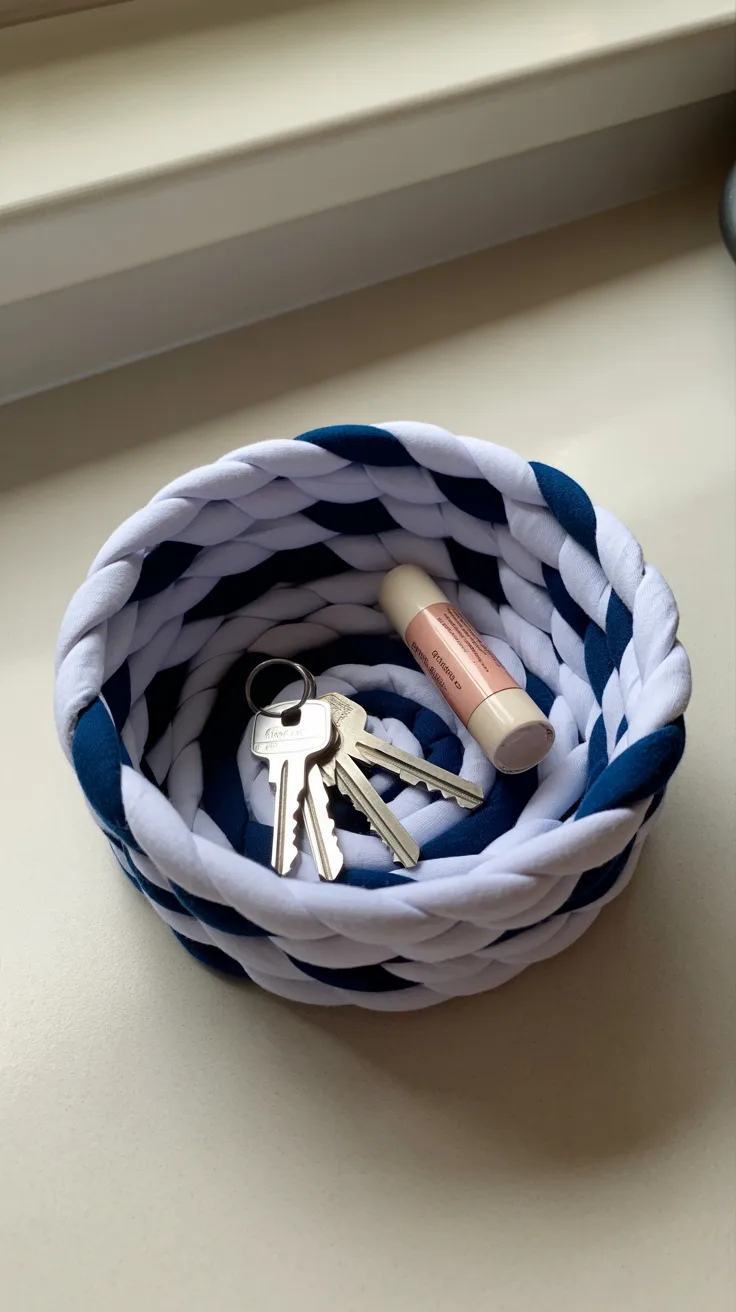
A cotton t-shirt that is too worn to donate and too guilty to throw away becomes fabric strips in about five minutes. Those strips become a braided rug, a coiled basket, or a small decorative bowl depending entirely on how long you braid and how you finish it. No sewing required for the basic version. No special tools. Just the shirt, your hands, and more patience than you think you have.
What You Need From Around the House
- Two or three old cotton t-shirts in any colors
- Scissors
- A safety pin to anchor while braiding
- A needle and thread for finishing, or fabric glue if you have it
How to Make It
- Cut each t-shirt into strips about 1 to 1.5 inches wide, cutting across the body of the shirt horizontally. Each strip will curl into itself slightly when stretched — this is normal and actually gives the finished piece a nice rounded texture.
- Knot three strips together at one end and pin that end to something sturdy — a couch cushion, a cutting board, a heavy book — so you have tension to braid against.
- Braid the three strips in a standard three-strand braid, pulling firmly to keep it tight and even. Attach new strips by knotting them onto the end of the old ones when you run out, tucking the knots to the underside of the braid.
- For a rug: coil the finished braid flat in a spiral and stitch or glue the coils together as you go.
- For a bowl: coil tightly and sew the coils together, then begin angling the coils upward to build the sides. The angle of your coiling determines the shape of the bowl.
- Finish the raw end by tucking it under the last coil and stitching it flat.
Tip: Mixing two shirt colors in the braid gives you a naturally striped pattern without any extra effort. A white shirt and a navy shirt braided together looks intentional and graphic rather than random.
Picture this: a small coiled fabric bowl sitting on the kitchen counter holding keys, chapstick, and a hair tie. It is tight, it is tidy, and it looks handmade in the way that costs money at a craft fair. You made it from the t-shirt you have not been able to throw away for three years.
5. Newspaper and Glue Decorative Vase
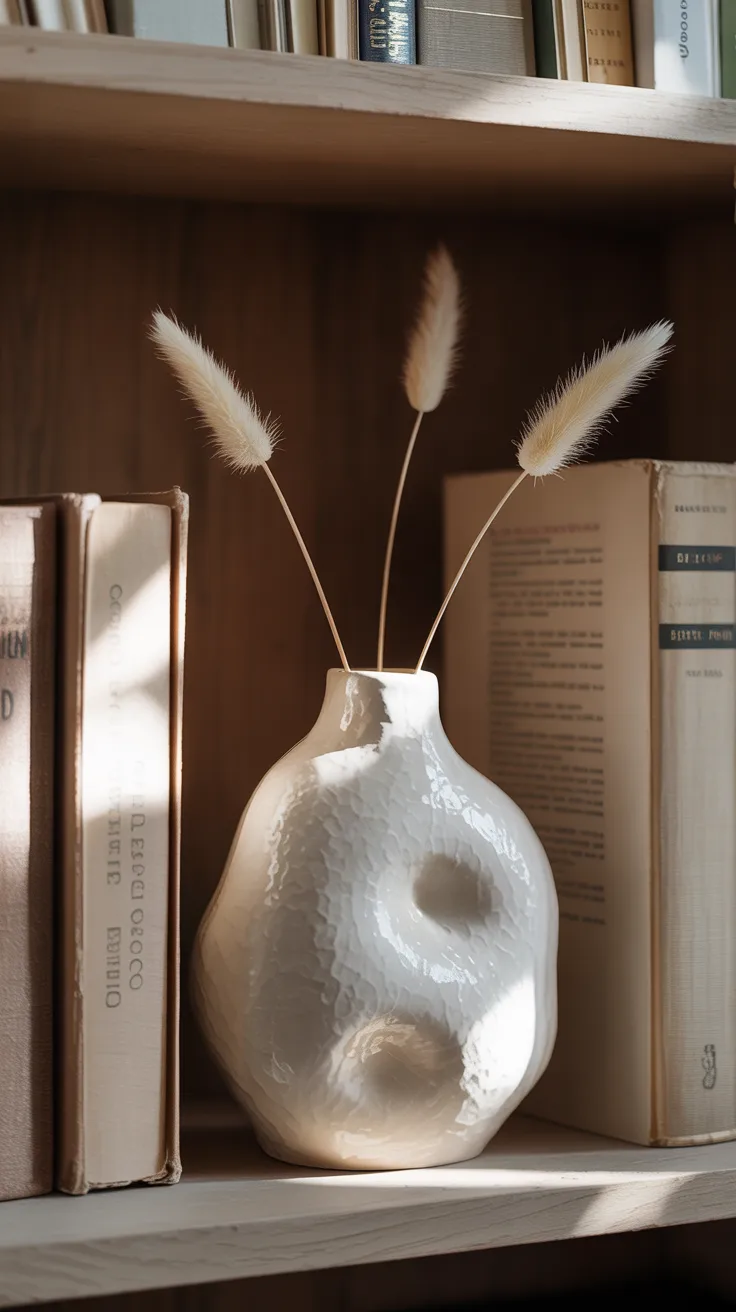
Strips of newspaper soaked in a mixture of white glue and water, layered over a glass bottle or jar, sanded smooth, and painted — this is papier mache and it produces a genuinely beautiful result when you take it seriously. The key is enough layers and enough sanding. Most people stop at four layers and skip the sanding. Do eight layers and sand it, and the finished piece looks like it is made from solid ceramic.
What You Need From Around the House
- Old newspapers or paper bags torn into strips about 1 inch wide
- White school glue mixed with water in equal parts
- A glass bottle, jar, or plastic bottle as your mold
- Petroleum jelly or cooking oil to coat the mold so the paper releases
- Fine sandpaper — the kind often found in a garage or utility drawer
- Leftover paint in any color
- Clear nail polish or old varnish for sealing
How to Make It
- Coat the outside of your mold lightly with petroleum jelly or cooking oil. This prevents the paper from bonding permanently to the mold.
- Dip each paper strip into the glue mixture, run it between your fingers to remove excess, and smooth it onto the mold surface. Overlap each strip slightly with the previous one.
- Apply at least four layers in the first session, letting each layer go on while the previous is still slightly wet. Let dry completely — overnight is ideal.
- Apply four more layers the next day. The more layers you add, the sturdier and smoother the final piece will be.
- Once fully dry and hard, gently work the paper form off the mold by twisting and pulling slightly. It should release with some coaxing.
- Sand the outside surface lightly with fine sandpaper to smooth any rough edges or bumps.
- Paint with two coats of leftover paint. White makes it look ceramic. A dark color makes it look like stone. Let each coat dry fully.
- Seal with two coats of clear nail polish or varnish.
Tip: If you want a more interesting shape, wrap the paper over two different bottles overlapping, or pinch the wet paper at points to create organic irregular forms before it dries. Papier mache is forgiving and completely reworkable while wet.
Picture this: a matte white vase with a slightly irregular organic shape holding three dried stems on a bookshelf. It looks handcrafted and considered. It is made from last Sunday’s newspaper and the glue you bought four years ago for a school project.
6. Bobby Pin and Clear Nail Polish Pressed Flower Earrings
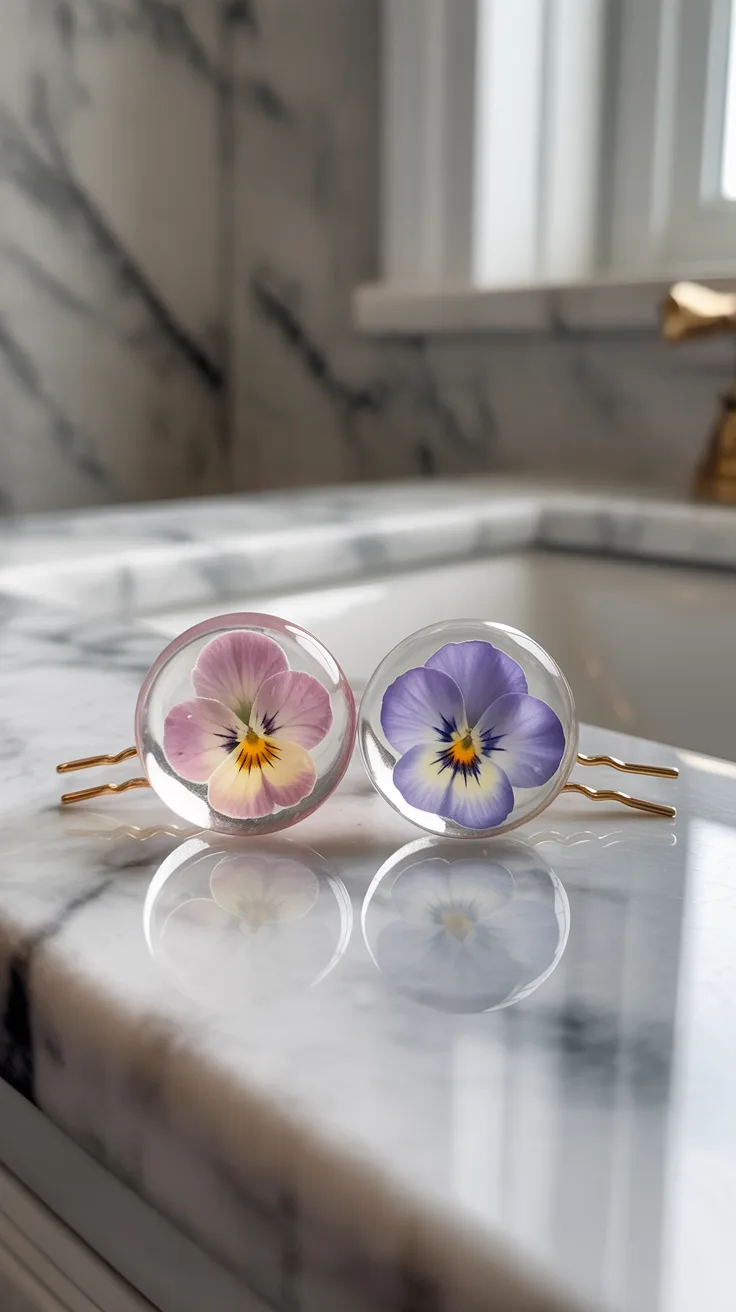
This one sounds like it should not work and it absolutely works. Take a plain bobby pin, arrange a tiny dried flower or leaf on the flat side, coat it in clear nail polish layer by layer until the flower is fully encased and sealed, and you have a pair of earrings that look handmade in the best possible way. The bobby pin becomes the earring. The flower becomes the design. The nail polish becomes the finish.
What You Need From Around the House
- Plain flat-topped bobby pins — the kind with the wavy side and the flat side
- Tiny dried flowers, small leaves, or herb sprigs — these can be pressed between book pages for a few days if fresh
- Clear nail polish
- Tweezers
How to Make It
- Press your flowers or leaves between two pieces of parchment or wax paper inside a heavy book for at least three days until completely flat and dry. Thin small flowers work best — pansy petals, tiny herb flowers, small fern pieces.
- Apply one thin coat of clear nail polish to the flat top surface of the bobby pin. Let dry for 5 minutes.
- Using tweezers, place your dried flower face down onto the sticky nail polish surface. Press gently to adhere.
- Apply a second coat of clear nail polish directly over the flower, sealing it to the pin surface. Let dry fully — about 15 minutes.
- Apply three to five more coats of nail polish over the flower, letting each one dry completely before the next. Each coat builds up a glass-like dome over the flower.
- The finished pin is ready to wear once the final coat is fully dry and hard, usually after a few hours.
Tip: Make matching pairs by using the same flower or leaf on two pins from the same batch. Wear them as hair pins the conventional way or clip them through a thin ear lobe as earrings if your ears are pierced — a flat bobby pin sits comfortably.
Picture this: two bobby pins with tiny pressed herb flowers sealed under a glossy dome of clear nail polish sitting on your bathroom counter. They took fifteen minutes across two days and cost nothing. Someone will ask where you got them and the answer will be genuinely surprising.
7. Candle Wax and String Botanical Fire Starters
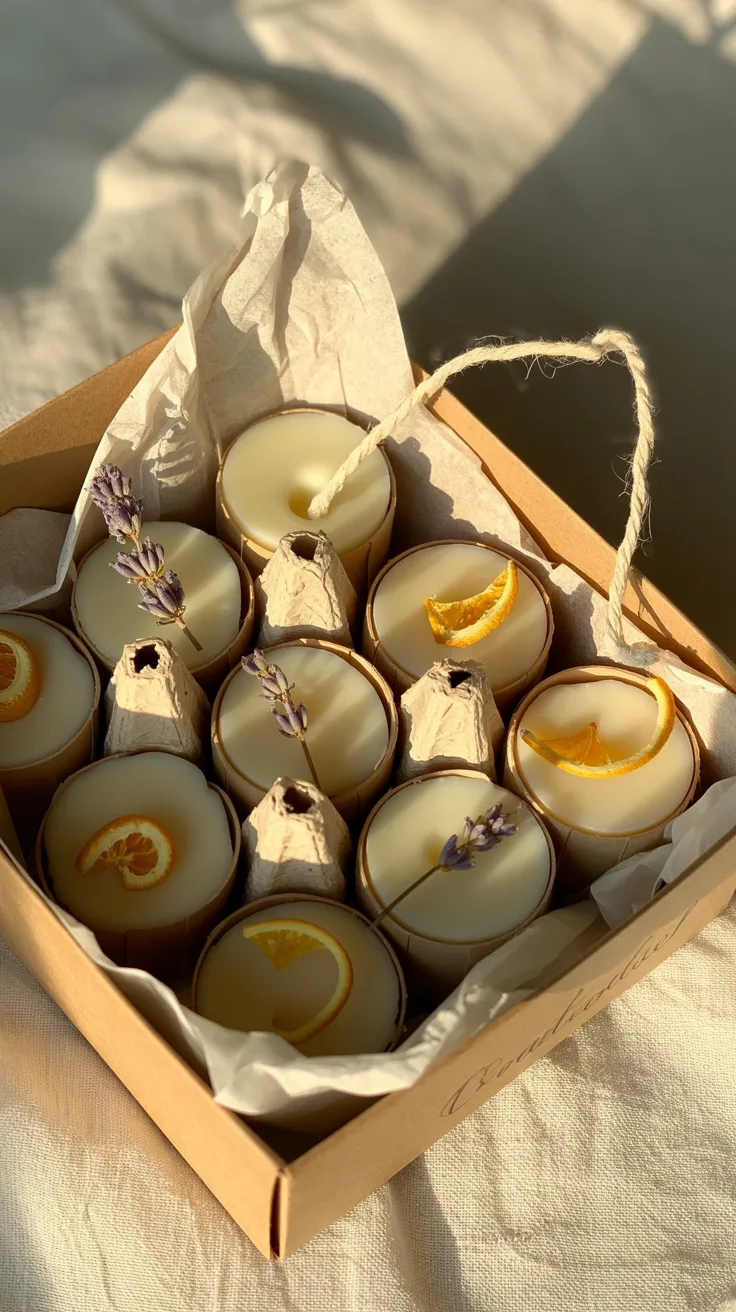
The last inch of every candle you have ever burned is still usable wax that you threw away. Collect it, melt it, pour it over a loosely coiled piece of cotton string or twine in an egg carton cup with a dried herb or citrus peel tucked in, and let it harden. You get a fire starter that smells incredible, burns for eight to ten minutes, and looks beautiful enough to give as a gift. This is one of those projects that feels too easy to be this useful.
What You Need From Around the House
- Old candle wax — even mixed colors and scents work fine melted together
- An egg carton, paper cups, or silicone ice cube trays as molds
- Cotton twine or thick cotton string for wicks — about 4 inches per fire starter
- Dried herb sprigs, citrus peels, or dried flowers from the garden for decoration and scent
- A can set inside a pot of simmering water as a double boiler for melting
How to Make It
- Collect your old candle wax by digging out the remaining wax from finished candles. Remove any old wicks. Break into smaller pieces for faster melting.
- Place the wax pieces in an old tin can or heat-safe jar. Set the can in a pot of simmering water and let the wax melt completely, stirring occasionally. Do not melt wax directly in a pot — always use a double boiler method.
- While the wax melts, prepare your molds. Cut egg carton sections apart into individual cups. Coil a piece of string in the bottom of each cup, leaving a short tail hanging over the side as a wick.
- Tuck a small dried herb sprig or citrus peel curl into each cup alongside the string.
- Pour the melted wax slowly into each cup, filling about three quarters full. The string and herbs will shift — use a toothpick to reposition if needed before the wax sets.
- Let cool completely at room temperature for at least two hours. Do not move until fully hardened.
- To use, light the string tail and place under kindling. The egg carton cup is part of the fire starter — it all burns together.
Tip: Package six fire starters in a small box lined with tissue paper for an instantly giftable set. Add a handwritten tag that says what herbs are in them and they look like something from a specialty outdoor shop.
Picture this: six little wax cups in a kraft box, each one with a lavender sprig or an orange peel curl set into the surface, smelling faintly of whatever candles you burned last winter. You gave them to someone for a housewarming gift. They burned them at their first fire of the season and texted you about it.
8. Rubber Band Resist Painted Planters
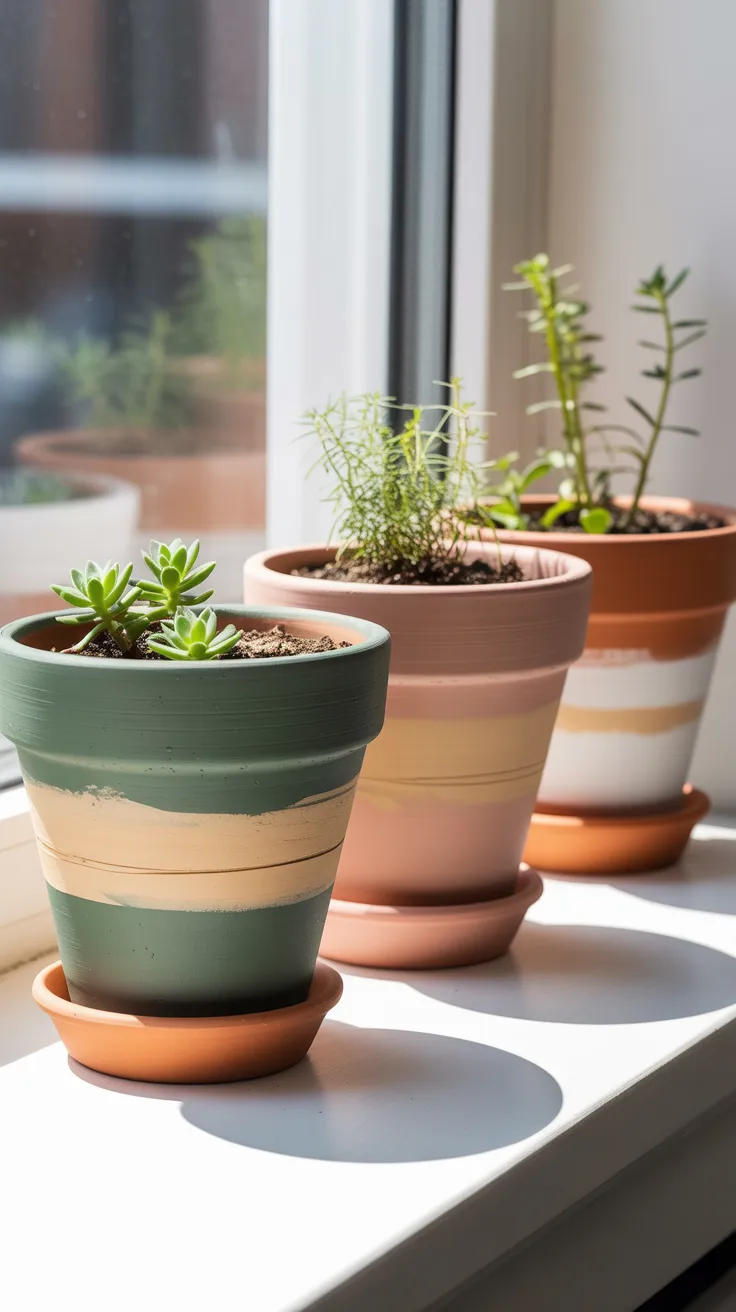
Wrap rubber bands tightly around a plain terra cotta pot or a glass jar in whatever pattern you want — horizontal stripes, a cluster in the middle, a diagonal cross pattern. Paint over the entire thing with leftover paint. Let dry completely. Remove the rubber bands. The unpainted lines underneath become the design. This is resist painting and it produces results that look intentional and graphic, not accidental, when you plan your rubber band placement thoughtfully before you start.
What You Need From Around the House
- A plain terra cotta pot, glass jar, or any smooth surface container
- Rubber bands in various thicknesses if possible
- Leftover paint in any color — one solid color works best for the most graphic result
- An old brush
- Clear sealer or nail polish for finishing
How to Make It
- Plan your rubber band placement before wrapping. Think about the spacing between bands and whether you want them evenly distributed or clustered. The gaps between bands will become the design.
- Wrap rubber bands tightly around the pot or jar in your planned arrangement. Make sure they lie flat against the surface with no gaps underneath — any lifted edge will let paint bleed under and blur the line.
- Apply two coats of paint over the entire surface, including over the rubber bands. Let dry completely between coats and let the final coat dry fully before removing bands — at least one hour.
- Carefully peel the rubber bands off one by one. Peel slowly at a low angle to prevent lifting the paint edges.
- If any paint bled under a band, touch up the line with a thin brush dipped in the original base color of the pot.
- Seal the painted surface with two coats of clear nail polish or varnish.
Tip: Try using two different paint colors in layers — paint the pot one color first and let dry, then add rubber bands and paint the second color over everything. When you remove the bands you get a two-tone striped effect that looks like it required skill and planning. It required rubber bands and patience.
Picture this: three terra cotta pots in a row on a windowsill, each painted in a different leftover wall paint color with clean white stripes from where the rubber bands were. They look designed. They cost nothing. The rubber bands are back in the kitchen drawer.
9. Magazine Page Rolled Paper Bowls
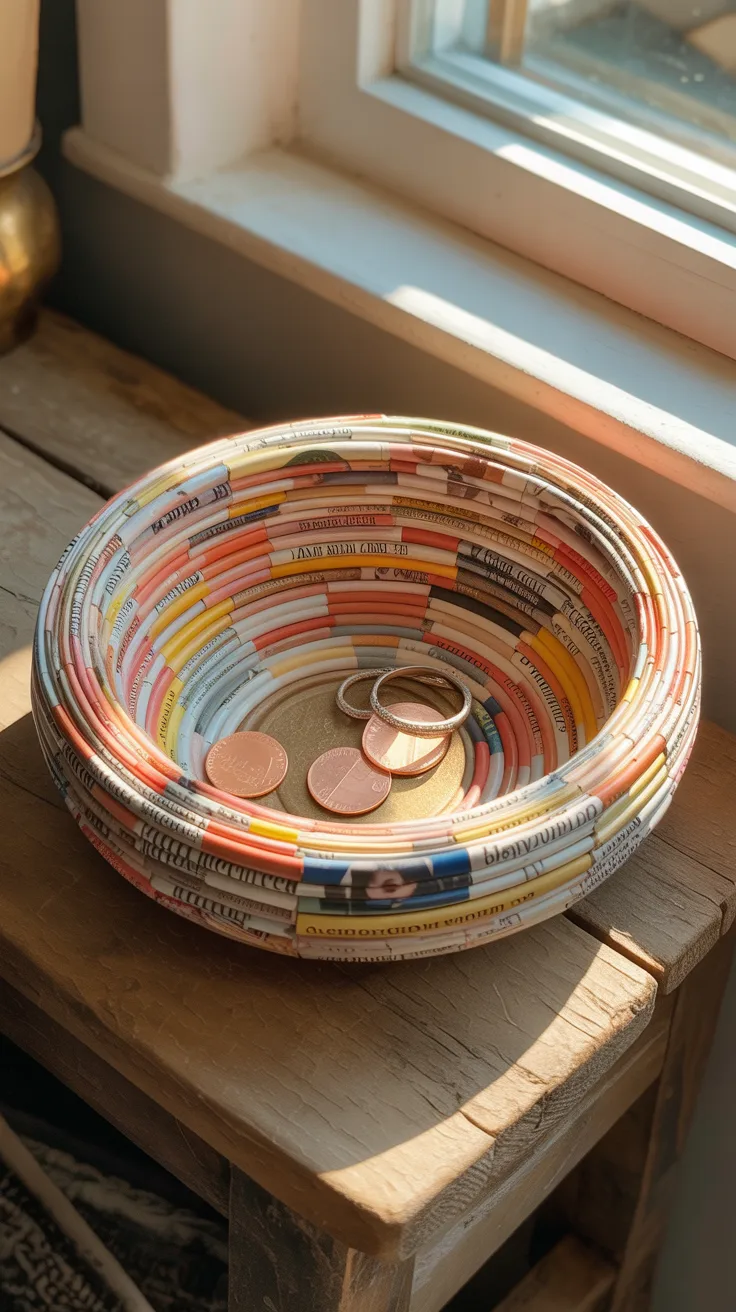
Magazine pages rolled into tight tubes and coiled into a bowl shape is one of those crafts that sounds tedious and becomes addictive. The rolls are satisfying to make, the coiling is meditative, and the finished bowl is actually sturdy and genuinely beautiful. The colors from the magazine pages create an accidental mosaic effect across the surface. You can make them as small or as large as you have patience for.
What You Need From Around the House
- Old magazines or catalogs — the more colorful the pages the better
- A thin dowel, skewer, or pencil to roll the paper around
- White glue or a glue stick
- Clear nail polish or varnish for sealing
How to Make It
- Tear or cut magazine pages into strips about 2 inches wide and the full length of the page.
- Place a skewer or pencil diagonally at one corner of a strip and roll the paper tightly around it at an angle, working toward the opposite corner. The diagonal rolling creates a tapered tube that is thicker in the middle and pointed at the ends.
- When you reach the end of the strip, apply a small dot of glue to secure the tail and hold for a few seconds. Slide the tube off the skewer.
- Make as many tubes as you can — you will need at least 40 for a small bowl, more for a larger one.
- To form the bowl, coil one tube tightly and glue the end to hold the circle shape. This is the base. Coil a second tube around the outside of the first, gluing as you go. Continue building outward to reach your desired base diameter.
- Once the base is the size you want, begin angling each new coil slightly upward to build the sides of the bowl. The steeper the angle, the taller and more upright the sides become.
- Finish the rim by tucking the final tube end neatly under the last coil and gluing flat.
- Seal the entire bowl inside and out with two coats of clear nail polish or varnish.
Tip: Sort your magazine pages loosely by color family before rolling so the finished bowl has a more cohesive color palette rather than a completely random mix. A bowl made from all warm-toned pages — reds, oranges, creams — looks intentionally designed.
Picture this: a small coiled magazine bowl on a side table holding a few coins, a ring, and a lip balm. The colors across the surface are warm and varied — golds and corals and creams — from the pages of a cooking magazine from two years ago. It looks woven. It looks intentional. It is made of recycled paper and glue.
10. Cardboard Loom Woven Wall Hanging
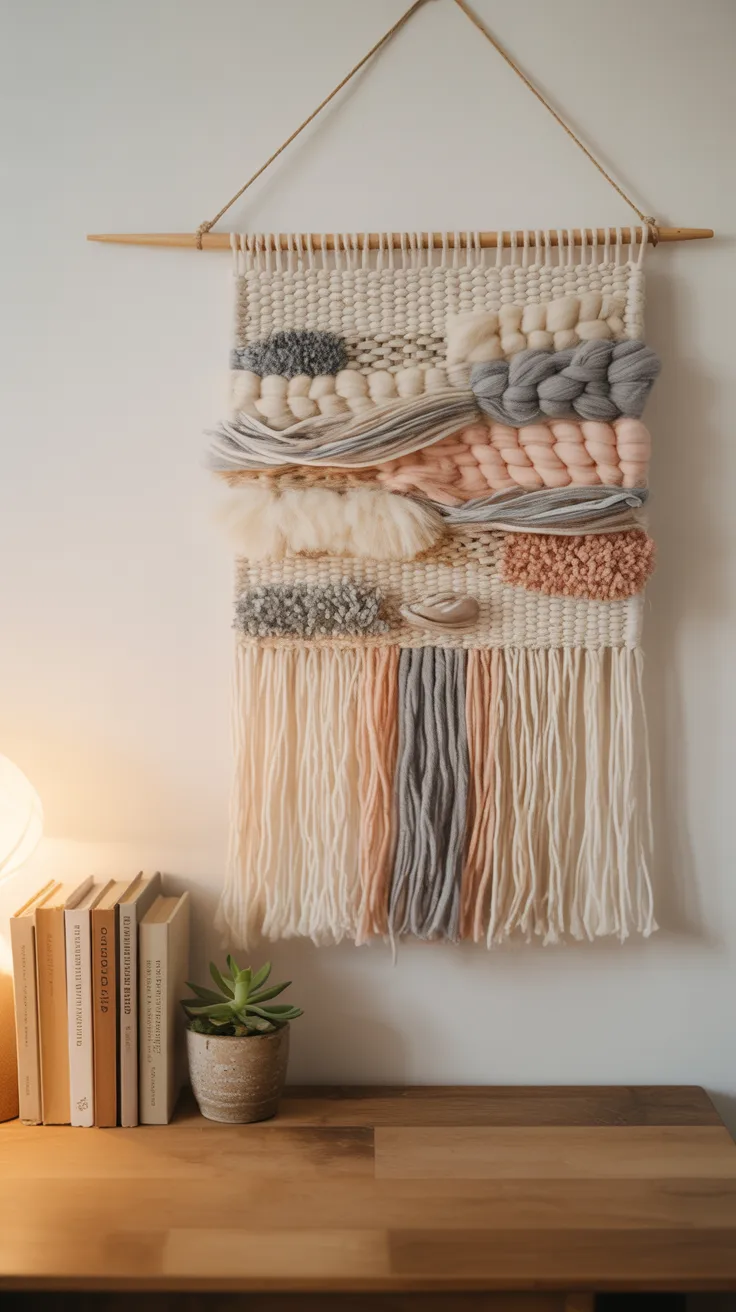
A piece of cardboard notched at the top and bottom becomes a loom. Any yarn, string, torn fabric strips, or even long strips of plastic bag threaded through it becomes weaving. The finished piece gets cut off the cardboard loom and hung from a stick, a pencil, or a chopstick. This is the project that requires the most time but produces the most visually striking result — a woven wall hanging that looks like something from a boutique home decor shop and costs genuinely zero dollars if you have any yarn at all in the house.
What You Need From Around the House
- A piece of stiff cardboard at least 8 by 12 inches
- Any yarn, twine, string, or torn fabric strips — mixing textures makes it more interesting
- Scissors and a ruler
- A pencil, chopstick, or thin stick for hanging
- A plastic comb or a fork to press the weaving down as you work
How to Make It
- Cut notches along the top and bottom edges of your cardboard, spaced about half an inch apart. Make them about half an inch deep.
- Thread your warp — the vertical strings — by looping a continuous piece of string or twine through the notches from top to bottom, top to bottom, until all notches are filled. Tape the ends to the back of the cardboard.
- Cut a long piece of your chosen yarn or fabric strip for your first weft row. Thread it over and under alternating warp strings across the full width. On the return row, go under the strings you went over before, and over the ones you went under. This alternating pattern is the weave.
- Use a fork or comb to push each row of weaving down firmly against the previous row. Dense, packed weaving looks more finished than loose weaving.
- Change colors or materials whenever you want by simply tying a new piece onto the end of the current one and continuing. Tuck the knots to the back.
- When you reach the top, cut the warp strings off the cardboard notches in pairs and tie them together over your hanging stick. Trim any uneven fringe at the bottom to your preferred length.
Tip: Do not try to make it perfectly even. Slight variations in tension and spacing are what make woven wall hangings look handmade in the expensive way rather than the beginner way. Embrace the organic quality of the edges and the texture changes between materials.
Picture this: a small woven wall hanging on a chopstick above your desk, made from four different yarns from the back of the craft drawer — cream, blush, a bit of grey, and a piece of torn linen from an old napkin. It is 8 inches wide and it changes the entire feel of the wall it is on. You made it on a Sunday afternoon with a piece of a cereal box.
11. Egg Carton Seed Starters That Go Directly Into the Ground
This one is seasonal and practical and it is exactly the kind of project that makes a thirty-day no-buy challenge feel worthwhile. Cardboard egg cartons filled with potting soil from an old bag or garden soil from the yard become perfect seed starters that you plant directly into the ground at the end — carton and all. The cardboard breaks down in the soil. The roots go straight through it. No transplant shock, no wasted plastic trays, no special supplies needed at all.
What You Need From Around the House
- A cardboard egg carton — not styrofoam, which does not break down
- Potting soil, garden soil, or a mix of both
- Seeds from a packet you already have, or seeds saved from produce — tomato seeds, pepper seeds, and herb seeds all work well saved from kitchen scraps
- A spray bottle filled with water for gentle watering
- Plastic wrap or a plastic bag to create a humidity dome
How to Make It
- Cut the lid off the egg carton and set it underneath the bottom half to catch any water drainage.
- Fill each cup about three quarters full with soil, pressing down lightly to eliminate air pockets.
- Plant two to three seeds per cup, pressing them about a quarter inch into the soil. More seeds per cup increases the chance of germination — you will thin to the strongest seedling later.
- Spray the surface of each cup with water until the soil is evenly moist but not soaking. The cardboard will absorb some of the water — that is fine.
- Cover loosely with plastic wrap or slide the whole carton into a large plastic bag to create a humidity dome. This traps moisture and warmth, which speeds germination.
- Place in a warm spot with indirect light. Check daily and spray if the soil surface looks dry. Remove the plastic once seedlings emerge.
- When seedlings are about 2 to 3 inches tall and the weather is right, plant the entire egg cup directly into the ground or a larger pot. Score the bottom of each cup a few times with scissors to help the roots break through faster.
Tip: Save seeds from store-bought produce all spring — tomatoes, peppers, cucumbers, and most herbs produce viable seeds. Let them dry on a paper towel for a week before planting. This is legitimately free food and it starts in an egg carton.
Picture this: a cardboard egg carton on a sunny windowsill with twelve tiny green seedlings poking up, each labeled with a strip of masking tape and a marker. You started those from seeds you saved from a tomato in February. By July they will be in your garden. The whole thing cost nothing.
12. Button and Cardboard Mosaic Art
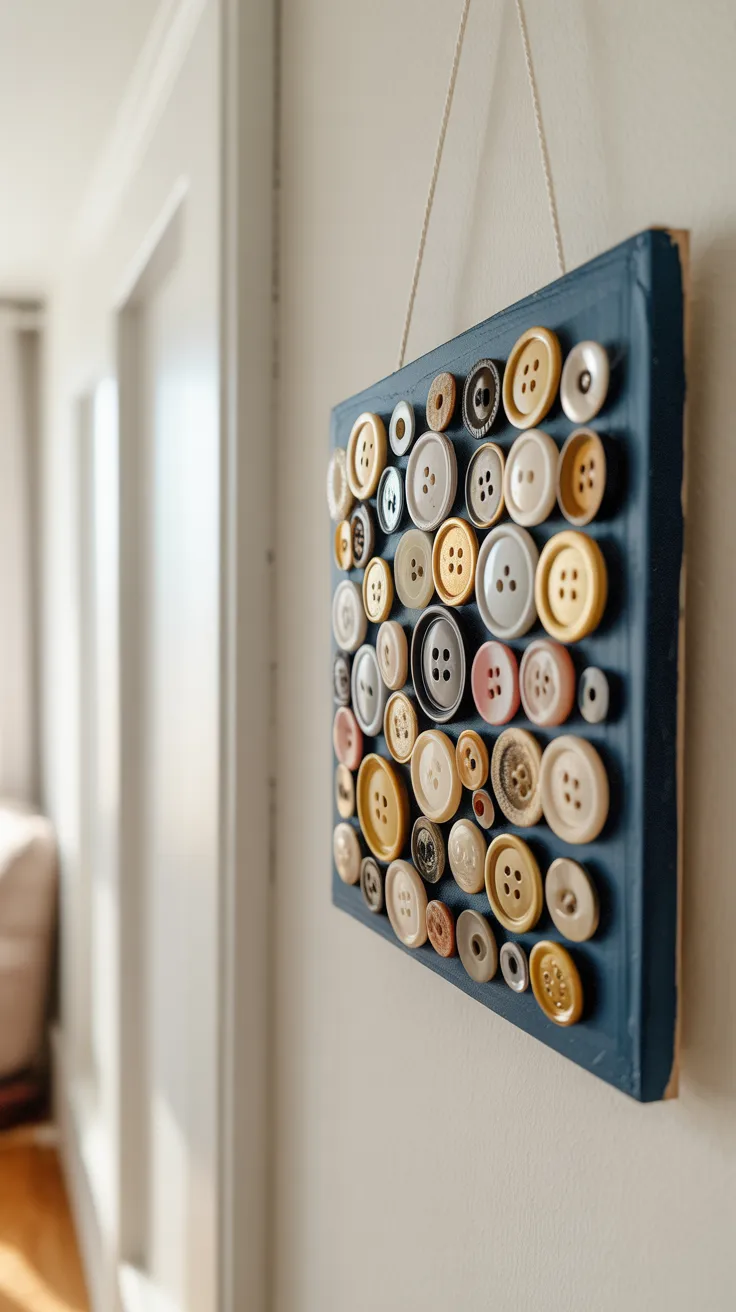
Every sewing kit, every junk drawer, every grandmother’s house has a jar of mismatched buttons. Arrange them on a piece of painted cardboard in a loose pattern — a flower shape, an abstract cluster, a simple geometric grid — glue them down, and you have a piece of textural wall art that looks considerably more intentional than a jar of old buttons has any right to. The dimensional quality of the buttons catches light in a way that flat painted art does not, and that is what makes it interesting.
What You Need From Around the House
- A collection of mismatched buttons in any colors and sizes
- Stiff cardboard — several layers glued together for rigidity
- Leftover paint for the background
- Strong glue — white glue works for lighter buttons, super glue for heavier ones
- Picture hanging hardware or a loop of string for display
How to Make It
- Glue two or three pieces of cardboard together and let dry completely. This gives you a rigid base that will not warp when the glue for the buttons is applied.
- Paint the entire surface of your cardboard base in a solid background color and let dry. A dark background makes colorful buttons pop. A white or cream background gives it a more delicate, gallery feel.
- Lay all your buttons out on the painted surface without gluing, arranging them into your chosen design. Take a photo of the arrangement you like before you start gluing.
- Working from the center of your design outward, apply a dot of glue to the back of each button and press firmly onto the cardboard. Hold each one for 15 to 20 seconds.
- Let cure completely — at least 2 hours — before moving or hanging.
- Attach a loop of string or picture hanging hardware to the back.
Tip: Sort your buttons by color before you start arranging and you will be able to create a gradient or color-blocked design that looks far more intentional than a random scatter. Even a simple arrangement of all the white buttons in the center fading to cream then tan at the edges looks designed and considered.
Picture this: a dark navy painted cardboard square covered in a loose flower shape made entirely from mismatched vintage buttons — ivory, gold, pale pink, cream — hanging on a gallery wall of your hallway. Someone will stop and look at it up close every single time. You made it from the button tin that has been in the linen closet since before you can remember.
The thirty days ended and I did not immediately go to the craft store. That surprised me. What did not surprise me was that the projects I was most proud of were the ones where I had no choice but to figure it out with what was already there. Constraints do something to creativity that abundance cannot. Your house is already full of materials. The only thing missing was the dare.
This post contains affiliate links. As an Amazon Associate, I earn from qualifying purchases. The content on this website was created with the help of AI.
This website contains affiliate links. Some products are gifted by the brand to test. As an Amazon Associate, I earn from qualifying purchases. The content on this website was created with the help of AI.