This website contains affiliate links. Some products are gifted by the brand to test. As an Amazon Associate, I earn from qualifying purchases. The content on this website was created with the help of AI.
You’ve been lied to. You’ve been told that to start a profitable online craft business, you need to be some kind of artistic genius. That you need a fancy studio, years of training, and a mountain of talent. What if I told you that’s not just wrong, but it’s the exact opposite of the truth? The biggest secret in the handmade world isn’t about skill; it’s about strategy. It’s about being lazy in the smartest way possible.
You scroll through Pinterest, see these gorgeous, professional-looking products and think, “I could never.” But you can. And you can do it with minimal effort, low-cost materials, and almost zero experience. These aren’t just crafts; they’re viral-worthy products. In a market where many people are spending more cautiously, these items hit the sweet spot of being affordable, custom, and totally irresistible.
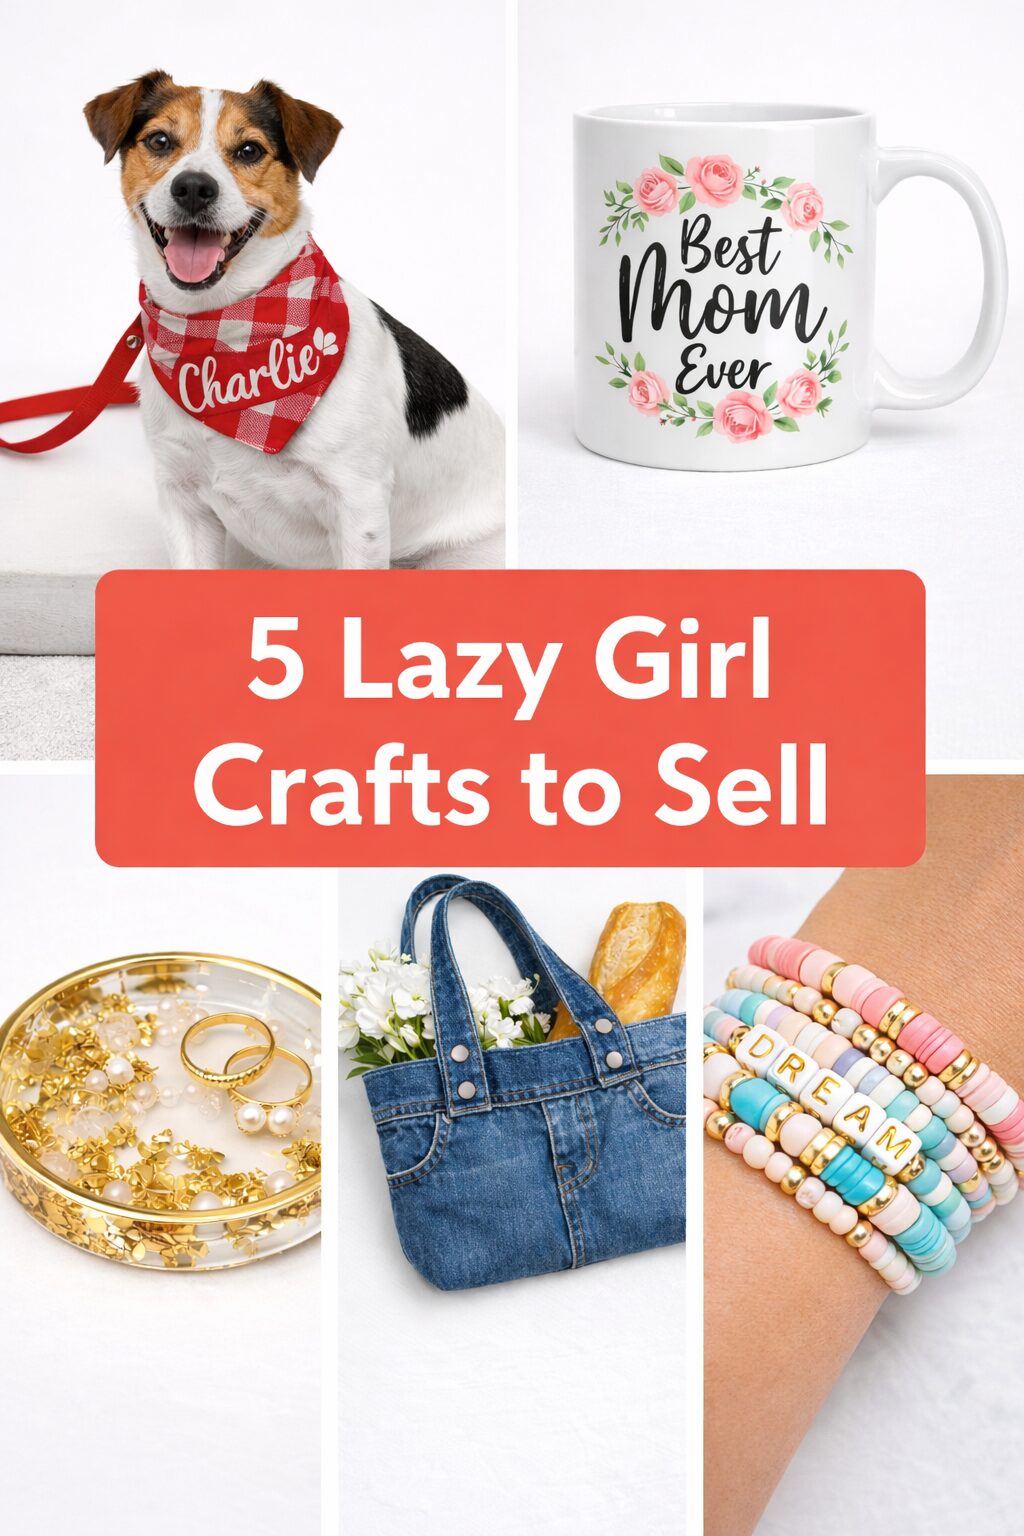
In this guide, I’m pulling back the curtain on five of my favorite ‘lazy girl’ crafts. These are the projects I’d start with right now if I were building a shop from scratch. They require almost no real effort but look so professional that buyers on Pinterest and Etsy will be begging to know where you got them. So, if you’re ready to stop dreaming about a creative side hustle and actually start one—the easy way—keep watching.
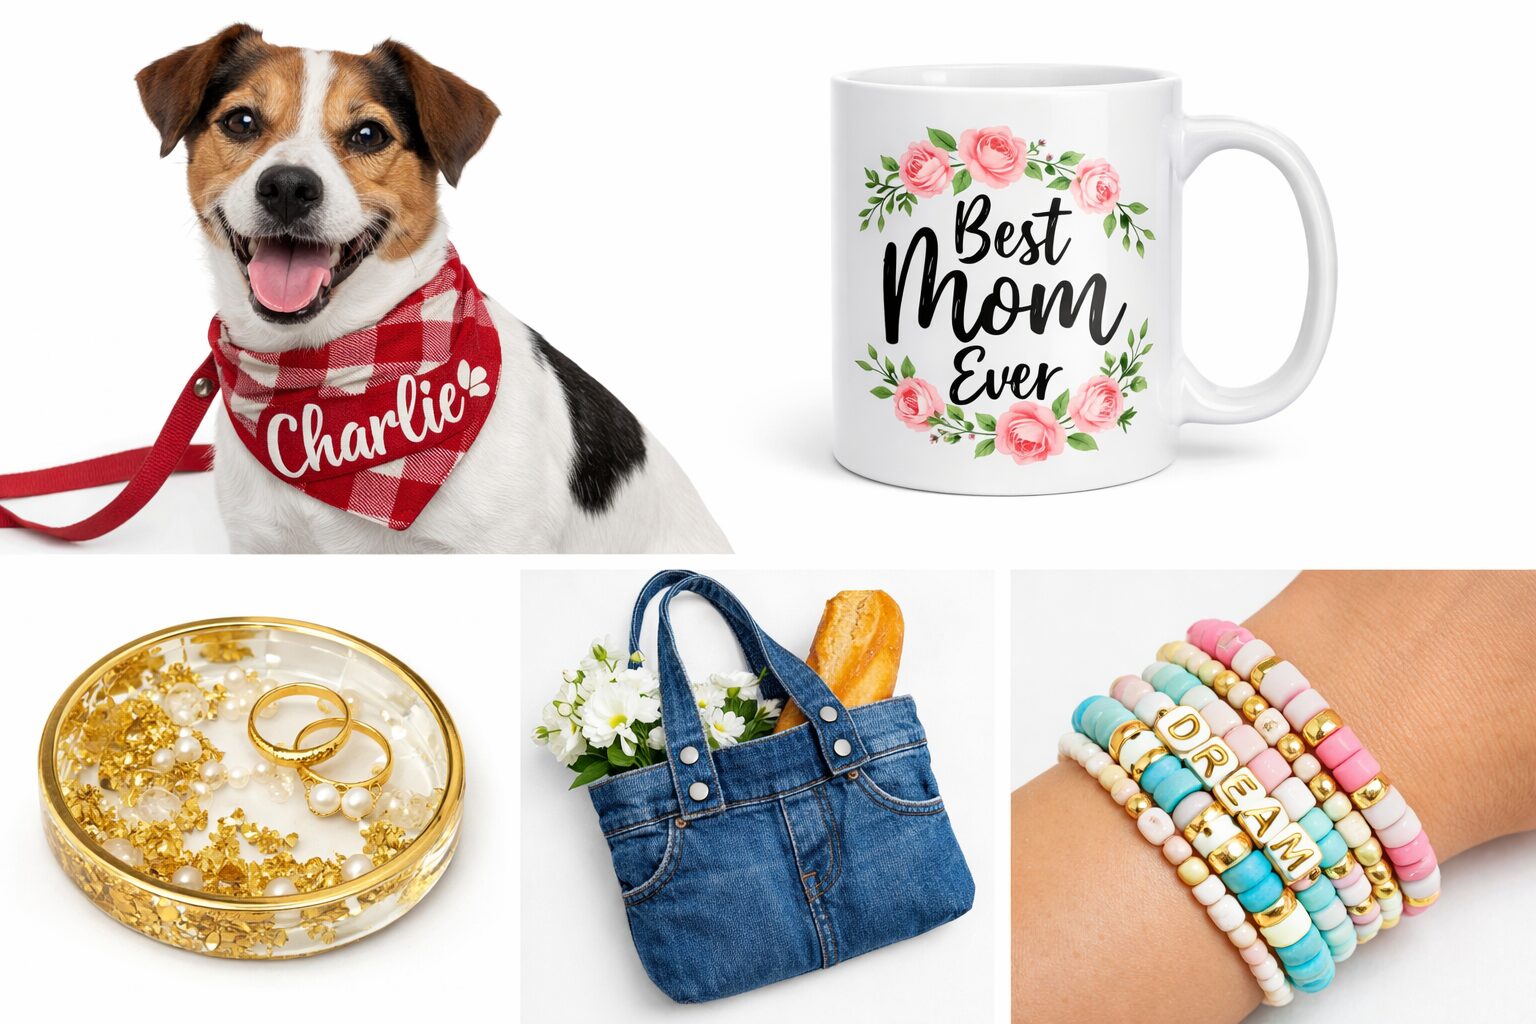
The Viral No-Sew Pet Bandana
Shopping List for The Viral No-Sew Pet Bandana (No-Sew Method)
- Fat quarters fabric (2–4 pieces): Fat Quarter Fabric
- Iron-on hemming tape: Iron-on Hemming Tape
- Plain iron (clothes iron): Clothes Iron
- Iron-on vinyl / heat transfer vinyl for personalization: Iron-On Vinyl
- Fabric scissors (for cutting fabric): Fabric Scissors
- Parchment paper or silicone sheet (to protect surfaces during pressing): Parchment Paper
- Optional: Additional personalization options (fabric markers): Fabric Markers
Our first lazy girl craft is an absolute winner, and it taps into one of the most passionate markets online: pet owners. People love to spoil their pets and share photos of them online. That’s where we come in with the ridiculously easy, no-sew personalized pet bandana. You don’t need a sewing machine, you don’t need a pattern, and you can whip one of these up in less than ten minutes.
The beauty here is simplicity and personalization. Pet parents go crazy for custom items, and the market for these accessories is strong. Think about it—every holiday, season, and birthday is an excuse for a new bandana. Valentine’s Day hearts, spooky ghosts for Halloween, festive trees for Christmas. The possibilities are endless.
So, let’s talk materials. This is where “lazy and cheap” really shines. All you need is a square of fabric—you can buy these as “fat quarters” at any craft store for a couple of bucks—some iron-on hemming tape, an iron, and your personalization tool of choice. My go-to lazy method is iron-on vinyl cut with a simple machine like a Cricut, but you could just as easily use fabric paint and stencils for a more handmade look.
Here’s how shockingly easy it is. Lay your fabric square flat, pretty side down. Fold one corner to the opposite corner to make a triangle. This is your basic shape. Now, to make a clean channel for the collar to slide through, just fold the long top edge down by an inch or two.
And here’s the magic. Cut a piece of iron-on hemming tape to the length of that fold. Tuck it inside the crease, grab your hot iron, and press firmly along the fold. The heat activates the tape’s adhesive, creating a permanent, no-sew seam. That’s it. You’ve made the main body of the bandana without a single stitch.
Next, we clean up the edges for that pro finish. For the two shorter sides of the triangle, just fold them in by about half an inch, tuck another piece of hemming tape inside, and press with your iron. You’re left with crisp, clean edges that look like they came straight off a sewing machine.
Now for the part that makes the money: personalization. This is where you turn fabric into a high-value item. If you’re using iron-on vinyl, you’ll cut out the pet’s name, a funny phrase like “Mom’s Favorite,” or a cute graphic. Place the vinyl on the bandana, cover it with parchment paper, and press with your iron. The result is a flawless, store-bought quality finish.
Let’s break down the profits because this is where it gets really interesting. One fat quarter of fabric might cost $2. The hemming tape is pennies per bandana. The vinyl is maybe 50 cents of material. All in, you’re looking at a cost of around $3 per bandana. What do these sell for? On Etsy, personalized pet bandanas can easily go for $20 to $40, especially for seasonal or custom designs. That is a seriously impressive profit margin for something you made in ten minutes while watching TV.
For staging your photos, show the product in action. If you have a pet, they’re your new supermodel. Get a clear, well-lit shot of them wearing it. If not, a friend’s pet or even a cute stuffed animal will work. Style it with a matching leash or a fun background. Your goal is to create an image that another pet owner sees and immediately thinks, “My Fluffy needs that.”
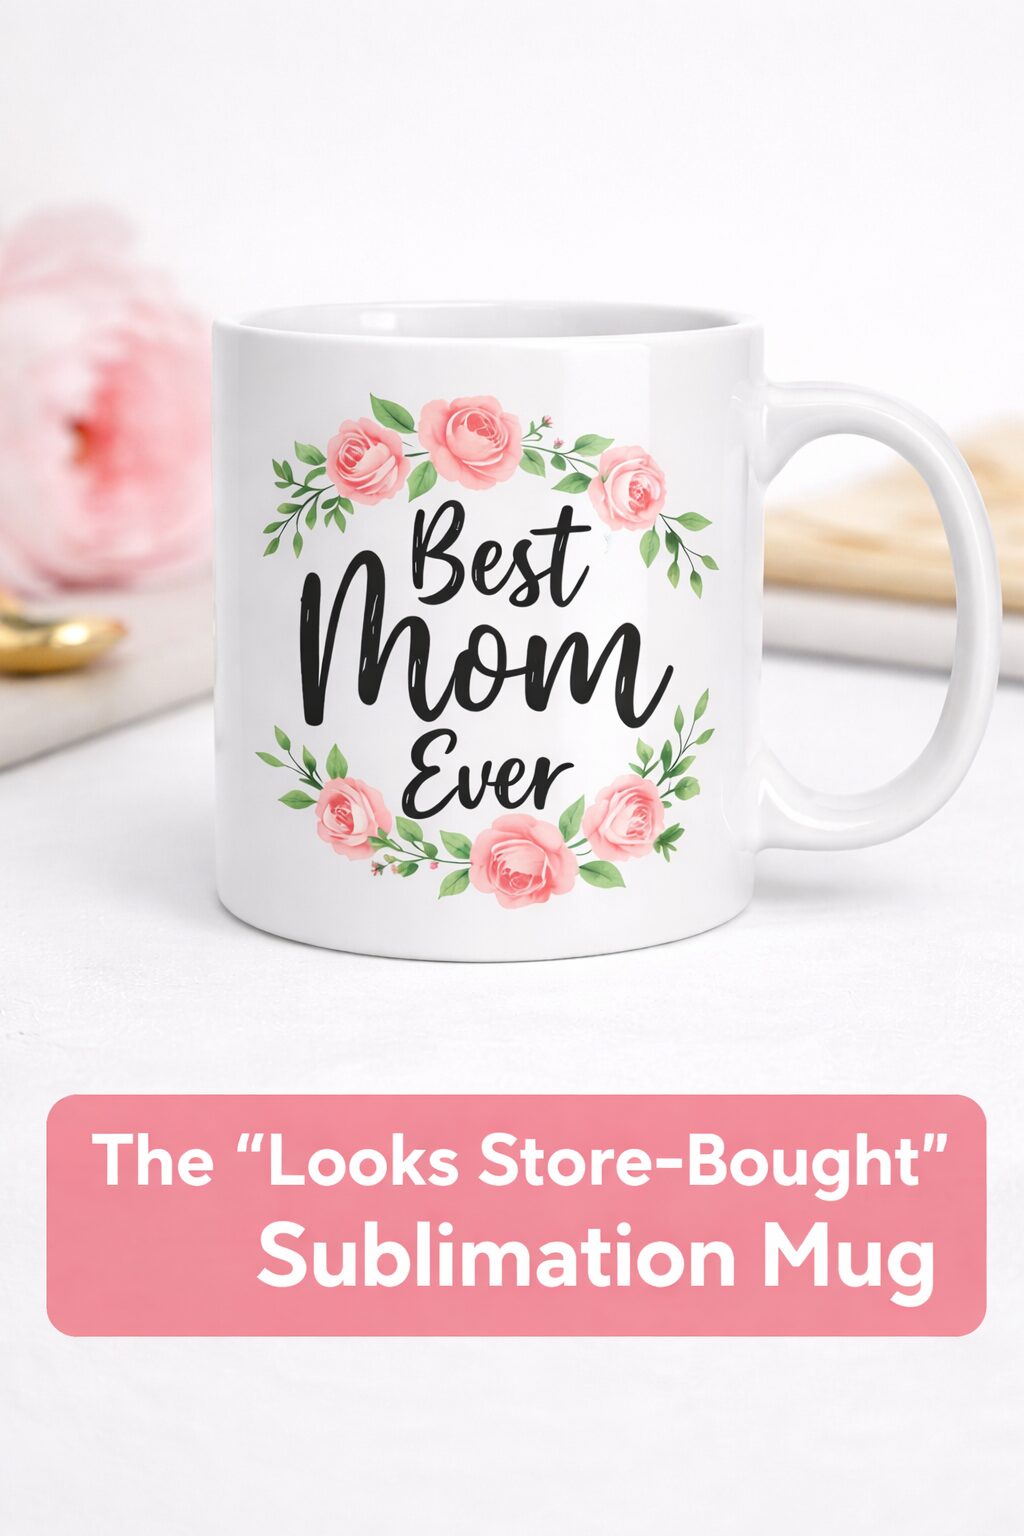
The “Looks Store-Bought” Sublimation Mug
Shopping List: The Sublimation Mug Setup
- Sublimation Printer: Sublimation Printer
- Sublimation Ink: Sublimation Ink
- Sublimation Paper: Sublimation Paper
- Blank Sublimation Mugs: Sublimation Mugs
- Mug Heat Press: Mug Heat Press
- Heat Resistant Tape: Heat Resistant Tape
- Parchment Paper: Parchment Paper
- Nitrile Gloves: Nitrile Gloves
- Safety Glasses: Safety Glasses
Alright, this next craft is the one that will have your friends saying, “No way you made that.” We’re talking about sublimation mugs and tumblers. If you’ve ever wondered how small shops create those vibrant, full-color designs on mugs that can go in the dishwasher without fading, this is the secret. And it is shockingly lazy.
Sublimation used to be a complex, industrial process, but technology has made it super accessible. The concept is simple: you print a design with special sublimation ink onto special paper. You then apply heat, which turns the ink into a gas that permanently infuses into the mug’s surface. It’s not a sticker or vinyl; the design becomes part of the mug itself, which is why it looks so impossibly professional.
Now, I know you’re thinking: “special ink, special paper, heat… this sounds expensive.” And I won’t lie, there is an initial equipment investment. You’ll need a sublimation printer, the ink and paper, and a heat press for mugs. But when you see the potential profit on each item, that startup cost starts to look a lot more manageable.
Here’s the lazy girl workflow. First, your design. This can be a funny quote, a floral pattern, a customer’s photo, whatever. You can design them in free programs like Canva or buy pre-made designs online to save even more time. You print the design with your sublimation printer, and it will look a little dull. Trust the process.
Next, you cut the design out, wrap it tightly around a blank sublimation mug, and tape it down with heat-resistant tape. Make sure it’s smooth and tight against the surface.
Now, the machine does the work. Place the mug in your preheated mug press, clamp it shut, and hit the button. When the timer beeps, you carefully take the hot mug out. This is the magic moment. You peel back the paper and reveal a stunningly vibrant, glossy, and permanent design. It’s one of the most satisfying reveals in all of crafting.
Let’s talk money. A blank sublimation mug can cost between $1 and $3 in bulk. The ink and paper are just cents per print. Let’s be generous and say your total cost is $3-5 per mug. What do these sell for? Custom photo mugs and personalized designs are consistent bestsellers, and can fetch $15 to $25 each. Even in a market with “cautious consumer spending,” a perfect personalized gift is always in demand. That’s a potential profit of over $15 per mug for about five minutes of your active time.
When photographing these, staging is everything. Don’t just show the mug on a white background. Show it in a lifestyle context. Fill it with coffee and put it on a cozy desk next to a laptop. You’re not just selling a mug; you’re selling the feeling of a perfect morning. That’s what makes people click “add to cart.”
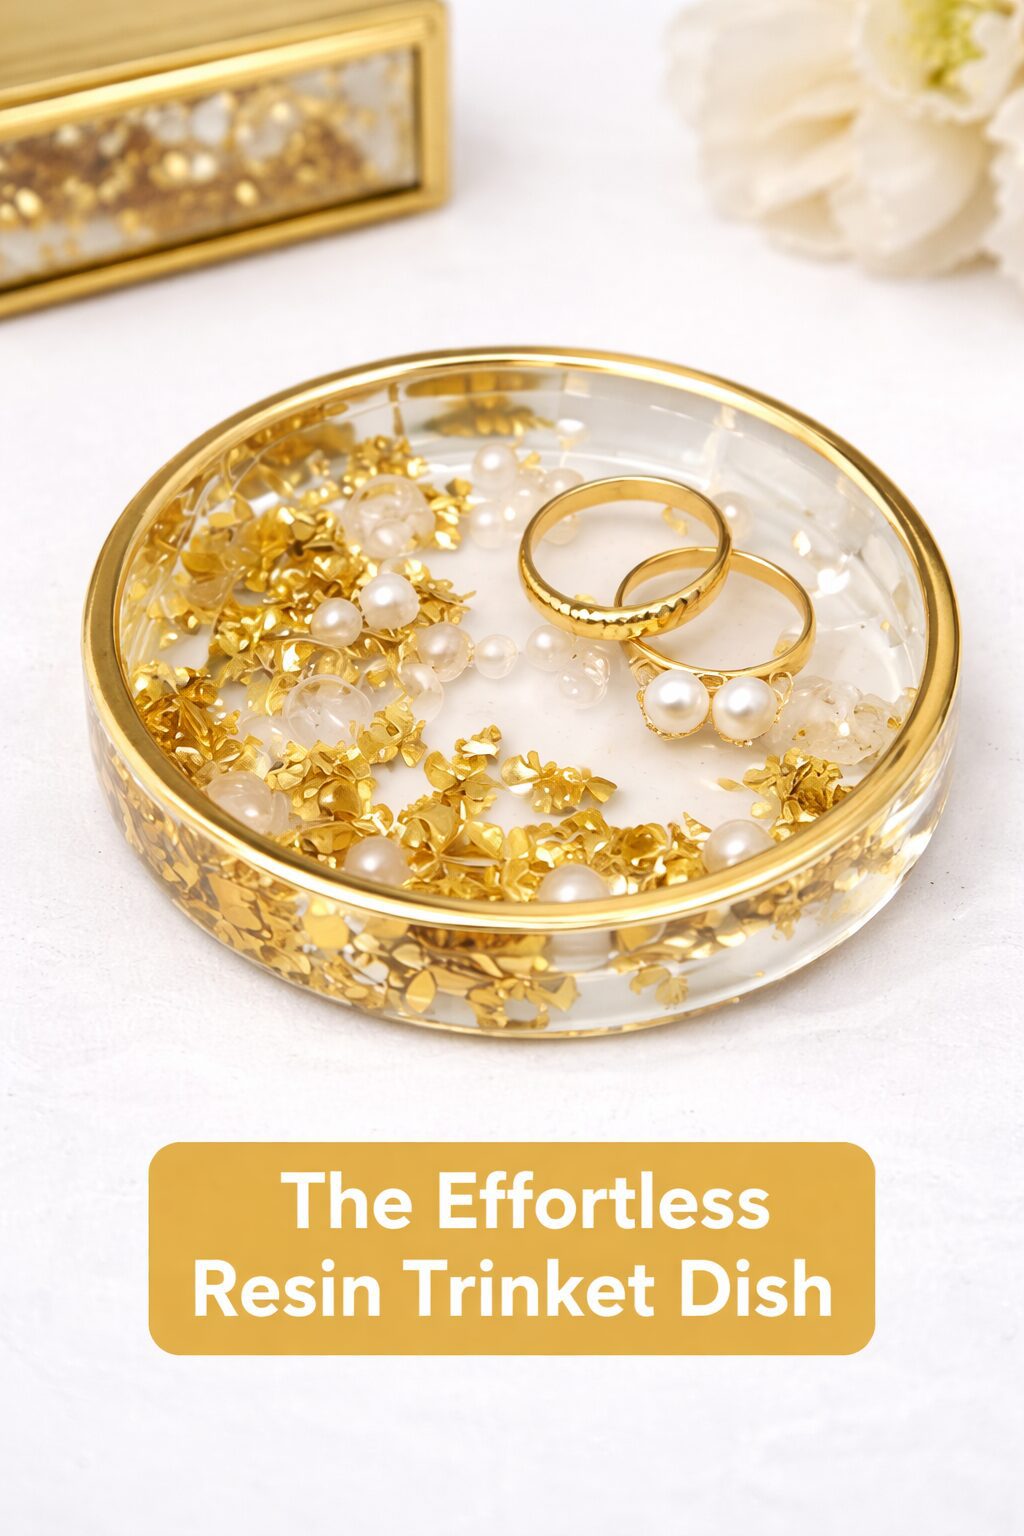
The Effortless Resin Trinket Dish
Shopping List for The Effortless Resin Trinket Dish
- Two-part epoxy resin kit: Epoxy Resin Kit
- Silicone molds for trinket dishes: Silicone Resin Molds
- Small disposable cups: Disposable Cups
- Popsicle sticks: Popsicle Sticks
- Glitter (various colors): Glitter
- Gold leaf sheets: Gold Leaf Sheets
- Dried flowers: Dried Flowers
- Mica powders: Mica Powder
- Alcohol inks (optional for color effects): Alcohol Ink
This next craft looks like it belongs in a high-end boutique with a price tag to match, but we’ll know the secret: it’s one of the laziest crafts imaginable. We are making resin trinket dishes and coasters. The appeal of resin is undeniable—it’s glossy, durable, and can suspend beautiful things like gold leaf and dried flowers in a glassy, solid form. People assume resin art takes a ton of skill, but honestly, if you can stir, you can do this.
These little dishes are perfect for holding keys by the door, rings on a nightstand, or serving as a coaster for a fancy drink. They’re super versatile and photogenic, making them a dream to sell on platforms like Pinterest and Etsy.
Let’s go over the materials. You’ll need a two-part epoxy resin, which comes with the resin and a hardener. You’ll also need silicone molds—they come in every shape imaginable. Then, you need some small disposable cups, popsicle sticks for stirring, and your “inclusions”—the fun part! This can be anything from glitter and gold leaf to dried flowers or mica powders for a shimmery color.
The process is almost comically simple. First, follow the ratio on your resin bottle to mix the resin and hardener. This is the only part that needs a little precision. Pour the two parts into a cup and stir slowly for a few minutes until it’s clear.
Now, you customize. Stir in some mica powder for a solid color, add a few drops of alcohol ink for a dreamy, translucent look, or mix in glitter and gold leaf for a touch of luxury.
Once it’s mixed, you just pour it into your silicone mold. That’s it. You pour. You can get fancy by pouring different colors and swirling them with a toothpick, or just keep it simple. If you see bubbles rise to the surface, you can get rid of them by gently blowing on them through a straw or giving them a quick pass with a heat gun.
And now for the laziest part of all: you walk away. The resin needs to cure, which can take 24 to 72 hours. The hardest part of this entire craft is just being patient.
After it’s cured, it’s time for the big reveal. You peel the flexible silicone mold away, and you’re left with a perfect, glossy trinket dish. The surface is already smooth and shiny, no sanding or polishing needed.
Let’s talk profit. A starter kit of resin might seem a bit pricey, but a little goes a long way. The cost per dish, including resin and some gold leaf, can be as low as $2 to $4. You can sell a single beautiful trinket dish for $15-$20. But the real money is in sets. A set of four matching coasters can easily sell for $40 to $60. That’s an incredible return for a project where 99% of the ‘work’ is just waiting.
To photograph these, let their glossiness shine. Use natural light to catch the reflections. Stage the trinket dish on a clean vanity with some delicate jewelry inside. Show the coasters on a wooden table with a sweating glass of iced tea on top. You’re selling an organized, beautiful, and stylish home.
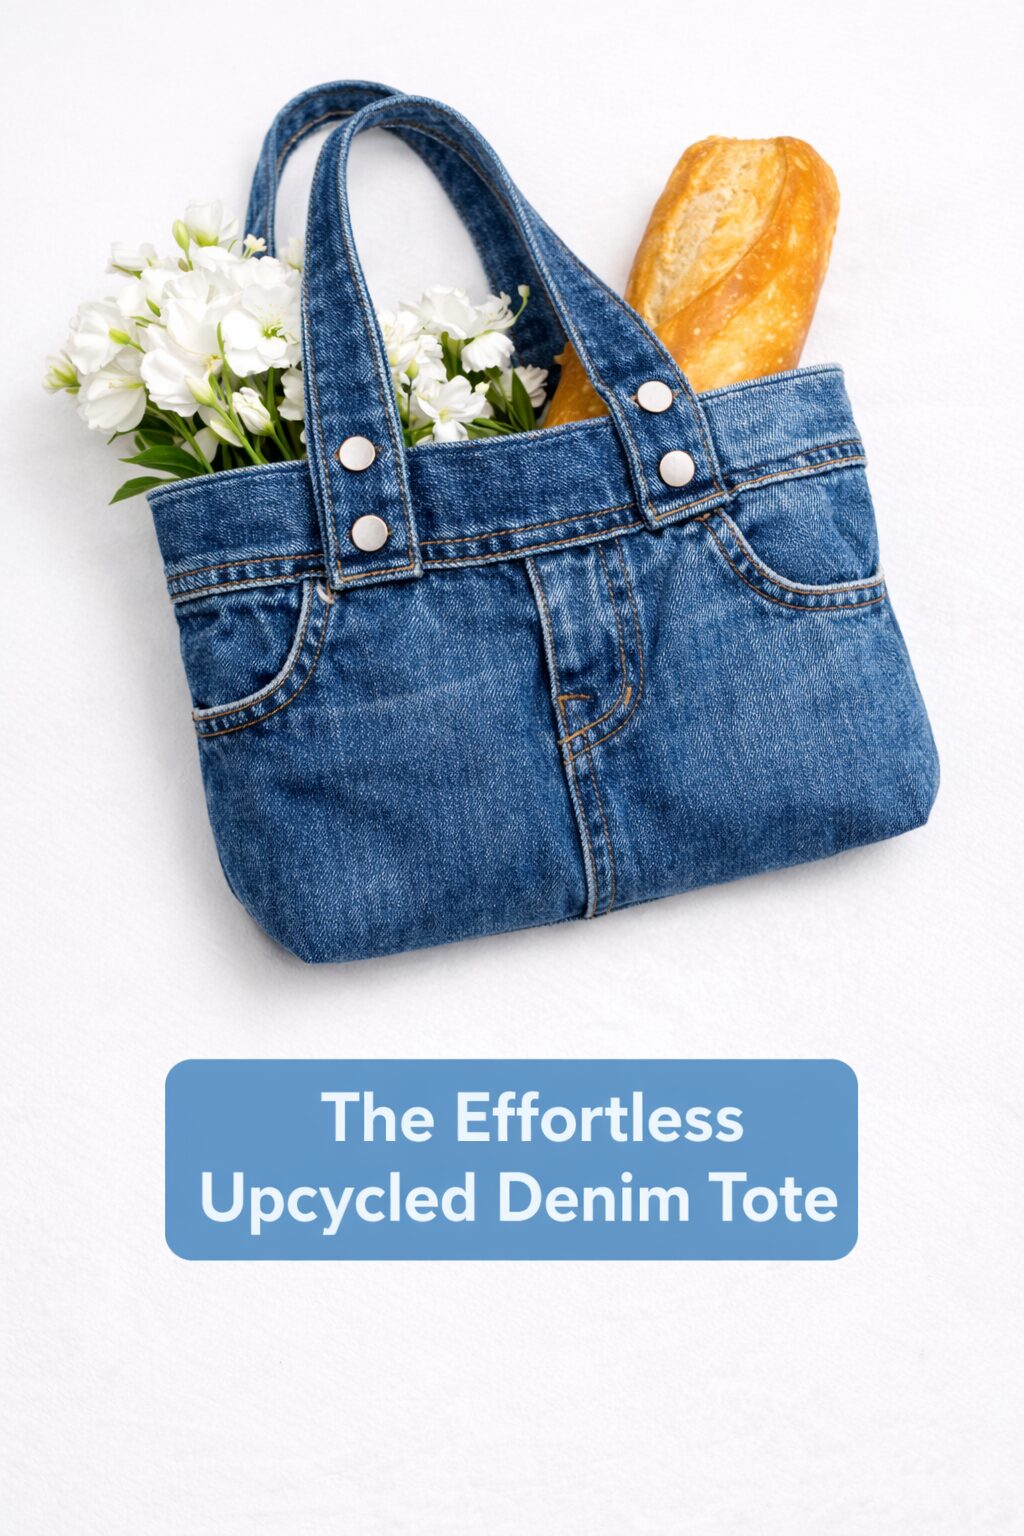
The Trendy Upcycled Denim Tote
hopping List: The Trendy Upcycled Denim Tote (with links)
- Denim jeans (for tote material): Denim Jeans
- Fabric glue (for bonding bottom edge): Fabric Glue
- Scissors (for cutting denim): Scissors
This next craft is for the lazy girl who is also eco-conscious and wants to tap into the massive sustainability trend. We’re making no-sew, upcycled denim tote bags. Tote bags are a staple, and denim is a timeless, durable fabric. The best part? Your main material is free—we’re talking about those old jeans in the back of your closet.
Turning trash into treasure is a huge selling point. Buyers love the story behind upcycled goods; it feels good to buy something stylish and sustainable. And you can do this with zero sewing skills.
The materials list is beautifully short: an old pair of jeans, sharp fabric scissors, and heavy-duty permanent fabric glue. You could also grab some metal rivets for a fancier touch, but it’s not necessary.
Here’s the unbelievably simple process. Lay a pair of jeans flat and decide how deep you want the bag. A good rule of thumb is to cut straight across both legs, right around the crotch area. You’re now left with what looks like a denim skirt.
Turn this piece inside out. You’ll see the raw edge you just cut. This will be the bottom of your bag. Run a generous line of fabric glue along that bottom edge and press the two sides together firmly. Place a stack of books on top and let it dry completely. This creates a super-strong bond that can handle whatever you need to carry.
Once it’s dry, turn the bag right-side out. You now have the body of your tote! The original top of the jeans, with the waistband and pockets, is now the top of your bag, which gives it instant character and storage.
For the handles, take the leftover jean legs and cut two long strips, about 3-4 inches wide. You can glue the edges down for a neater look or leave them raw and frayed for a rustic vibe. Attach the ends of these strips to the inside of the waistband with more glue, using binder clips to hold them while they dry. Adding a couple of metal rivets here not only strengthens the handle but also adds a professional, industrial-chic detail.
And that’s it. You’ve created a sturdy, stylish tote bag from something destined for a landfill. The cost is practically zero, so the profit is pure gain. A unique upcycled denim bag can sell for $30 to $50. In a world looking for sustainable options, a bag with a story is a powerful thing.
For your product photos, highlight the bag’s function. Stage it as a farmer’s market bag with fresh baguettes and flowers sticking out. Show it on someone’s shoulder with a cool, casual outfit. Get close-up shots of the pockets and original denim details to emphasize its unique, upcycled nature.
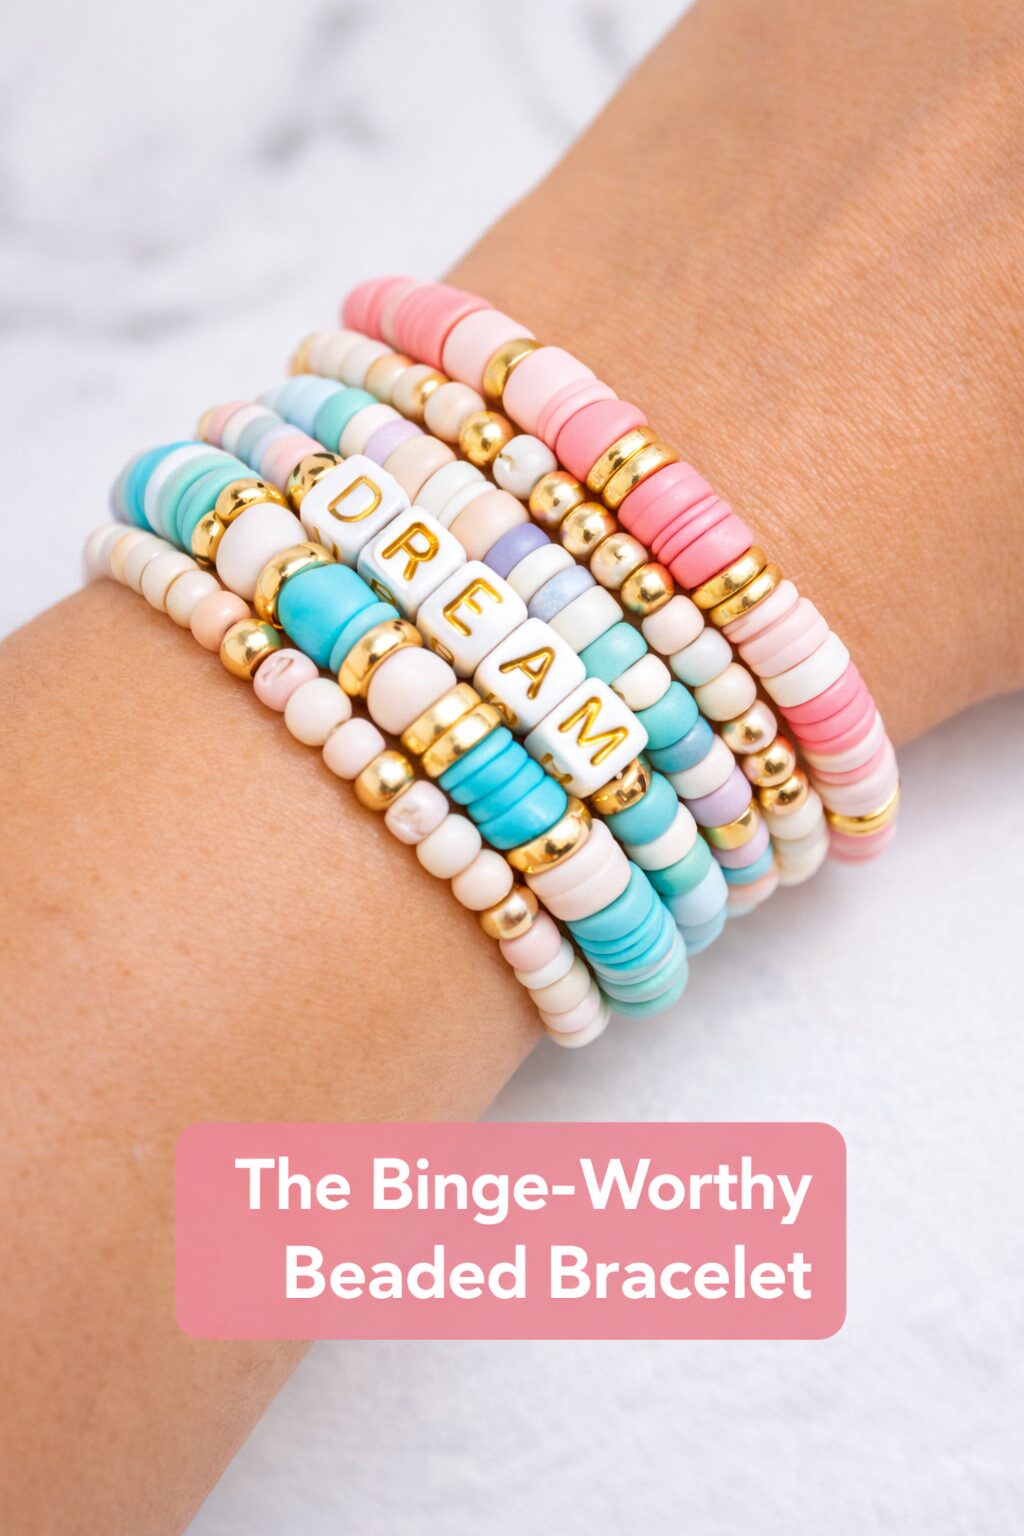
The Binge-Worthy Beaded Bracelet
Shopping List: The Binge-Worthy Beaded Bracelet (with links)
- Seed Beads: Seed Beads
- Alphabet Beads (Letter Beads): Alphabet Beads
- Polymer Clay Heishi Beads: Polymer Clay Heishi Beads
- Beading Elastic Cord (Stretch Cord): Beading Elastic Cord
- Scissors (for trimming cord): Scissors
Our final craft is the ultimate ‘lazy girl’ project. It’s something you can do with your hands while your brain is focused on binge-watching your favorite show. We are making personalized beaded bracelets. You’ve seen them everywhere—stacks of colorful bracelets on Instagram and Pinterest, spelling out names, affirmations, or inside jokes. They are incredibly trendy, unbelievably cheap to make, and so simple it feels like a childhood craft with a chic, modern twist.
Their appeal is their personal nature and stackability. People don’t just buy one; they buy a whole stack to tell a story on their wrist. They are the perfect friendship bracelet, subtle fan merch, or a little treat-yourself purchase.
The materials are the cheapest of all our crafts. You just need high-quality stretch cord, a variety of beads, and a dab of strong glue. For beads, offer a range of options: colorful seed beads, classic gold or silver accents, trendy polymer clay heishi beads, and—most importantly—letter beads. The letter beads are what make these so sellable.
The process barely needs an explanation. Cut a length of stretch cord, a couple of inches longer than you want the bracelet to be. Start stringing on your beads. This is your creative time—make a pattern, do a random mix, or keep it simple. Somewhere in the design, spell out a word with your letter beads. Popular choices include names, zodiac signs, or empowering words like “Breathe” or “Fearless.”
Once it’s fully beaded, it’s time to tie it off. This is the most critical step for a durable product. Tie a simple surgeon’s knot—it’s just a basic double knot, but on the second pass, you loop the end through one more time before pulling tight. Pull it as tight as you can. Then, add a tiny dab of strong, clear glue like G-S Hypo Cement right on the knot to prevent it from ever coming undone. Let it dry, snip the excess cord close to the knot, and gently tuck the knot inside an adjacent bead to hide it.
You now have a custom, trendy bracelet that took you maybe fifteen minutes to make while you were catching up on reality TV.
Now for the best part: the profit. The cost of materials for one bracelet is laughably low—we’re talking pennies. You can buy thousands of beads for very little money. Let’s say a single bracelet costs you 50 cents to make, at most. These bracelets often sell for $10 to $30 each, depending on the beads and customization. But nobody buys just one. The real money is in curated sets of three or five. A “Beach Day” stack with blues and golds, or a “Taylor Swift Eras” stack with colors from each album—this is how you turn a $1.50 cost into a $50 sale.
Photographing these is all about the stack. Get a model (or use your own wrist) and stack up 5 to 7 bracelets. Take the photo in good natural light against a simple background. The focus should be on the colors and the words. You’re selling a look, a vibe, and a form of self-expression that is both affordable and deeply personal.
Conclusion
So there you have it—five ridiculously easy, ‘lazy girl’ approved crafts that you can turn into a seriously profitable online business. We made the no-sew personalized pet bandana, the professional-grade sublimation mug, the luxurious resin trinket dish, the sustainable upcycled denim tote, and the trendy, stackable beaded bracelets.
As you can see from the finished products, nothing here screams “I made this on my couch with no skills.” They look professional, they are in high demand, and they have impressive profit margins. The myth that you need to be a traditionally skilled artist to have a successful creative business is officially busted. You just need to be smart and strategic—and a little bit lazy. Find the intersection of what’s easy to make, what looks amazing, and what people actually want to buy.
This website contains affiliate links. Some products are gifted by the brand to test. As an Amazon Associate, I earn from qualifying purchases. The content on this website was created with the help of AI.