This website contains affiliate links. Some products are gifted by the brand to test. As an Amazon Associate, I earn from qualifying purchases. The content on this website was created with the help of AI.
Flannel shirts aren’t just for cozying up in the cooler months—they’re perfect for turning into unique, DIY fall projects. Whether you’re looking to add a rustic touch to your home decor or create a handmade gift, flannel is the ultimate fabric to work with. In this post, I’ll show you 5 crafty ways to repurpose your flannel shirts into something special that screams autumn vibes.
1. Cozy DIY Flannel Throw Pillows for Fall
Create the ultimate fall vibe with DIY flannel throw pillows. Mix plaid and solid colors for a stylish, rustic touch that brings warmth to any room. Perfect for fall decor lovers!
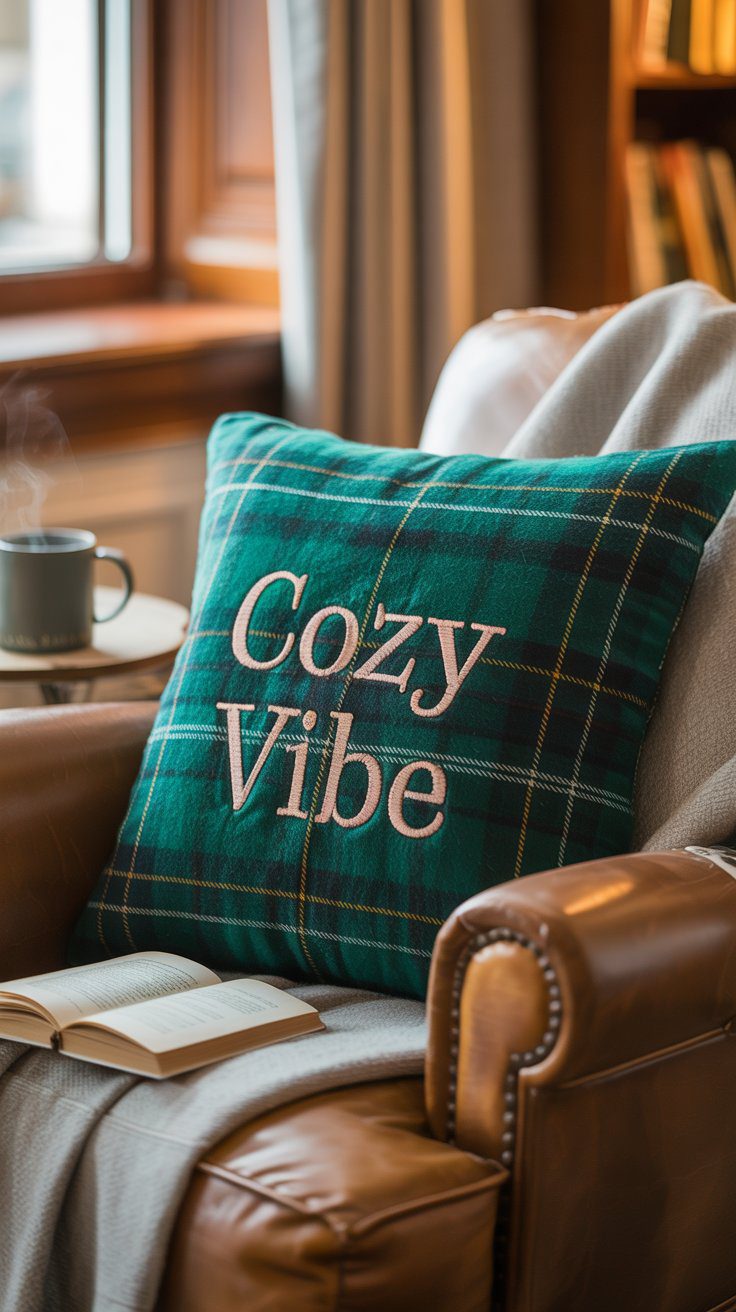
Bring a Cozy Vibe to Your Space Flannel fabric, with its soft texture and warm colors, is perfect for creating plush throw pillows that will instantly add comfort and warmth to any room. Choose flannel in shades of red, plaid, or deep greens for an extra seasonal touch. For a more balanced look, mix solid-colored flannel with patterned ones—this will add texture without overwhelming the space.
Shop the Look:
How to Make Flannel Throw Pillows
- Choose Your Fabric
Select flannel fabric in cozy autumn shades like red plaid, green, or deep orange. You can mix and match solid-colored flannel with patterned ones for added texture. - Cut the Fabric
Cut two squares or rectangles of fabric, each the size of your desired pillow. Add an extra inch on all sides for seam allowance. - Sew the Edges
Place the fabric pieces together with the pattern sides facing each other. Sew along the edges, leaving one side open for inserting the pillow insert. Use contrasting thread for a visible, stylish stitch detail. - Add the Pillow Insert
Insert the pillow insert into the sewn cover. Ensure it fits snugly but not too tight, as you want the pillow to remain soft and comfortable. - Close the Pillow
Once the insert is inside, fold the edges of the open side and sew them shut using a simple stitch. Optionally, add a zipper for easy washing. - Final Touches
Fluff your pillow and display it on your couch, bed, or reading nook for an instant cozy vibe.
Dos & Don’ts:
- Do mix patterns with solids for added dimension.
- Don’t overstuff the pillows—aim for a soft, comfortable feel.
- Do use contrasting thread for a visible stitch detail.
- Don’t forget to add a zipper for easy washing.
2. Rustic DIY Flannel Picture Frames for Your Fall Home
Turn a basic picture frame into something rustic and charming with a little flannel! This easy DIY project will add warmth and personality to your home.

Add Rustic Charm to Your Walls Flannel isn’t just for fabric crafts—it can also be used to cover and transform basic picture frames into something rustic and charming. Choose a plaid pattern or solid color to match your home’s aesthetic. It’s a simple project that only requires fabric glue, a pair of scissors, and a picture frame to get started.
How to Make Flannel-Coated Picture Frames
- Choose Your Frame
Start with a basic wooden picture frame that suits your desired size. Pick one that will match the aesthetic of your home. - Pick Your Fabric
Select a plaid or solid-colored flannel fabric that complements your home decor. You can go for seasonal colors like red, green, or any pattern that fits your space. - Cut the Fabric
Measure and cut the fabric slightly larger than the frame to ensure you have enough to wrap around the edges. Leave about 1-2 inches of excess on all sides. - Apply Fabric Glue
Apply fabric glue to the back side of the frame. Carefully press the fabric into the glue, smoothing it out to remove wrinkles and bubbles. - Wrap the Frame
Wrap the fabric around the frame, folding the edges neatly to the back. Press down to secure the fabric, making sure it’s tightly wrapped. - Trim Excess Fabric
Once the fabric is glued in place, trim any excess fabric from the back, ensuring the edges are clean and tidy. - Final Touches
Let the glue dry completely. For a vintage, rustic look, you can distress the frame slightly by lightly sanding the edges. Once dry, insert your favorite photo and enjoy your new flannel-coated frame.
Shop the Look:
Dos & Don’ts:
- Do cut the fabric slightly larger than the frame for easier wrapping.
- Don’t rush the drying process—give the glue time to set.
- Do consider distressing the frame for an extra vintage look.
- Don’t use fabric that’s too thick for easy wrapping.
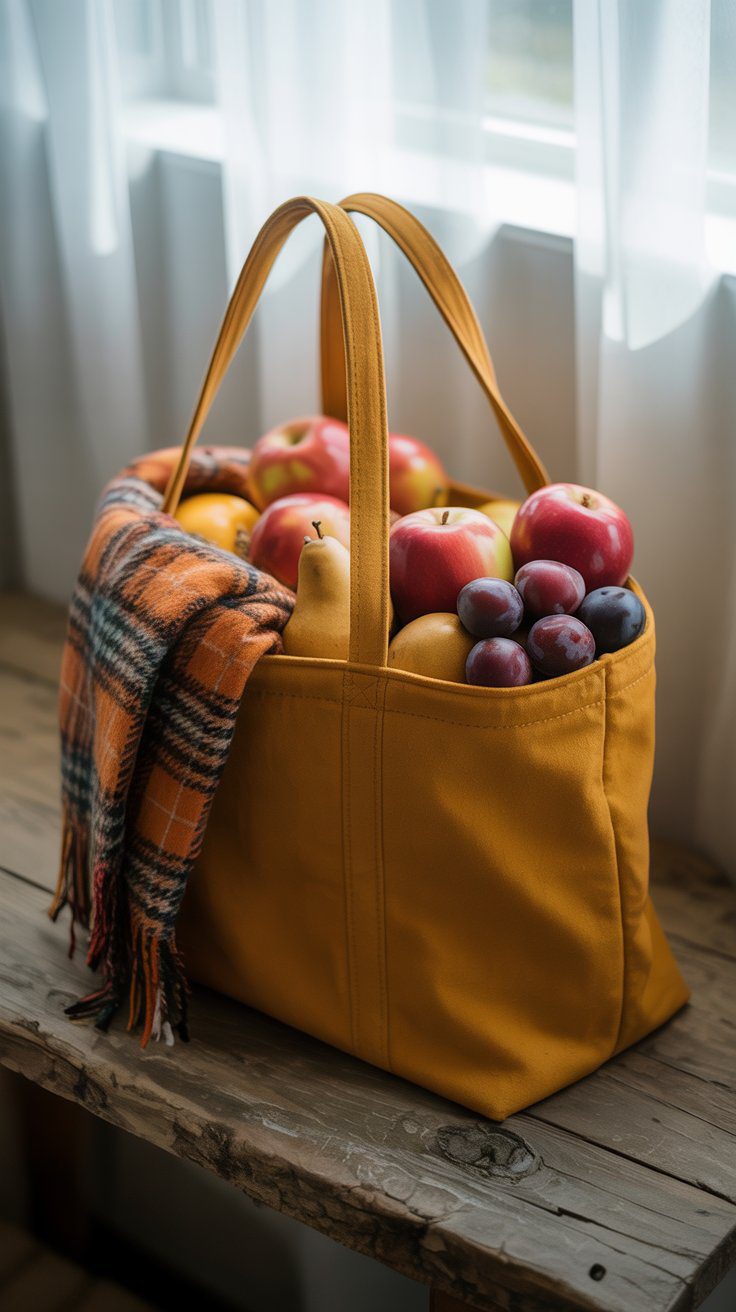
3. DIY Flannel Tote Bags for Fall Shopping
Make functional and fashionable flannel tote bags perfect for your fall shopping trips. Add interior pockets for extra flair and usability.
How to Make Flannel Tote Bags
- Choose Your Fabric
Select flannel in a vibrant autumn color like mustard yellow, burgundy, or even a plaid pattern. The soft texture of flannel will add comfort to your tote while keeping it trendy. - Cut the Fabric
Use a flannel tote bag pattern or cut two large rectangles for the body of your bag. Be sure to add extra inches for seam allowances and the bag’s depth. - Sew the Sides
Place the fabric pieces with the pattern sides facing each other. Sew along the sides and the bottom of the bag, leaving the top open. Use a strong stitch to ensure durability. - Add Handles
Attach the bag handles to the top edges. You can buy pre-made handles or create your own by cutting strips of fabric and folding them for extra strength. Sew the handles securely to the bag. - Reinforce the Bottom
For added durability, reinforce the bottom of the bag by adding a second layer of fabric. This will help support heavy items and give the bag extra strength. - Add Pockets (Optional)
Add interior pockets to your tote bag for extra functionality. You can create simple pockets by folding a piece of fabric and sewing it onto the inside of the bag. - Final Touches
Press the fabric with an iron to remove any wrinkles. Turn the bag inside out, and you’re ready to carry your fall vibes everywhere you go!
Shop the Look:
Dos & Don’ts:
- Do reinforce the bottom of the bag for added strength.
- Don’t skip the ironing step to avoid wrinkles in the fabric.
- Do add interior pockets for extra functionality.
- Don’t use too much fabric for a bulky finish.
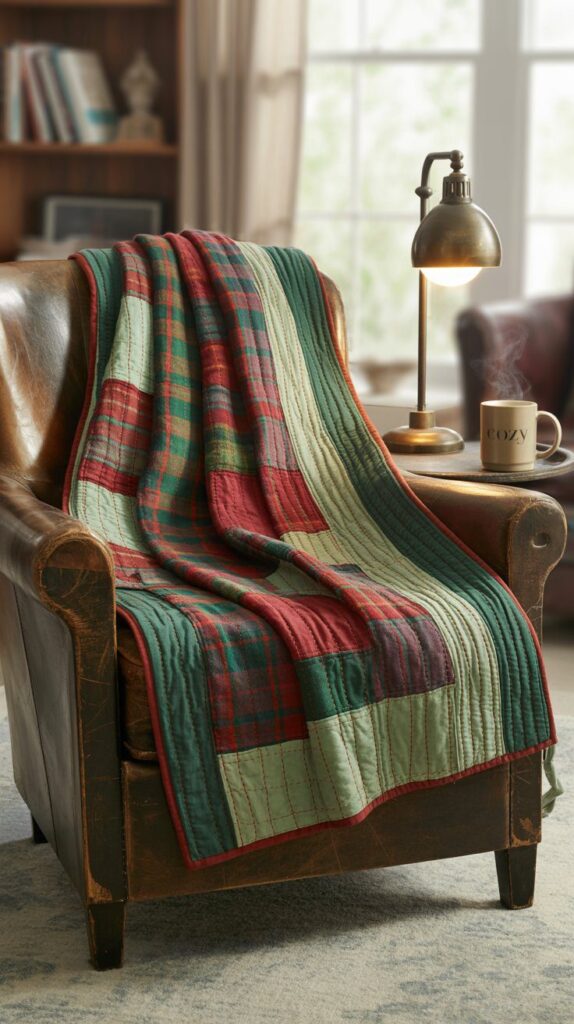
4. Flannel Quilted Throw Blankets
What you’re making: A cozy, flannel quilt that you’ll want to wrap up in all season long. This blanket is the ultimate fall project!
- Choose Your Fabric
Select flannel in a variety of colors and patterns to make your quilt unique. Plaid and solid colors work well together for a rustic look. You can also mix and match various flannel patterns for added visual interest. - Cut Your Fabric
Cut the fabric into squares or rectangles, depending on your desired quilt design. For a traditional look, aim for 6-inch squares, but feel free to adjust the size based on your preference. - Arrange the Pieces
Lay out the fabric pieces in your desired pattern. Experiment with different arrangements before committing to stitching. You can alternate patterns and colors for a balanced, eye-catching look. - Sew the Squares Together
Sew the fabric pieces together in rows. Make sure to press the seams flat after each row to keep the quilt smooth. Once the rows are sewn, join them together to form the quilt. - Add the Quilt Batting
Lay the quilt top over a layer of quilt batting. This will give your quilt its thickness and softness. Cut the batting to match the size of your quilt. - Sew the Layers Together
Pin the quilt top, batting, and backing fabric together. Sew along the edges to secure the layers. Use a walking foot to ensure smooth stitching through all layers. - Finish the Quilt
Trim any excess fabric from the edges and bind the edges with a coordinating fabric. This will give the quilt a polished finish. - Final Touches
Wash and dry the quilt before using to soften the fabric and reduce any shrinkage. Your cozy, homemade flannel quilt is ready to enjoy!
Shop the Look:
Dos & Don’ts:
- Do choose a mix of flannel patterns for visual interest.
- Don’t forget to pre-wash the fabric to avoid shrinkage.
- Do use a walking foot for smooth stitching through multiple layers.
- Don’t rush the quilting process—take your time for even stitching.
5. Flannel Scarves
What you’re making: Flannel scarves that are as cozy as they are cute. This is your perfect accessory for fall.

How to Make Flannel Scarves
- Choose Your Fabric
Select a flannel fabric in your desired pattern. You can go for classic plaid or solid colors, depending on your style preference. Autumn tones work best for a cozy, seasonal look. - Cut the Fabric
Cut the fabric into a rectangle large enough for a scarf. A typical size would be 60 inches long by 10-12 inches wide, but adjust to fit your style. - Prepare the Edges
If you want a fringed edge, cut slits along the fabric’s ends to create frayed tassels. You can also use pinking shears to prevent fraying if you prefer a more finished look. - Sew the Edges (Optional)
For a more polished finish, fold the raw edges of the scarf inward and sew them down using a simple hem stitch. This will give the scarf a clean, neat look without raw edges. - Add Fringe (Optional)
If you like a more playful, boho look, fringe the edges by making small cuts and pulling the threads. This gives the scarf a fun, textured finish. - Final Touches
Press the scarf with an iron to remove any wrinkles and set the fabric. Once done, your scarf is ready to wear and enjoy on those cool fall days.
Shop the Look:
Dos & Don’ts:
- Do fringe the edges for a playful touch.
- Don’t use too much fabric—aim for a lightweight feel.
- Do consider adding a lining for extra warmth.
- Don’t forget to hem the edges to avoid fraying.
6. Fabric Pumpkin Covers
What you’re making: Cute little flannel pumpkin covers to dress up your pumpkins this fall. They’ll add a rustic vibe to any space.

- Choose Your Fabric
Select flannel in seasonal shades like orange, plaid, or deep burgundy to create cute, cozy pumpkin covers. You can also mix patterns to add variety and texture to your decor. - Cut the Fabric
Cut a square piece of fabric large enough to cover a small pumpkin. Make sure to leave extra fabric for gathering and creating the “pumpkin” shape. - Prepare the Fabric
Place the fabric over the pumpkin. Gather the fabric at the top of the pumpkin, pulling the edges together. Secure with a piece of twine or string to form the base of the pumpkin cover. - Create the Pumpkin Shape
Tuck in the fabric around the pumpkin to make sure it fits snugly. You can sew the edges if desired, or leave it loose for a more natural look. - Add a Stem
Use a small stick, cinnamon stick, or a piece of fabric to create the pumpkin’s stem. Attach it to the top of the fabric with a hot glue gun or by tying it into the gathered fabric. - Finishing Touches
Adjust the fabric around the pumpkin to make sure it sits evenly. Add any additional decorative touches like faux leaves, ribbons, or small embellishments to make it unique.
Shop the Look:
7. Mug Cozies
What you’re making: A cute flannel cozy to wrap around your mugs. You’ll never burn your hands on hot drinks again, plus it looks adorable!
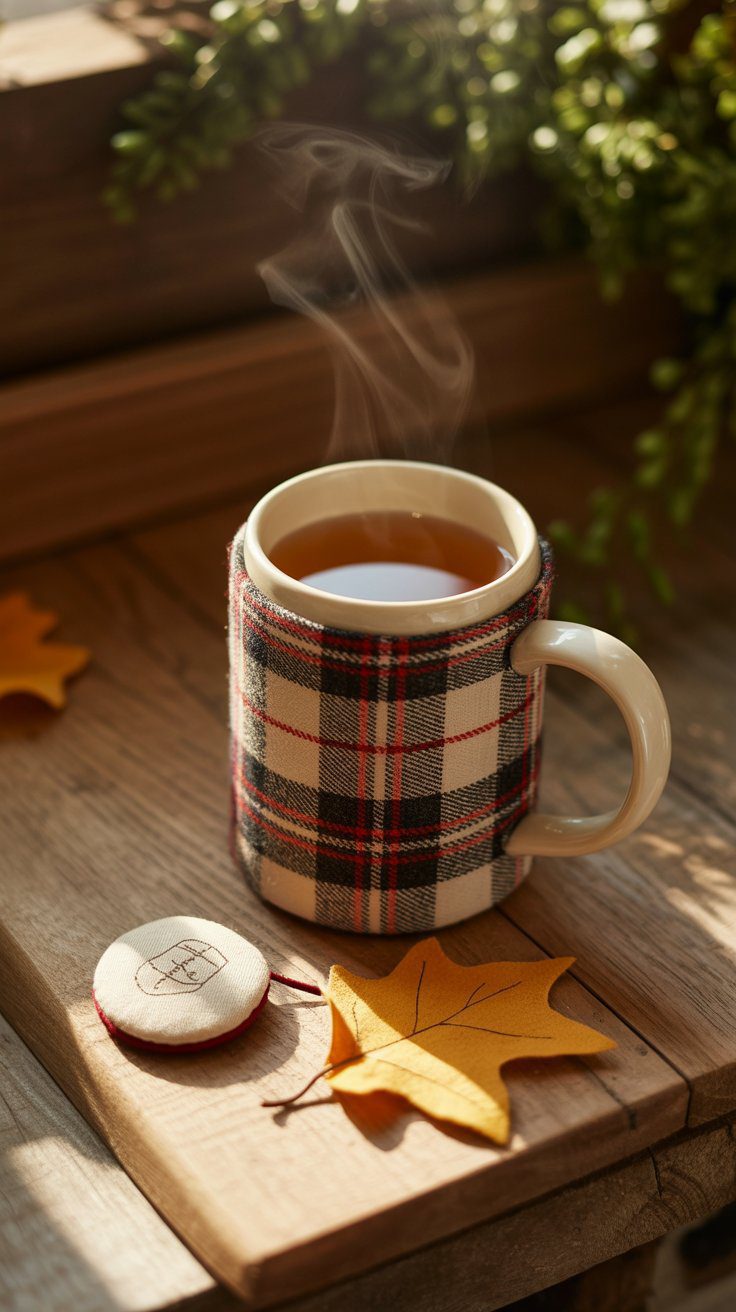
- Choose Your Fabric
Select a cozy, soft flannel fabric in autumn colors or plaid patterns. You can also go for a solid color to match the vibe of the season. - Measure and Cut
Measure the circumference of your mug to determine the length. Cut a strip of fabric that’s about 4-5 inches wide and the length of your mug’s circumference, adding a 1-inch seam allowance on each side. - Sew the Edges
Fold the fabric strip in half, pattern sides facing inward. Sew along the edges, leaving the ends open. This will form a tube around your mug. - Add Buttons or a Tie
For a secure fit, add a button on one end of the cozy and a small loop on the other side, or use a tie to fasten the cozy around the mug. - Turn and Finish
Turn the cozy right side out and press it with an iron. Optionally, you can add a decorative embellishment like a small felt leaf or button for a more personalized touch. - Final Touches
Slide the cozy over your mug, and you’re ready to enjoy a cozy fall beverage without burning your hands!
Shop the Look:
8. Flannel Banner Garland
What you’re making: A fall-inspired flannel banner garland to hang around your house. It’s the perfect DIY for adding some cozy vibes to any space.
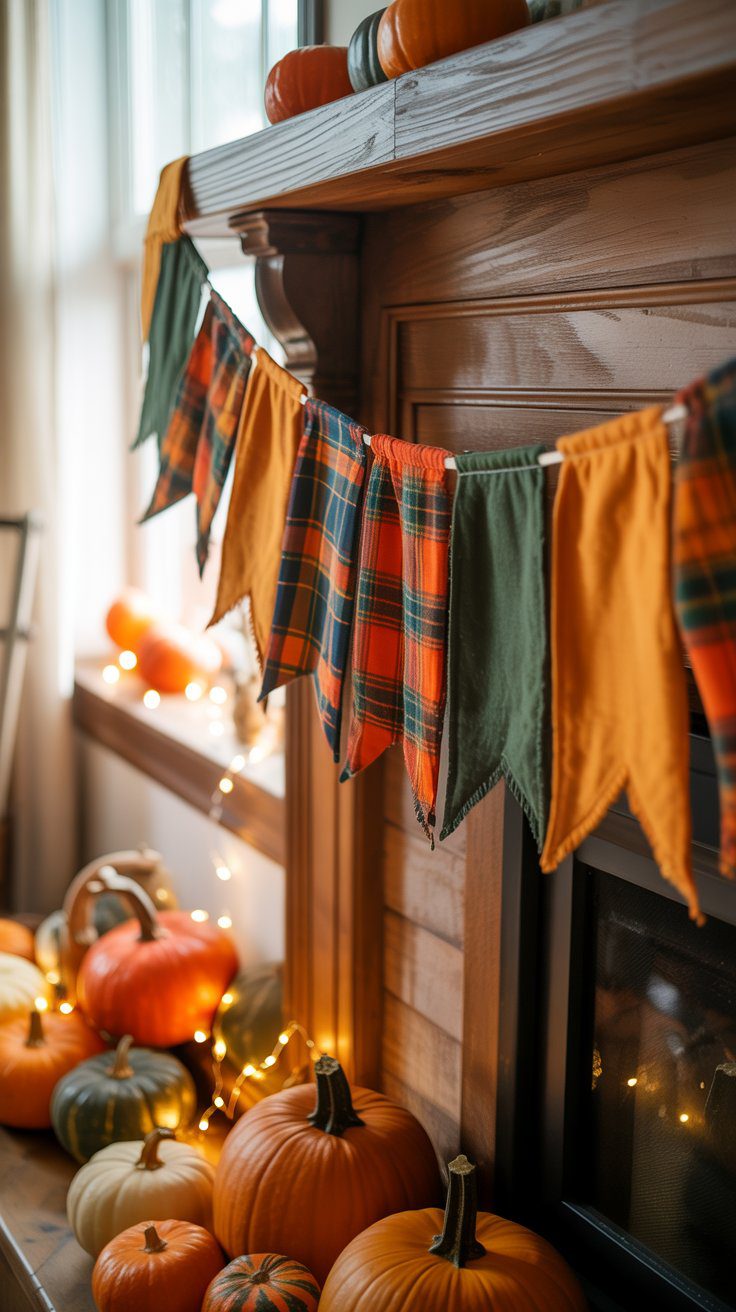
- Choose Your Fabric
Select a variety of flannel fabrics in seasonal colors and patterns, such as orange, plaid, or deep green. You can mix solids and prints to create a vibrant garland. - Cut the Fabric
Cut the flannel into triangle-shaped flags. A typical size would be about 5-6 inches wide at the top and 6-8 inches long, but adjust based on your preference for the garland’s size. - Prepare the Fabric
Fold the top of each triangle over a length of twine or string, making sure there’s enough fabric to create a clean fold. Secure the fold with fabric glue or a hot glue gun. - Attach the Flags
Space the flags evenly along the twine, attaching them securely with glue. You can overlap them slightly or leave space, depending on the look you want. - Add Embellishments (Optional)
For extra flair, you can add decorative touches such as buttons, beads, or small fabric flowers. You can also layer smaller triangles of different fabrics on top for a layered effect. - Final Touches
Allow the glue to dry completely before hanging the garland. Once done, drape it across a mantel, wall, or window for a festive fall decoration.
Shop the Look:
9. Flannel Wrapped Wreath Base
What you’re making: A cozy flannel wreath to hang on your front door or wall. It’s the perfect fall DIY to greet everyone with warmth.
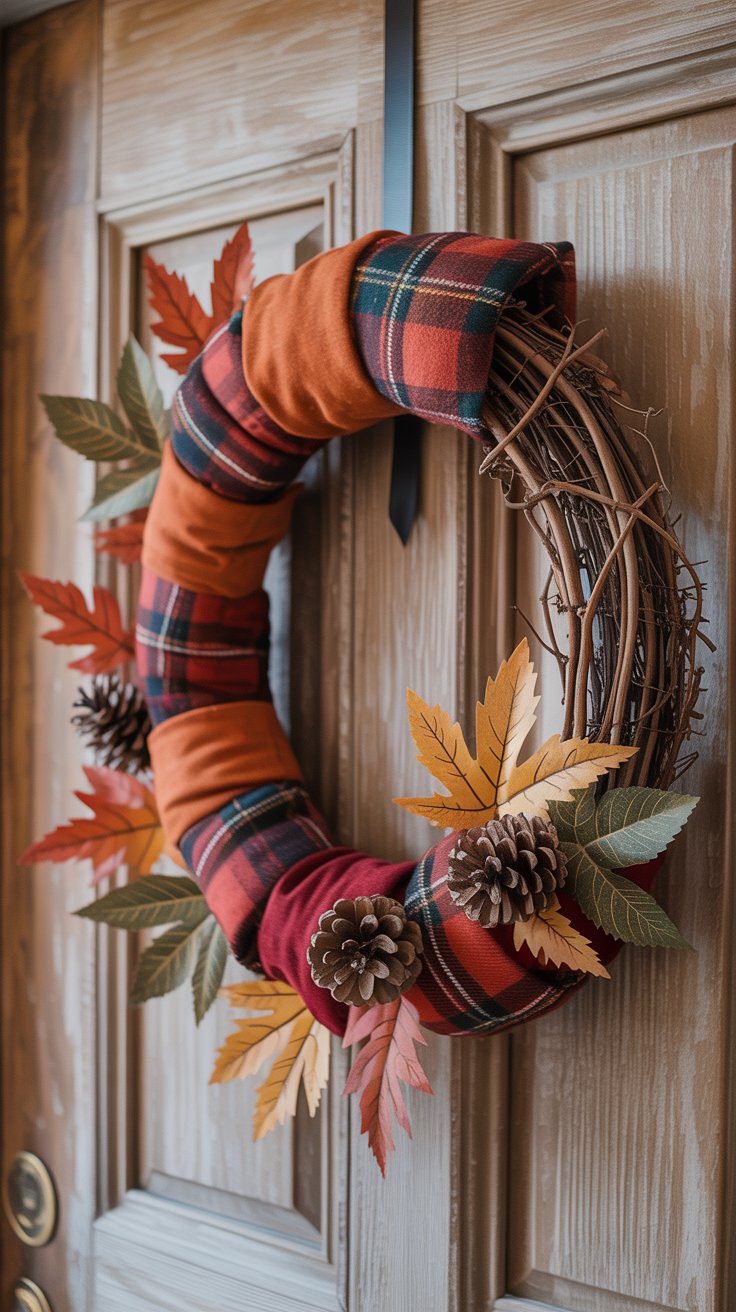
- Choose Your Fabric
Pick a flannel fabric in warm, autumn colors like burnt orange, plaid, or rich burgundy. You can mix patterns or go with a solid color for a more subdued look. - Create the Base
Begin with a wreath base made of foam, grapevine, or wire. You can also make your own base by cutting a circular shape from cardboard. - Cut the Fabric
Cut the flannel fabric into strips, about 2 inches wide and long enough to wrap around the wreath base. You may need to adjust the length depending on your wreath’s size. - Wrap the Base
Start by securing one end of the fabric strip to the wreath base with a hot glue gun. Then, wrap the fabric tightly around the wreath, slightly overlapping each layer as you go. Continue until the entire wreath is covered. - Secure the End
Once the wreath is fully wrapped, tuck the end of the fabric into the last section of fabric and glue it in place for a neat finish. - Add Embellishments
You can add decorative touches like small fabric flowers, faux leaves, or seasonal embellishments such as acorns or pinecones for extra flair. - Final Touches
Attach a ribbon or twine to the top of the wreath for hanging. Make sure the fabric is securely fastened, and your cozy, flannel-wrapped wreath is ready to hang.
Shop the Look:
10. Stuffed Flannel Hearts
What you’re making: These flannel hearts are a cute, cozy touch for any fall decor. You can hang them up, add them to wreaths, or just tuck them around your home.
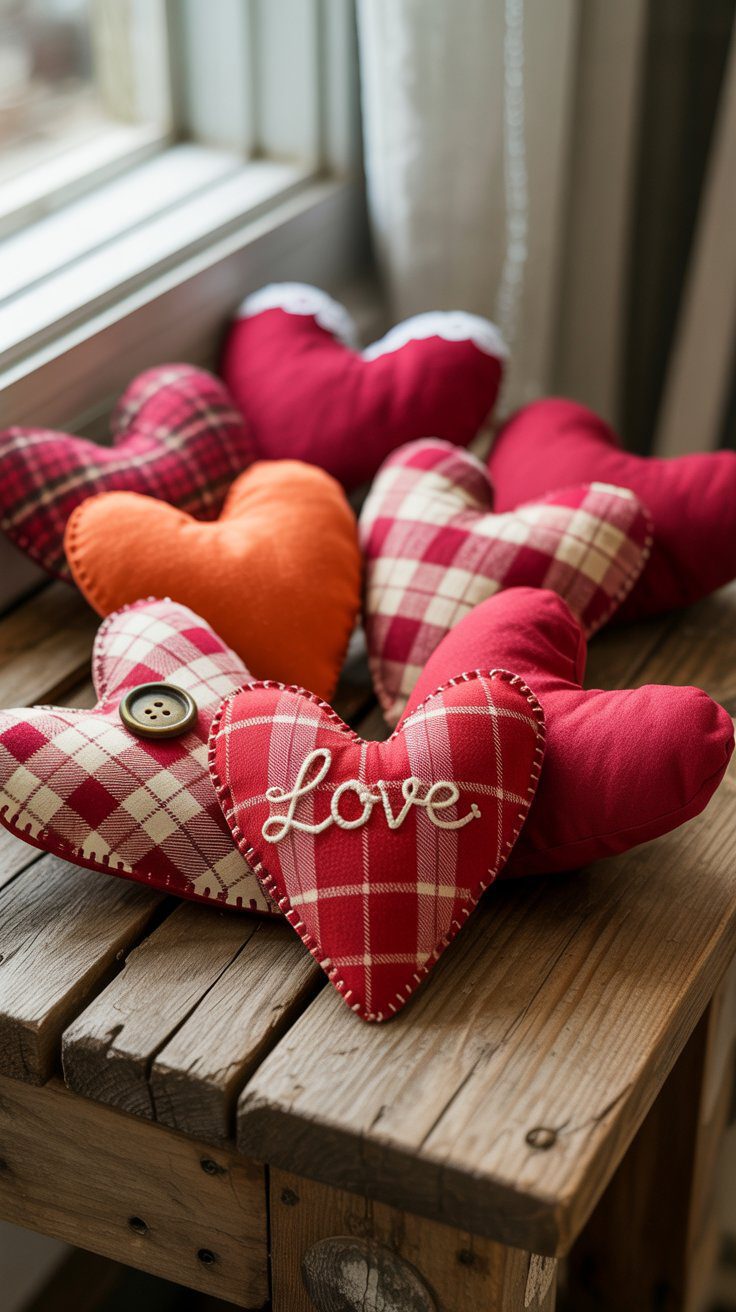
- Choose Your Fabric
Select a flannel fabric in warm autumn colors like red, orange, or plaid patterns. You can also use a mix of seasonal shades to add variety to your stuffed hearts. - Cut the Fabric
Cut two identical heart-shaped pieces of fabric. A typical size would be around 5-6 inches wide, but adjust based on your desired heart size. You can use a heart-shaped template for precision. - Sew the Heart
Place the fabric pieces together, pattern sides facing inward. Sew around the edges, leaving a small opening at the top for turning and stuffing. Use a strong stitch for durability. - Turn and Stuff
Turn the heart right side out through the opening. Fill it with stuffing (cotton, fabric scraps, or other materials) to give it a plush feel. Add as much stuffing as you like for the desired firmness. - Close the Opening
Once the heart is stuffed, fold the edges of the opening inward and sew it shut using a simple stitch. - Add Embellishments
For extra charm, you can sew on small decorative elements like buttons, lace, or a fabric flower. You could also add a ribbon loop at the top for hanging. - Final Touches
Adjust the stuffing to ensure the heart holds its shape. Once done, you can display your stuffed flannel hearts around your home for a cozy, seasonal touch.
Shop the Look:
Affiliate Disclosure: This website contains affiliate links. As an Amazon Associate, I earn from qualifying purchases.
This website contains affiliate links. Some products are gifted by the brand to test. As an Amazon Associate, I earn from qualifying purchases. The content on this website was created with the help of AI.