Clicky

  • Crafts
  • Fashion
  • Food Ideas
  • Games
  • Holidays and Special Occassions
  • Home and Garden Ideas
  • Home Decor
  • Homesteading
  • Lifestyle
  • Pets
Ballen Blogger
  • Crafts
  • Fashion
  • Food Ideas
  • Games
  • Holidays and Special Occassions
  • Home and Garden Ideas
  • Home Decor
  • Homesteading
  • Lifestyle
  • Pets
No Result
View All Result
  • Crafts
  • Fashion
  • Food Ideas
  • Games
  • Holidays and Special Occassions
  • Home and Garden Ideas
  • Home Decor
  • Homesteading
  • Lifestyle
  • Pets
No Result
View All Result
Ballen's Buys
No Result
View All Result

DIY Rain Boot Planters: A Fun & Whimsical Spring Porch Idea

Lori Ballen by Lori Ballen
February 11, 2025
in Crafts
0
69
SHARES
0
VIEWS
Share on FacebookShare on Twitter

This website contains affiliate links. Some products are gifted by the brand to test. As an Amazon Associate, I earn from qualifying purchases. The content on this website was created with the help of AI.

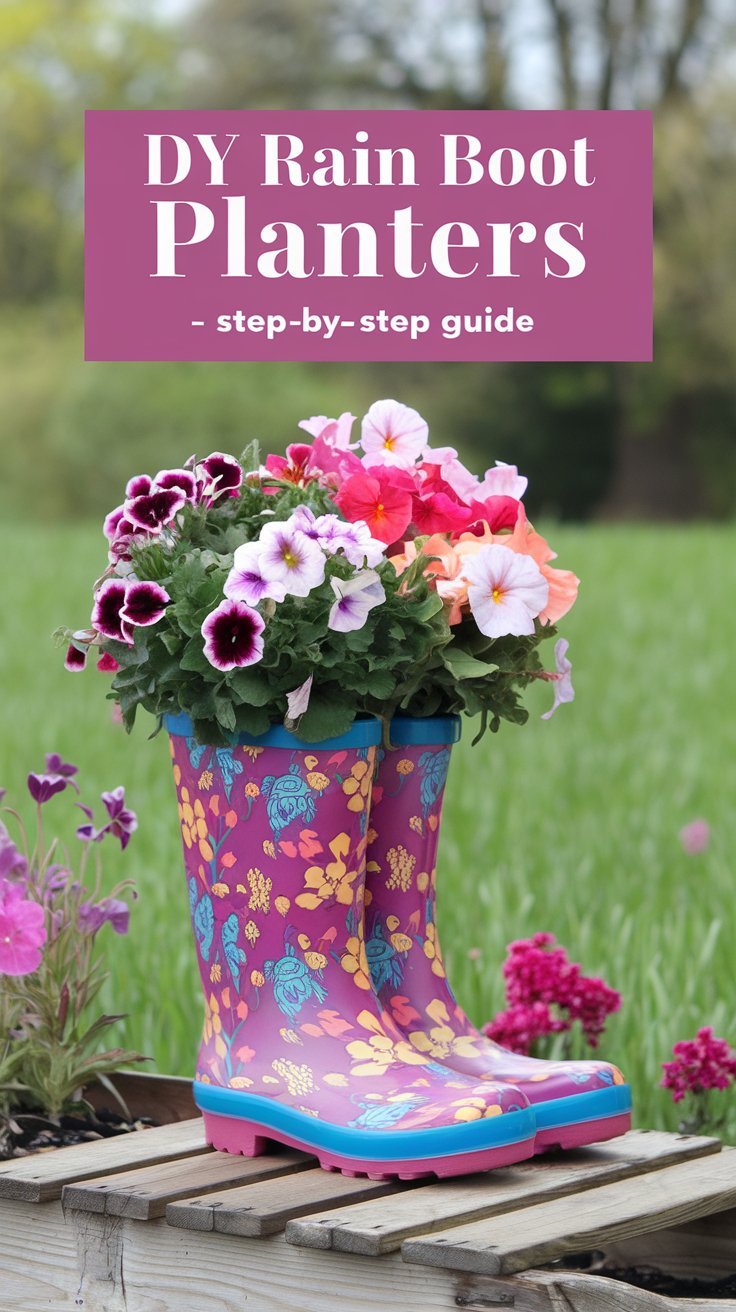
Spring is all about fresh blooms, bright colors, and fun, unexpected decor. If you’re looking for a creative way to bring personality to your front porch, rain boot planters are the perfect DIY project. They add a playful touch, are super easy to make, and let you repurpose old boots into something beautiful. Whether you go for vintage floral boots, bold and colorful patterns, or classic yellow wellies, this simple project will instantly brighten up your entryway.

What You’ll Need

Yellow rain boots, a yellow drill, gloves, potting soil bag, stones, and a trowel on a wooden surface. Text reads DIY Rain Boot Planters: What You’ll Need.
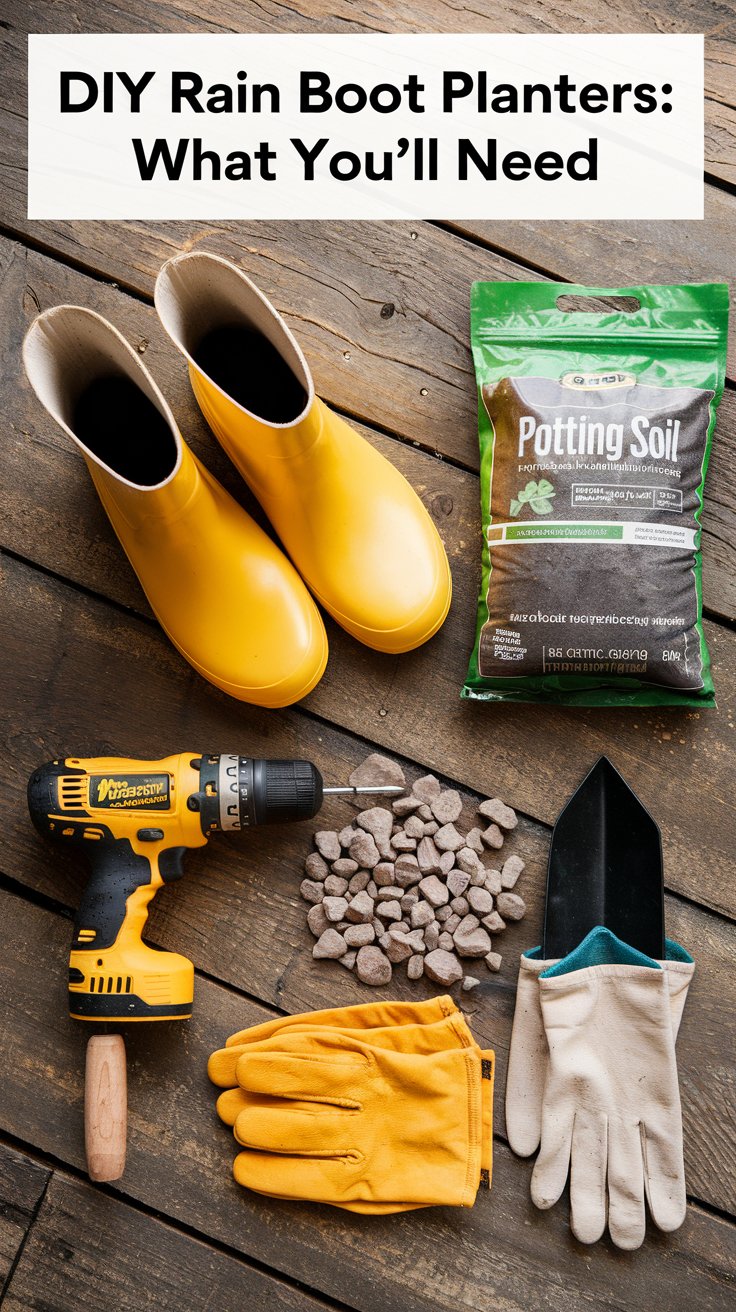
  • A pair of rain boots – New or old, any size or style works
  • Drill or nail & hammer – To create drainage holes
  • Potting soil – Lightweight mix for better drainage
  • Flowers or plants – Petunias, pansies, marigolds, or trailing ivy work great
  • Small rocks or pebbles – Helps with water drainage
  • Gardening gloves & trowel – For easy planting

1. Choose Your Rain Boots

Colorful rain boots, each with different patterns like polka dots and flowers, are lined up against a pastel wall. The boots are used as planters, filled with vibrant flowers. A sign on the wall reads, DIY rain Boot planters: choose your rain boots.

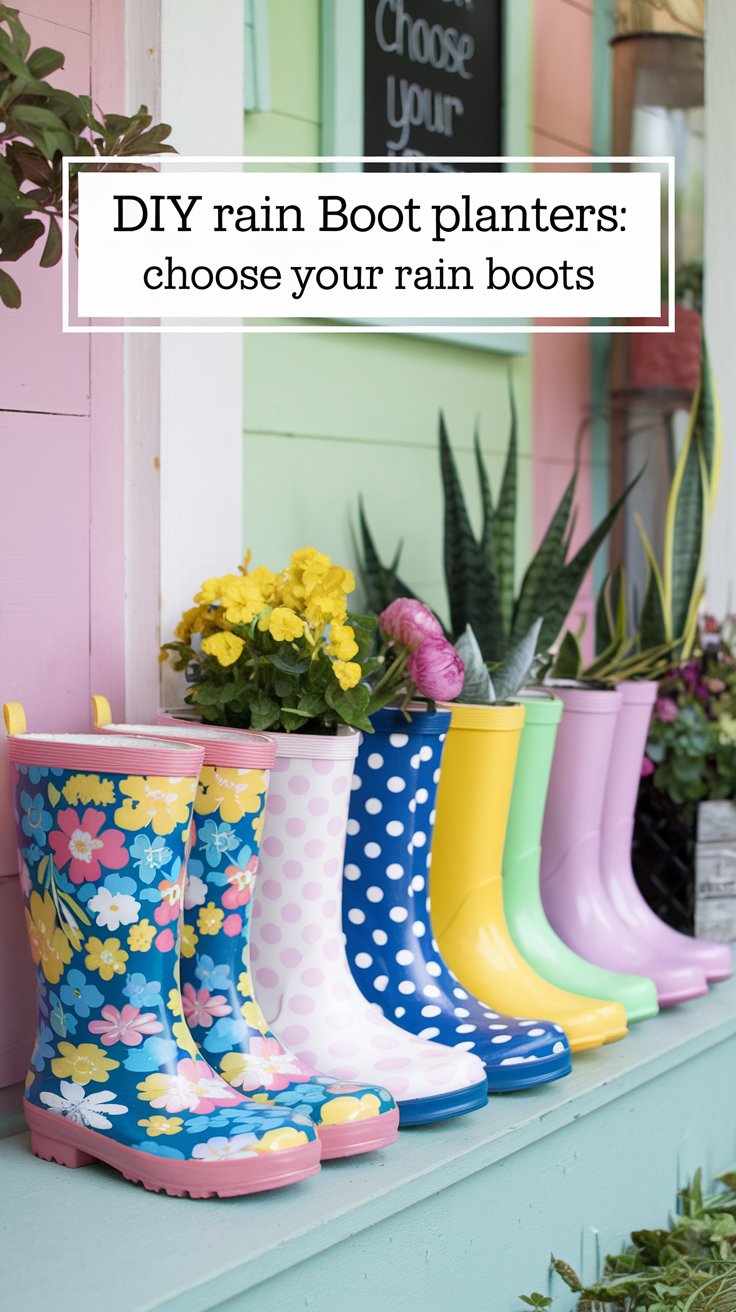
This is where the fun starts! You can use any old rain boots you have lying around or grab a pair from a thrift store or discount shop. Look for styles that match your spring decor:

  • Bright yellow or pink boots – A cheerful, classic spring look
  • Floral or polka dot boots – Adds a vintage or cottagecore vibe
  • Neutral tones like sage green or beige – Perfect for a minimalist porch
  • Kids’ rain boots – Cute for smaller spaces or lining up multiple pairs

Picture This

A row of mismatched rain boots in different pastel shades lines the porch steps, each overflowing with bright spring flowers. One pair features a floral print, while another boasts a classic yellow hue. A tiny set of toddler boots sits beside a larger pair, making the display feel personal and full of charm.

2. Create Drainage Holes

A floral-patterned rain boot is placed upside down on a bed of pebbles. A power drill is creating drainage holes in the boots sole, as part of a DIY rain boot planter project.

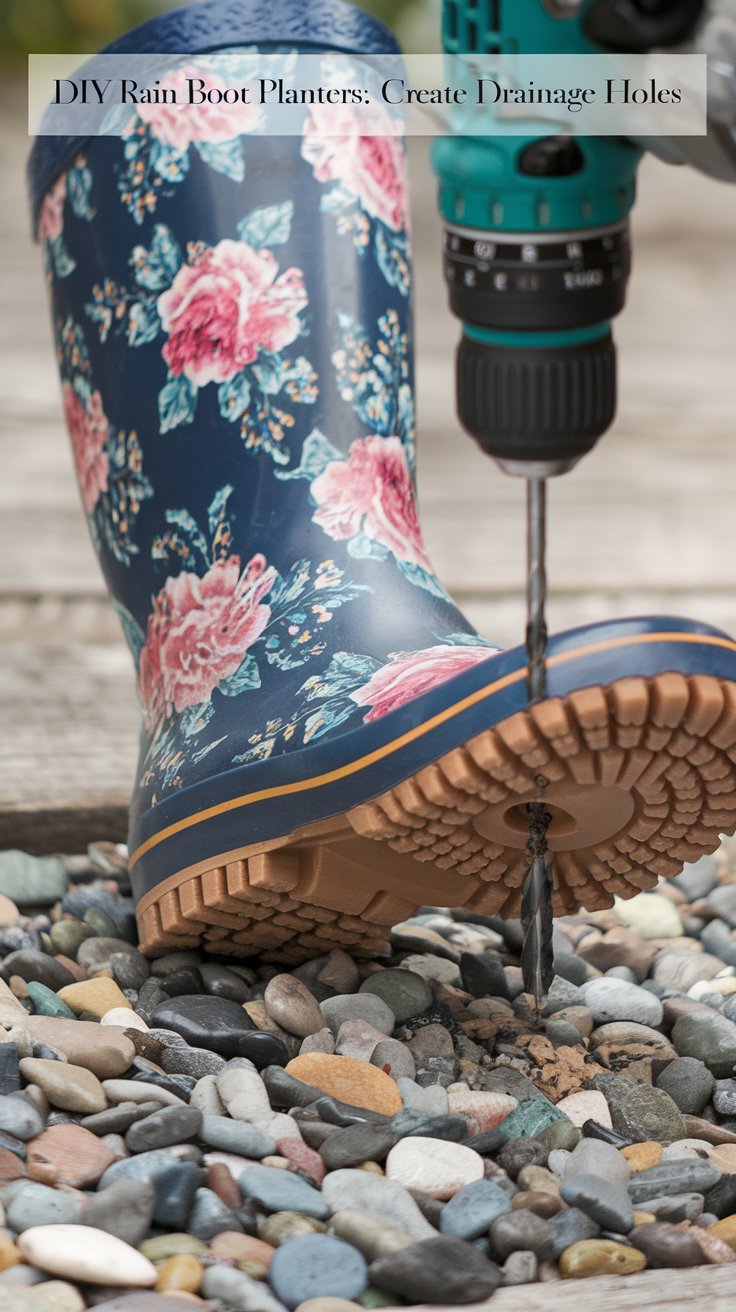
To keep your plants happy and avoid root rot, you’ll need to add drainage holes at the bottom of each boot.

  • If using a drill, make 3–5 small holes in the sole.
  • If using a hammer and nail, carefully punch a few holes through the rubber.

Once your holes are in place, add a layer of small pebbles or gravel at the bottom to prevent water from sitting inside the boot.

Picture This

A pair of floral-print rain boots sits on a workbench, flipped upside down as small drainage holes are carefully drilled into the soles. A handful of smooth river pebbles rests beside them, ready to be added before planting begins.

3. Pick the Right Plants

Colorful rain boots converted into planters, filled with vibrant flowers like petunias and marigolds, are displayed on a tiered shelf against a wooden backdrop. A text overlay reads, DIY Rain Boot Planters: Pick the Right Plants.

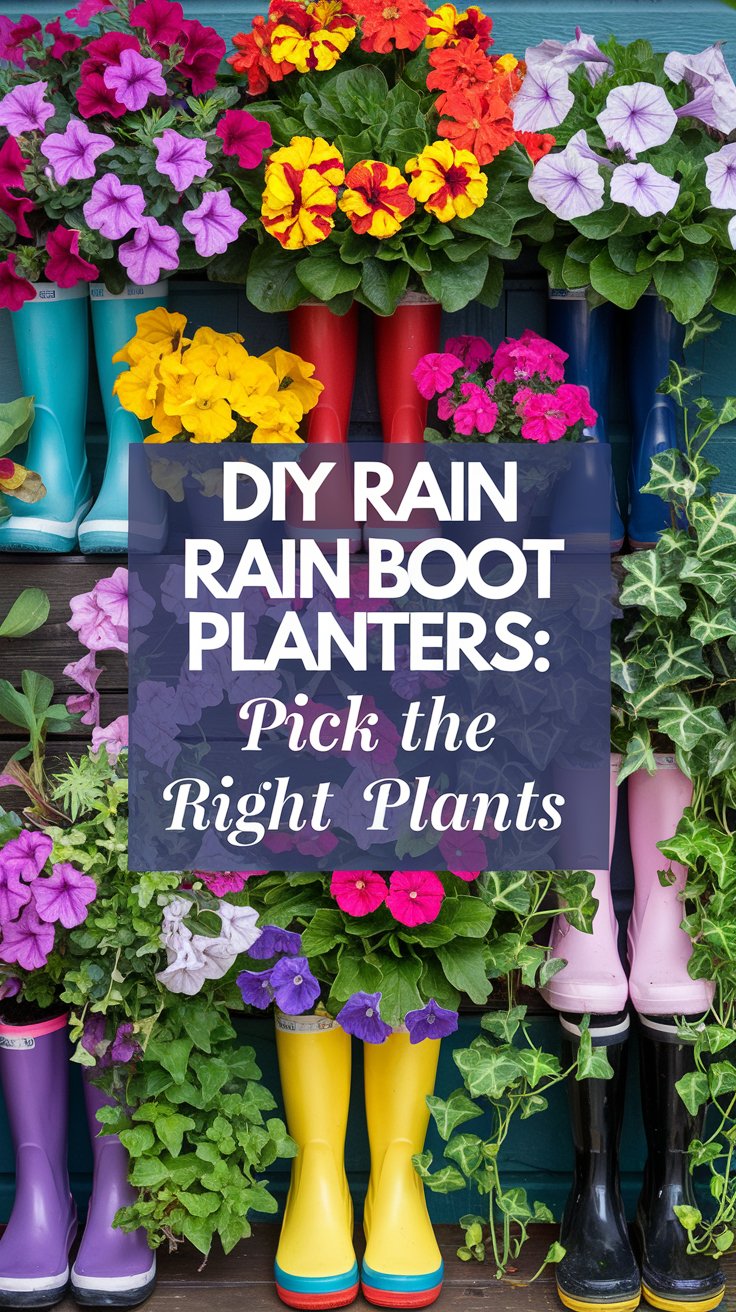
Not all plants thrive in small containers, so choosing the right ones will ensure your rain boot planters look full and healthy all season.

Best flowers for rain boot planters:

  • Pansies – Hardy, colorful, and perfect for spring
  • Petunias – Trailing blooms that spill beautifully over the edges
  • Marigolds – Vibrant and easy to care for
  • Trailing Ivy or Sweet Potato Vine – Adds greenery and a cascading effect
  • Lavender or Small Herbs – A fragrant, unique option

Picture This

A soft pink rain boot bursts with cascading white petunias, their delicate petals spilling over the sides. Next to it, a navy-blue boot with white polka dots holds a mix of cheerful yellow marigolds and trailing ivy, adding height and depth to the display.

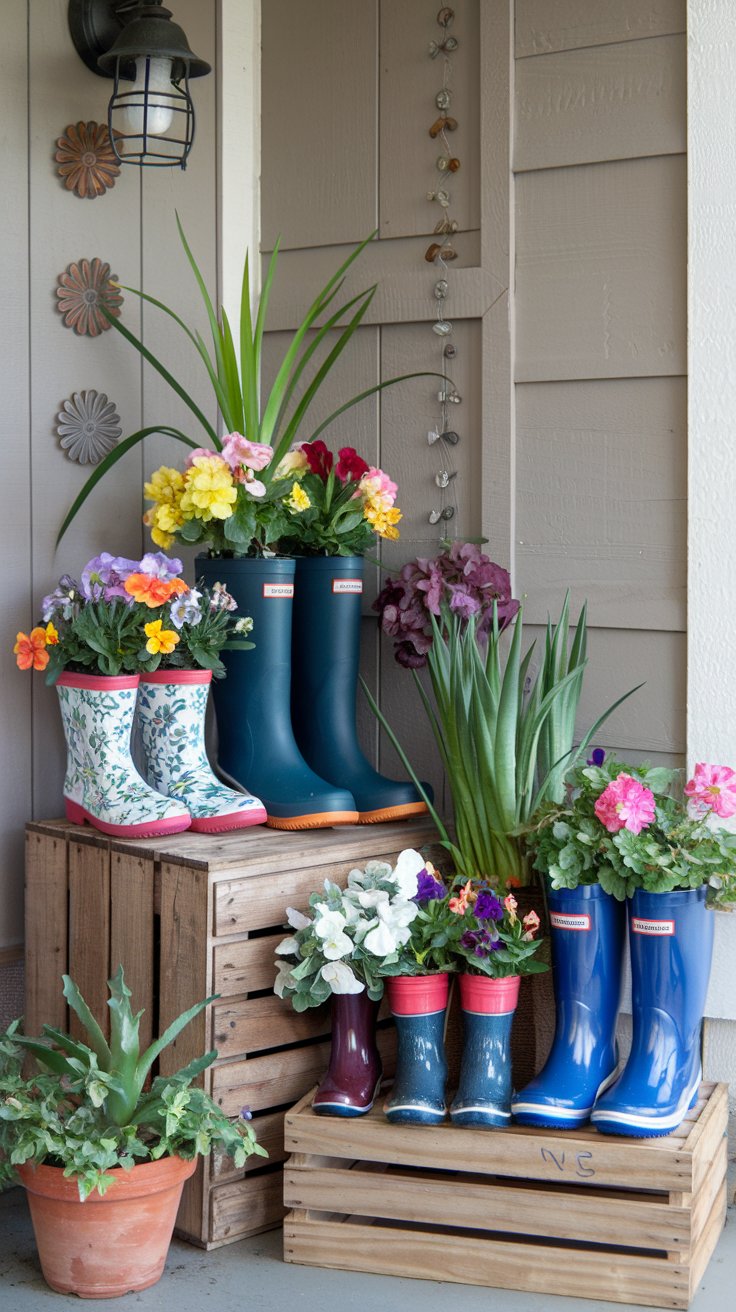
4. Plant & Arrange Your Boots

Colorful rain boots repurposed as planters filled with vibrant flowers and greenery are arranged on wooden crates on a porch. A few decorative items hang on the wall, enhancing the cheerful and creative outdoor display.

Now for the fun part—putting it all together!

  • Fill each boot halfway with potting soil.
  • Carefully plant your flowers, making sure the roots are well covered.
  • Add extra soil around the plants, pressing lightly to secure them.

Once your boots are planted, think about where to display them on your porch.

  • Line them up along the steps or walkway for a colorful path
  • Group them together near the front door as a cheerful welcome
  • Place a pair on a small wooden stool or crate for added height
  • Hang smaller boots from porch railings for a creative vertical garden

Picture This

A vintage wooden crate sits in the corner of the porch, holding a pair of baby blue rain boots overflowing with lavender. Below, two more boots—one bright red, the other sunshine yellow—are lined up beside the door, their petunias spilling over the tops. The arrangement is playful, colorful, and full of spring charm.

5. Add the Final Touches

Colorful rain boots used as planters line up with plants inside. Each boot is adorned with a striped ribbon and fairy lights. A sign reads: DIY Rain Boot Planters: Add The Final Touches. A pastel-striped background enhances the scene.

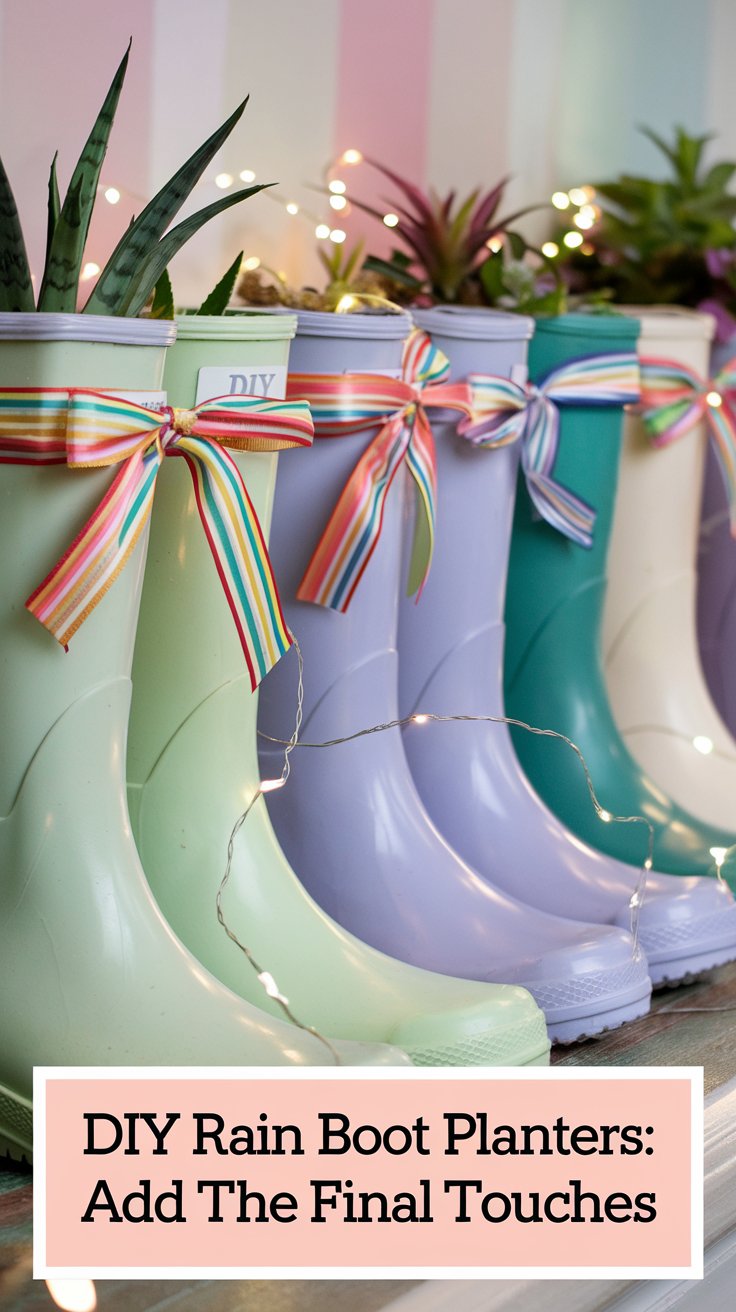
A few extra details can take your rain boot planters to the next level.

  • Tie ribbons or twine around the tops for a charming touch
  • Add small garden stakes with handwritten plant names
  • Mix in lanterns or fairy lights for a cozy evening glow
  • Use different boot sizes to create a dynamic display

Picture This

A row of pastel-colored rain boots sits neatly along the porch railing, each one tied with a thin satin ribbon in a matching hue. Tiny metal garden stakes peek out from the soil, marking each plant with handwritten labels. As the sun sets, a string of fairy lights wrapped around the porch beams casts a warm, magical glow over the playful arrangement.

Final Thoughts

Colorful rain boots repurposed as planters, filled with vibrant flowers, sit on a wooden surface against a green, grassy background. Text above reads DIY Rain Boot Planters - step-by-step guide.

Rain boot planters are a fun, easy way to add personality to your front porch this spring. They bring color, charm, and a touch of whimsy to your outdoor space while repurposing old boots in a creative way. Whether you go for bold and bright or soft and subtle, these DIY planters will make your entryway feel fresh and inviting.

Are you trying this idea for your porch? Let me know in the comments—I’d love to see your creative rain boot planter displays!

This website contains affiliate links. Some products are gifted by the brand to test. As an Amazon Associate, I earn from qualifying purchases. The content on this website was created with the help of AI.

Previous Post

10 Southern Home Kitchen Features Every Cook Will Love

Next Post

Cat Activity Tree: Scratching Post

Related Posts

Discover 21 cozy wood slice crafts, from elegant wall art and charming garlands to creative snack trays and coasters—rustic DIY projects with boutique-worthy style.
Crafts

21 Cozy DIY Wood Slice Crafts That Bring Instant Rustic Vibes

May 22, 2025

Whether you're decorating your home, gifting something handmade, or just want that warm, cozy texture layered into your space—these cozy...

quilted pot holders
Sewing

Design Your Own Quilted Pot Holders

May 21, 2025

Create beautiful and functional quilted pot holders with our step-by-step guide. Learn essential techniques, fabric selection tips, and creative patterns...

Transform thrifted finds into profit by styling a mid-century modern sideboard with vintage decor—think lamps, books, greenery, and art—for an eye-catching look that can earn you $100 or more.
Crafts

How to Make $100 in a Weekend Flipping Thrift Store Junk into ‘Vintage Decor’

May 20, 2025

Discover expert tips for styling flipped furniture to sell quickly,

I Never Expected These DIY Flowers to Make Such a Big Impact
Crafts

I Never Expected These DIY Flowers to Make Such a Big Impact

May 22, 2025

Transform your home with these stunning diy dried flower projects that add natural elegance to any space. From wreaths to...

A vintage-themed workspace with a typewriter, notebooks, and dried flowers on a wooden table. Bottles and books are arranged neatly. Text overlays the image: 15 charming vintage craft ideas to bring nostalgia to your home décor.
Crafts

I’m Bringing Vintage Vibes Back with These 15 Charming Craft Ideas

May 7, 2025

Whether you're a seasoned DIYer or just dipping your toes into the world of crafting, these vintage-inspired ideas are the...

Transform your space with an easy DIY Boho wall hanging—crafted from dollar store supplies in earthy cream, brown, and rust tones, attached to a rustic twig. Surrounded by cozy yarns and simple tools, this charming project brings effortless boho flair to any room.
Crafts

This DIY Boho Wall Hanging Only Looks Expensive (But It’s Made with Dollar Store Supplies)

May 7, 2025

You’ve seen them. Those woven, tasseled wall hangings that scream high-end Etsy shop or $80 boutique splurge. But what if...

Next Post
Cozy living room with a cat activity tree featuring a scratching post. Various cats play on the trees multiple levels and small house. A beige sofa, chairs, and a round coffee table furnish the room, while large windows let in soft natural light.

Cat Activity Tree: Scratching Post

No Result
View All Result

Lori Ballen

A cheerful woman enjoys a sunny day outdoors in her suburban neighborhood, radiating warmth and relaxation.

Hi! I’m Lori Ballen. I’m a midlife creator who finds joy in home projects, cozy spaces, effortless style, and simple-but-delicious recipes. I started this lifestyle blog as my personal outlet—a place to create, explore, and share what I’m loving right now.

I live in Las Vegas and travel often, especially on solo adventures and cruises that feed my love for freedom and discovery. When I’m not writing or filming, I’m probably hanging out at home with my two adopted cats—one spunky and playful, the other a total lap lover. They’re constant companions in my quiet, creative life.

This blog is a reflection of that life—equal parts fun, functional, and full of soul. Whether you’re looking for a new DIY idea, a comfy outfit, or a quick dinner recipe, I hope you find inspiration here to create a home and lifestyle you love.

Recent Posts

  • Laura Geller Blush Serum Review
  • 21 Cozy DIY Wood Slice Crafts That Bring Instant Rustic Vibes
  • Backyard Party Ideas That Don’t Feel Like a Kid’s Birthday
  • Boho Bridal Shower Ideas That Feel Stylish, Not Tacky
  • Design Your Own Quilted Pot Holders
  • How to Make a DIY Junk Journal (Beginner-Friendly Guide)
  • How to Set Up a Garage Sale That Actually Sells
  • How to Paint a Boho Rainbow “Choose Joy” Tote Bag (Step-by-Step DIY)

RSS Product Reviews

  • This would be the swimsuit I would wear out when there’s gonna be kids in the area or I just overall
  • I meant to put this on my other channel but since it’s here, I’m just gonna leave it here
  • This is the 10-inch HexClad pan I use every single morning
  • Laura Geller makes a makeup primer that she calls spackle and each of her speckles do something
  • It doesn’t match, but somehow it’s still working
  • This is one of those tools you didn’t know you needed until you needed it
  • You don’t really wanna quit
  • It looks like a luxury lipstick feels like a BALM and gives that juicy done look in one swipe the
  • My Secret To Even Cooking Revealed! Hexclad Pans!
  • Is This the Perfect Makeup for Mature Skin? Laura Geller Cult Classics
  • About Us
  • Affiliate Disclosure
  • Privacy Policy
Author: Lori Ballen

© 2023 Ballen Publishing

No Result
View All Result
  • Crafts
  • Fashion
  • Food Ideas
  • Games
  • Holidays and Special Occassions
  • Home and Garden Ideas
  • Home Decor
  • Homesteading
  • Lifestyle
  • Pets

© 2023 Ballen Publishing