This website contains affiliate links. Some products are gifted by the brand to test. As an Amazon Associate, I earn from qualifying purchases. The content on this website was created with the help of AI.
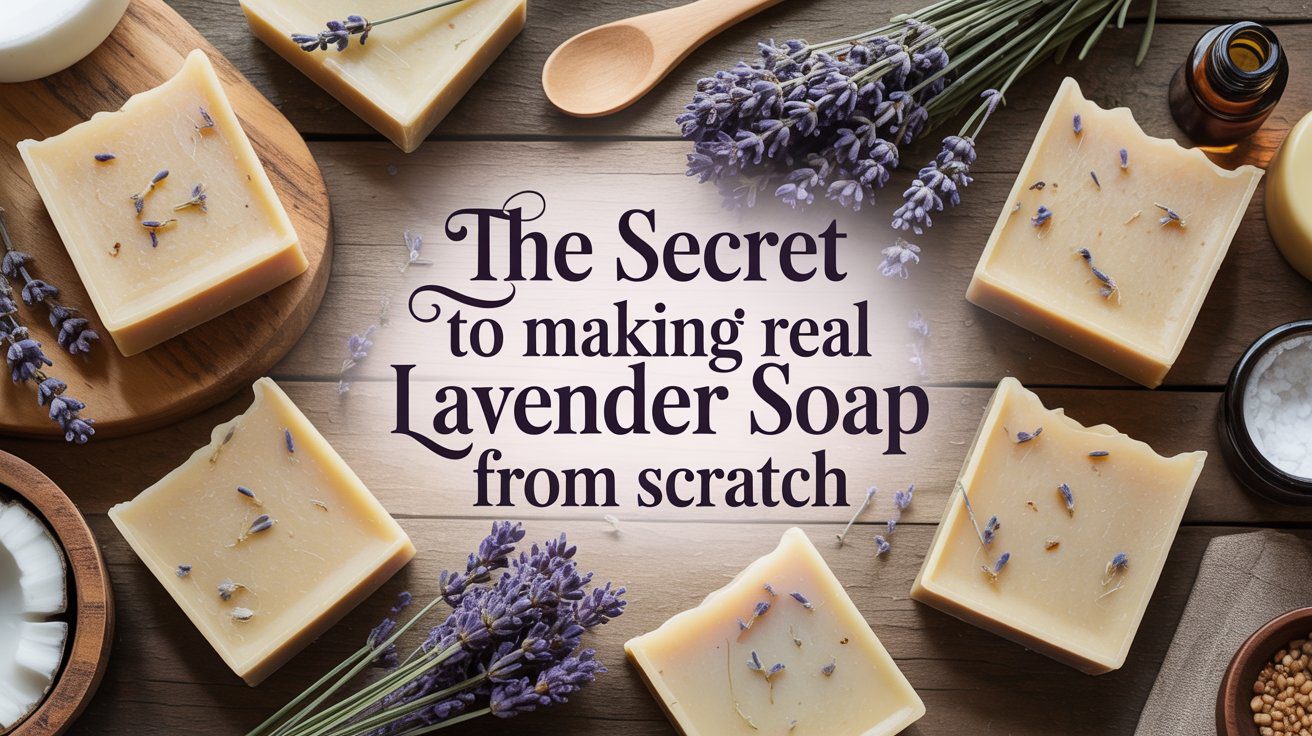
I always thought making beautiful, fragrant soap bars was for experts who messed with scary chemicals and complicated gear. The whole idea felt totally out of my league, something reserved for artisans. But what if you could make stunning, all-natural soap bars, scented exactly how you like, right in your own kitchen? And what if the process was actually simple, safe, and seriously rewarding? This super-easy melt-and-pour recipe proved me completely wrong, and today, I’m walking you through the entire thing, step-by-step. We’re about to take all the mystery out of soap making and have a ton of fun doing it.
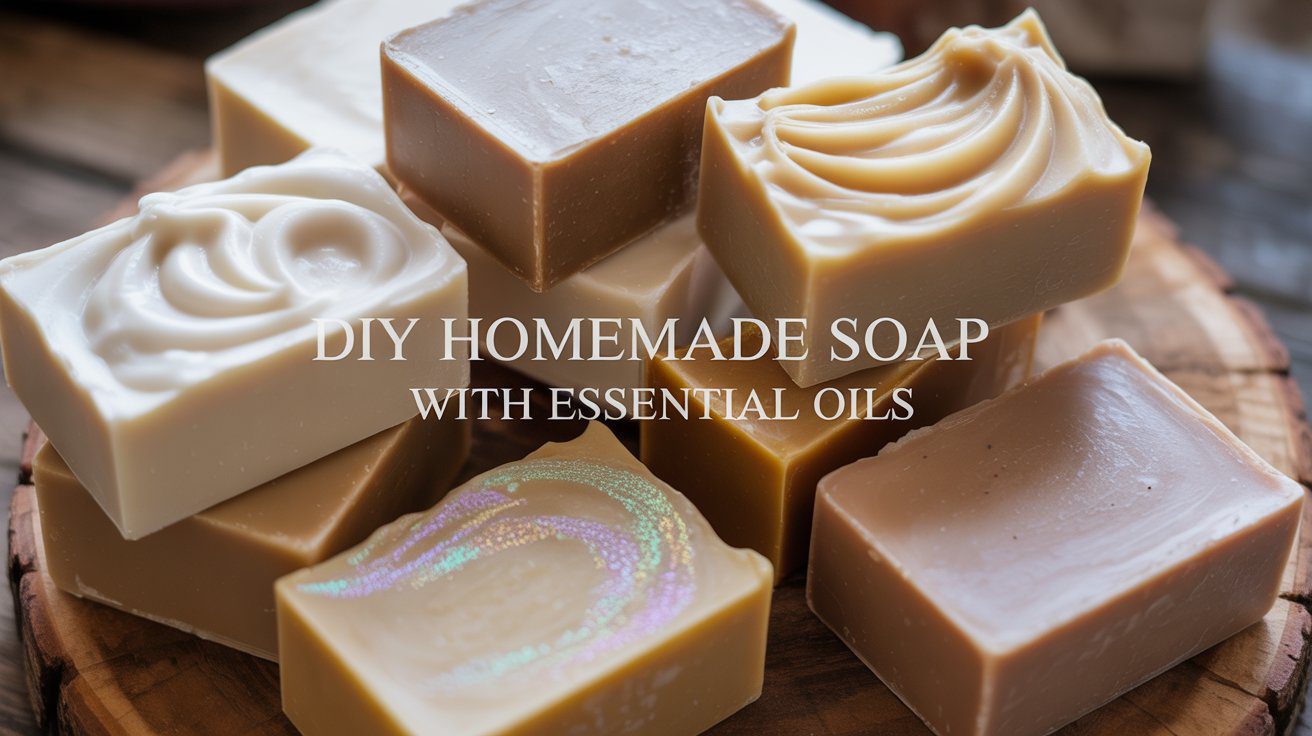
Forget everything you think you know about making soap—the intimidating chemistry and the long curing times. Our secret weapon today is the melt-and-pour method. It’s the perfect way to start because all the tricky, science-y stuff—the saponification process with lye—has already been done. All we have to do is melt a ready-made soap base, add our own personal flair with amazing essential oils and skin-friendly goodies, and pour. It’s that easy. In just a couple of hours, you’ll have a set of gorgeous, DIY homemade soap bars with essential oils ready to go, perfect for gifting or just making your daily shower feel like a spa.
Your Shopping List: Gathering Tools and Ingredients
Before we get to the fun part, let’s get organized. Having everything ready to go makes the whole process a breeze. Think of it as your mise en place for soap making.
Soap-Making Supply List
- Melt-and-Pour Soap Base – 10–16 oz. Choose goat’s milk, shea butter, honey, or clear glycerin.
- Essential Oils – Lavender, sweet orange, peppermint, eucalyptus, rosemary, or blends of your choice.
- Vitamin E Oil – ¼ teaspoon for moisturizing and extending shelf life.
- Optional Add-Ins:
- Skin-safe mica powders for color
- Two tablespoons of honey for moisture
- Ground oats, fine sea salt, or coffee grounds for exfoliation
- Dried lavender buds or rose petals for decoration
- Tools:
- Heat-safe glass mixing bowl or large glass measuring cup
- Sharp knife and cutting board
- Silicone spatula or wooden spoon
- Kitchen scale for accuracy
- Thermometer (optional but helpful)
- Silicone soap molds (rectangular or decorative shapes)
- Spray bottle with rubbing alcohol (for a smooth, bubble-free finish)
- Cooling rack and parchment paper for drying
- Plastic wrap or shrink wrap for storage and gifting
The Base
The star of the show is the soap base. You’ll need about 10 to 16 ounces of a melt-and-pour base. They come in all kinds of options, like creamy goat’s milk, shea butter, honey, or a simple clear glycerin. I’m using a goat’s milk base today because it feels wonderfully creamy and moisturizing, but pick whatever speaks to you. You can find these easily at craft stores or online.
The Fragrance
Next, the essential oils. This is where you get to play perfumer. Now, this is important: the amount you can safely use depends entirely on the specific oil. A general starting point for many gentle oils, like lavender, is 20-40 drops per 10-ounce batch, but some oils, like cinnamon or clove, are much stronger and have very low usage limits. Always check the IFRA (International Fragrance Association) guidelines for each oil you use to find the maximum safe percentage for rinse-off products, which fall under “Category 9.”
The Add-ins
For an extra conditioning boost and to help prevent the oils from going rancid, we’ll add a quarter teaspoon of vitamin E oil. While it helps extend the shelf life of the oils, it’s not a preservative that stops bacteria, but melt-and-pour soap generally doesn’t need that if you store it properly. Optionally, you can grab some colorants and other additives. Skin-safe mica powders add beautiful color and shimmer, while two tablespoons of honey can add moisture, and ground oats offer gentle exfoliation.
The Tools
You’ll also need your tools. A simple kitchen scale is a must for accuracy. Grab a heat-safe glass mixing bowl or a large measuring cup—glass is best because some oils can damage plastic. You’ll need a sharp knife and cutting board to chop the base, and a silicone spatula or wooden spoon for stirring. Of course, you need a soap mold. Silicone molds are fantastic because they’re flexible, which makes popping the finished bars out super easy. Finally, have a small spray bottle filled with rubbing alcohol (isopropyl alcohol) nearby. This is the secret weapon for a professional, bubble-free finish.
Step 1: Getting Started – Prep and Melt
With all our supplies gathered, it’s time to make soap! First things first, set up your workspace in a well-ventilated area. Make sure your molds, bowls, and tools are clean and totally dry.
Start by prepping the soap base. Using your knife, carefully chop the base into small, one-inch cubes. The smaller and more uniform the pieces, the faster and more evenly they’ll melt.
Now, let’s melt. You can use a double boiler on the stove, but the microwave is usually the quickest way to go for beginners. Pop your soap cubes into your heat-safe glass bowl. Here’s the most important tip for this stage: melt in short bursts. Heat the base in the microwave for just 30 seconds at a time. After each interval, take it out and give it a gentle stir. You’ll see it start to get slushy. Keep doing this—30 seconds of heat, then stir—until it’s almost completely melted. If you just have a few small lumps left, don’t nuke it again; just keep stirring, and the residual heat will finish the job.
Whatever you do, don’t overheat the soap base. If it starts to boil or get foamy, it’s too hot. Overheating can make the final texture rubbery and weird, and it can even smell a little burnt. You’re aiming for a smooth, liquid consistency that’s not steaming, ideally below 160°F (about 71°C). A little patience here goes a long way.
Step 2: The Creative Heart – Adding Fragrance and Color
Okay, this is my favorite part—where we turn a simple melted base into something special. Once your soap is smooth and melted, let it cool for a minute or two. If you add your essential oils when the base is scorching hot, the beautiful scents can just evaporate away. Waiting until the temperature is around 140-150°F is a good rule of thumb.
Now, let’s talk scents! The possibilities are endless. Pure lavender oil is a classic for a reason—it’s so calming. For a bright, energizing morning bar, try a blend of sweet orange and peppermint. For a spa vibe, you can’t go wrong with eucalyptus and rosemary. A great tip is to mix your essential oil blend in a separate small glass first. This lets the scents meld together before they hit the soap base, creating a more balanced aroma. Remember to stick to the safe usage rates for the specific oils you’ve chosen by checking their IFRA data. Stir the oils in gently but thoroughly to make sure they’re mixed all the way through.
If you’re adding color, now’s the time. For mica powders, a great trick is to dissolve the powder in a tiny bit of rubbing alcohol first to make a paste. This helps avoid clumps and gives you an even color. Add a little at a time and stir until you love the shade.
If you’re using other additives like honey, ground oats, or your vitamin E oil, stir them in now. Mix until everything is incorporated, but don’t go crazy with the stirring, or you’ll create extra air bubbles.
Step 3: The Final Steps – Pouring and Setting
With your beautifully scented and colored soap ready, it’s time to pour. But first, a quick trick: give your empty soap molds a light spritz with rubbing alcohol. This helps the liquid soap flow into all the nooks and crannies of the mold and prevents bubbles.
Now, slowly and steadily pour the soap base into each mold cavity. Pouring from a low height helps minimize bubbles too. Fill each mold right to the top.
Once you’re done pouring, you’ll probably see some small bubbles on the surface. That’s totally normal. Grab your spray bottle of rubbing alcohol and give the tops a light spritz. You’ll see the bubbles vanish instantly, leaving a perfect, glassy finish. It’s so satisfying to watch!
And now, the hardest part: waiting. The soap needs to cool and harden completely, which usually takes about one to two hours at room temperature. If you’re feeling impatient, you can pop the mold in the fridge for 30-45 minutes, but skip the freezer—it can make the soap crack or get sweaty.
Step 4: The Grand Reveal – Unmolding Your Soap
This is it, the moment of truth! Once your soap bars are completely firm to the touch, they’re ready to be unmolded. Gently pull the sides of the silicone mold away from the soap to break the seal. Then, flip the mold over and press on the bottom. The bar should pop right out.
Take a second to admire what you made. Check out that smooth finish and inhale the amazing fragrance you created. While the soap is technically ready to use right away, it’s a good idea to let the bars air-dry on a rack for about 24 hours. This helps any extra moisture evaporate, which makes for a harder, longer-lasting bar of soap.
Once they’ve aired out, wrap them up! Simple plastic wrap or shrink-wrap works great to protect them from moisture and lock in that scent until you’re ready to use them or give them as gifts.
Level Up: Customization and Pro-Level Tips
Once you’ve nailed this basic recipe, you can start getting really creative. Let’s talk about leveling up your soap game.
- Exfoliation: Try adding a tablespoon of fine sea salt, ground oatmeal, or even coffee grounds to your base.
- Decoration: You can sprinkle dried botanicals like lavender buds or rose petals on top of the soap right after you pour. Just be aware that some botanicals can turn brown if you mix them into the soap.
- Color Effects: Try layering different colored soaps. Pour your first layer, spritz it with alcohol, and let it set just until a firm skin forms. Then—and this is key—spritz that surface again with alcohol to help the layers stick together, and pour your next color on top. You can also make beautiful swirls by pouring two colors into the mold at once and gently zig-zagging a skewer through them. The trick to good swirls is a slightly cooler, thicker soap base, which will give you more defined lines.
- Suspension: A common beginner problem is having all your cool additives sink to the bottom. If you’re using something heavy like oats, let your soap base cool down and thicken up a bit before you stir them in. This little suspension trick helps keep them distributed evenly throughout the bar.
- Base Choices: A clear glycerin base is perfect for embedding little objects or for achieving bright, jewel-toned colors. A white base, like the goat’s milk I used, will give you softer, pastel shades.
Safety First: Working with Essential Oils
While we aren’t using lye, it’s still important to be safe, especially with pure essential oils. They are highly concentrated and should never be put directly on your skin without being diluted. Always make sure they are thoroughly mixed into your soap base.
Be mindful of potential skin sensitivities. Some oils, like cinnamon, clove, or lemongrass, can be irritating and must be used in very small, precise amounts, if at all. Citrus oils like bergamot can be phototoxic, meaning they can cause a skin reaction in sunlight, but since soap is a wash-off product, the risk is much lower. For peace of mind, always check the safety data for each specific oil. The IFRA standards are your best friend here, as they set the maximum safe usage levels for different products.
Always keep your essential oils away from kids and pets. Work in a well-ventilated space, and consider wearing gloves to avoid getting undiluted oils on your skin. Also, a bit of common sense—essential oils are flammable, so keep them away from open flames.
And there you have it—gorgeous, handcrafted soap, made by you, right in your own kitchen! We took a simple block of soap base and turned it into something truly special. It just goes to show, you don’t need to be an expert to create something amazing.
I hope this has inspired you to start your own soap-making adventure. It’s such a fun and rewarding hobby. Now I want to hear from you! What essential oil blends are you dreaming up? Let me know in the comments below. I’d love to hear your ideas!
If you had fun with this tutorial, feel free to share it with a friend. For your convenience, I’ve put the full list of ingredients and links to some of my favorite supplies below. Happy soap making
This website contains affiliate links. Some products are gifted by the brand to test. As an Amazon Associate, I earn from qualifying purchases. The content on this website was created with the help of AI.