This website contains affiliate links. Some products are gifted by the brand to test. As an Amazon Associate, I earn from qualifying purchases. The content on this website was created with the help of AI.
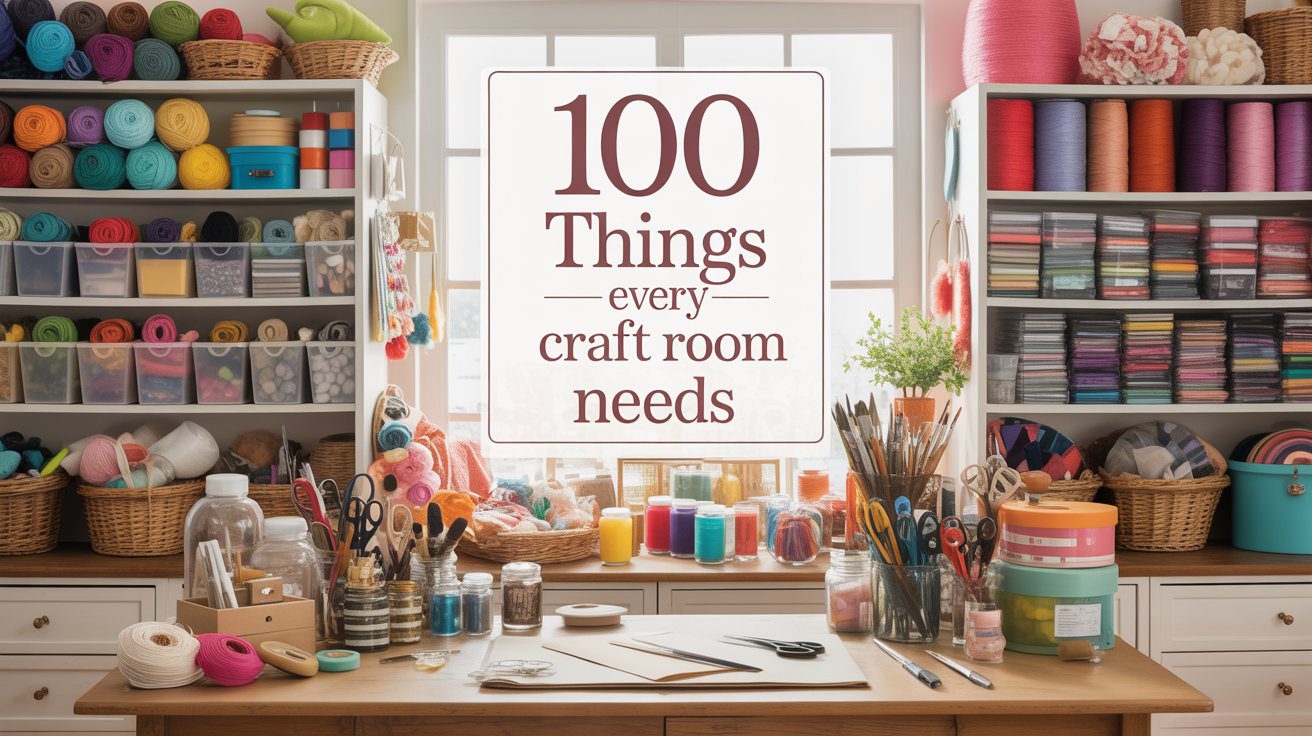
Let’s be honest. You’re staring at a room that looks like a craft store exploded, and your inspiration is… well, it’s buried under a pile of yarn and glitter. What if you could transform that creative chaos into your dream workstation, a place where everything has a home and your ideas can finally flow? In this guide, we’re tackling the ultimate checklist: 100 things every craft room needs to go from cluttered to truly creative. We’re covering it all, from must-have tools to genius storage that will completely change your crafting game. We have a lot to get through, so let’s jump in!
The Foundation: Workstation & Ergonomics
Alright, before we dive into the glitter and glue, we need to build the foundation of your creative craft room sanctuary. This is all about the core setup that makes crafting comfortable, efficient, and lets you work for hours without feeling wrecked.
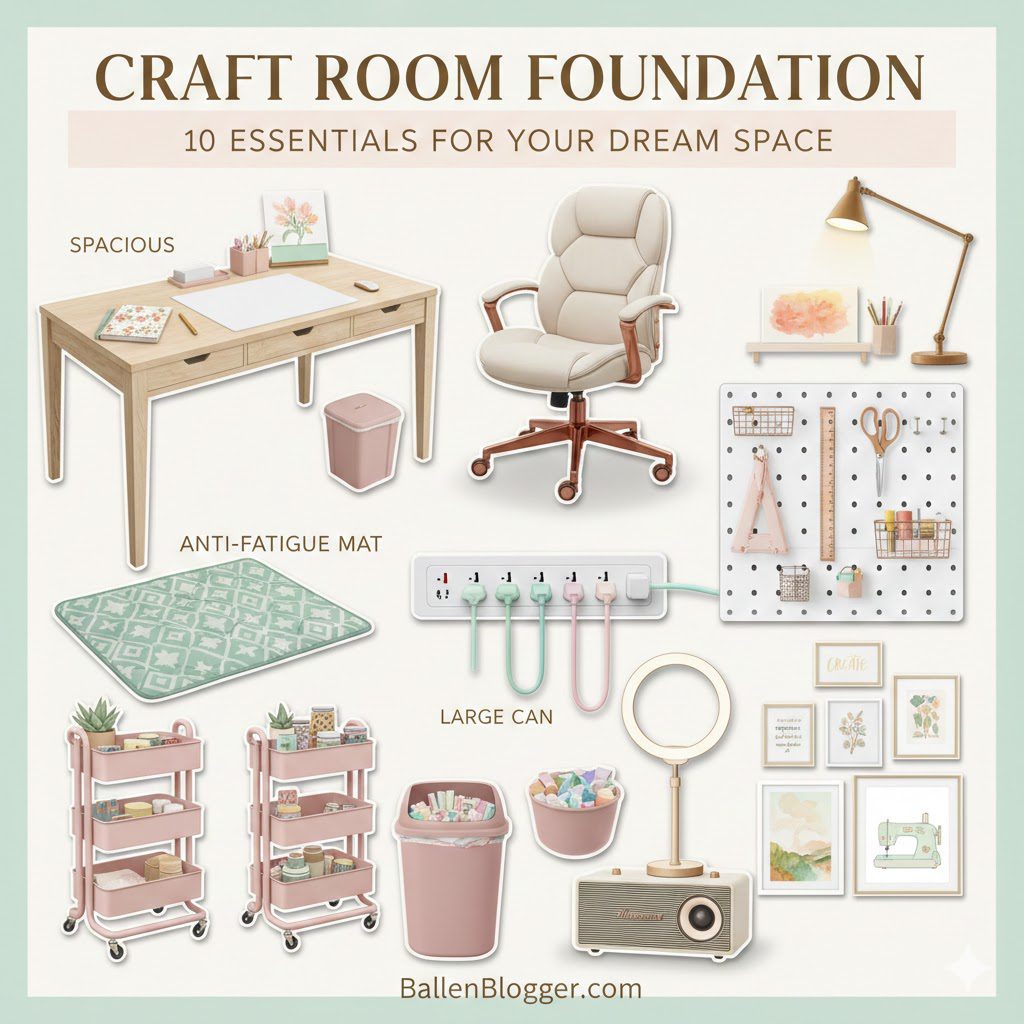
- A Spacious Desk. This is non-negotiable. With a small desk, you spend more time playing Tetris with your supplies than actually creating. A generously sized desk in your craft room gives you room to spread out, keeping your project, your tools, and your sanity all in one place. I’m a huge fan of a big, flat workspace where I can have a cutting mat, my project, and my tools all out without it feeling like a traffic jam.
- An Ergonomic Chair. You might think any old chair is fine, but after a three-hour craft-a-thon, your back will stage a protest. A bad chair cuts your creative time short with aches and pains. An ergonomic crafting chair gives you proper support, and if you snag one with wheels, you can glide effortlessly from your desk to your supplies. It’s an investment in your health and your hobby.
- An Anti-Fatigue Mat. If you’re someone who likes to work standing up, this is a total game-changer. Standing on a hard floor for hours is brutal on your feet and back. An anti-fatigue mat adds a layer of cushion that makes a world of difference, letting you work comfortably for much longer.
- Excellent Lighting. This is one of the most overlooked but critical elements. Poor lighting is the arch-nemesis of good crafting. It strains your eyes and makes it impossible to see true colors or tiny details. You need a two-pronged attack: good overhead ambient light and focused task lighting. A flexible desk lamp you can point directly at your work is an absolute must. Pro tip: use LED bulbs that mimic natural daylight; they show true colors and are way easier on the eyes.
- Dedicated Power Strips. Tell me if this sounds familiar: one outlet for the glue gun, the Cricut, the lamp, and your phone. Instead of constantly swapping plugs, get one or two heavy-duty power strips with surge protection. Mount one on the side of your desk for easy access and end the outlet Olympics for good.
- A Large Trash Can. Crafting is messy. Paper scraps, vinyl backings, and thread snips multiply like rabbits. A tiny, decorative wastebasket is just asking for an overflow situation. Get a substantial trash can and keep it right by your desk so you can toss as you go.
- A Separate Recycling Bin. So much of our craft waste is paper, cardstock, and cardboard. Keep a dedicated recycling bin next to your trash can. It’s a simple, easy way to make your hobby a little greener.
- Pegboard. Your wall space is prime real estate, so use it! A pegboard is the perfect solution for getting tools and supplies off your desk but still within arm’s reach. With a few hooks and baskets, you can create a custom, vertical storage system for scissors, rulers, and rolls of tape, keeping your workspace clear.
- A Mobile Storage Cart. There’s a reason these three-tiered rolling carts are everywhere—they’re amazing. They’re perfect for creating a mobile “station” for a specific craft. Load one up with your painting supplies, another with your vinyl, or use it to hold a project-in-progress. You can roll it right up to you while you work and tuck it away when you’re done.
- A Comfortable and Inspiring Environment. This isn’t one item, but it’s just as important. Your craft room should be a place you want to hang out. A sterile, boring room doesn’t spark joy or creativity. Add a cozy blanket, a speaker for music or podcasts, and art on the walls that inspires you. Let your personality shine through!
Cutting, Shaping & Measuring Essentials
Okay, let’s talk about the tools that help you cut, fold, and measure with precision. Getting these basics right is what gives your projects that clean, professional finish.
- High-Quality Scissors. And I mean multiple pairs. The cardinal sin of crafting is using one pair of scissors for everything. You need a dedicated pair for fabric (and only fabric!), another for paper, and a small, precision-tip pair for fussy cutting. Using your fabric shears on paper will dull them in a heartbeat—don’t do it!
- A Paper Trimmer. If you do any paper crafting at all, a paper trimmer is a non-negotiable. Trying to cut a perfectly straight line with scissors is a recipe for disappointment. A trimmer gives you a crisp, clean edge every single time, saving you time and frustration.
- A Rotary Cutter. For anyone who works with fabric, a rotary cutter is absolutely life-changing. It’s like a pizza cutter for textiles, letting you slice through multiple layers at once with incredible accuracy. Paired with a self-healing mat, it’s the fastest way to get perfect strips and squares.
- A Self-Healing Cutting Mat. This is the trusty sidekick to your rotary cutter and craft knife. Using those sharp tools directly on your desk will destroy the surface. A self-healing mat protects your workspace, and the surface magically “heals” after each cut. Plus, most have grid lines printed on them, which is a huge help for measuring.
- A Craft Knife. You probably know it as an X-Acto knife, and it’s essential for making precise, intricate cuts that scissors just can’t handle. It’s perfect for stencils, detailed paper art, or weeding tiny pieces of vinyl. A sharp blade is key here, both for safety and for getting clean cuts.
- A Metal-Edge Ruler. Why a metal edge? Because if you use a craft knife with a plastic or wooden ruler, you’ll inevitably shave off bits of the ruler, ruining your straight edge. A ruler with a metal edge stands up to the blade and gives you a reliable guide for cutting and measuring.
- A Flexible Measuring Tape. A rigid ruler is great for flat surfaces, but a flexible measuring tape is a must for measuring anything with curves. It’s indispensable for sewing, measuring a tumbler for a decal, or any other 3D project.
- A Bone Folder. This is one of those tools you don’t think you need, but once you have one, you’ll use it constantly. Folding cardstock with your fingers creates a soft, kind of sad-looking crease. A bone folder gives you a sharp, crisp, professional fold every single time. It’s a game-changer for card making.
- A Scoring Board. To take your folding to the next level, a scoring board is fantastic. It has evenly spaced grooves that let you create a perfect score line before you fold. This prevents cardstock from cracking and ensures your folds are exactly where you want them. It’s key for making boxes, envelopes, and fancy multi-fold cards.
- Needle-Nose Pliers. These are surprisingly useful for all sorts of crafts. They’re perfect for jewelry making, bending floral wire, or even just picking up and placing tiny, fiddly embellishments with precision.
- Wire Cutters or Tin Snips. If you work with any kind of wire, you need a dedicated pair of cutters. Please, I’m begging you, do not use your good craft scissors on wire! You will ruin them instantly. A sturdy pair of wire cutters will slice through it with ease and save your scissors from a tragic fate.
- A Staple Remover. You might think this belongs in an office, but a staple remover is a lifesaver for DIY projects. It’s great for de-upholstering furniture or removing a misplaced staple from a wood project without gouging the surface. The jaw-style ones work way better than the little claw ones.
- A Mini Sander or Sanding Sponges. For anyone working with wood or who just loves that distressed, rustic look, sanding tools are a must. A small orbital sander is great for big jobs, but a variety pack of sanding sponges is perfect for smaller crafts and for getting into nooks and crannies.
- Miter Shears. This is a bit more of an advanced tool, but if you work with small wood trim or dowels, miter shears are incredible. They let you make clean, angled cuts for things like small picture frames without needing a giant saw.
- A Good Set of Hole Punches. Think beyond the standard single-hole punch. A screw punch lets you cleanly make holes of different sizes, and a long-reach hole punch is great for setting tags in the middle of a page. They are essential for making banners, gift tags, and binding little books.
Section 3: The Ultimate Adhesive Arsenal
Next up, let’s get sticky! Nothing is more heartbreaking than a project that falls apart because the glue gave up. Having a variety of adhesives on hand ensures your creations will hold together for the long haul.
- A Hot Glue Gun. This is the undisputed workhorse of the craft room. I recommend having two: a high-temp, full-size gun for a strong bond on wood and fabric, and a low-temp detail-tip gun for delicate stuff like foam or ribbon that might melt. Some personal favorite brands for reliability are Surebonder and Gorilla.
- Quality Glue Sticks. Your glue gun is only as good as the glue you feed it. Don’t cheap out here! I’m a huge fan of Gorilla Glue sticks because they offer a much stronger, more durable bond than a lot of the generic brands. Keep a big bag of them on hand so you never run out mid-project.
- Mod Podge. The legend! Mod Podge is brilliant because it’s a glue, a sealer, and a finish all in one. It’s perfect for applying paper or fabric to pretty much any surface. It comes in different finishes like matte, gloss, and sparkle, so you can pick the perfect one for your project’s vibe.
- Double-Sided Tape. An absolute must-have for paper crafters. It provides a strong, invisible bond with zero drying time and zero mess. It’s perfect for assembling cards and layering paper in scrapbooks when you need a clean, flat finish.
- Glue Dots. These are the perfect solution for attaching small, fiddly things like buttons, sequins, or tiny die-cuts. They give you a precise dot of strong adhesive exactly where you need it, with no mess.
- Spray Adhesive. When you need to cover a large area evenly, spray adhesive is your best friend. It’s great for mounting photos or adhering fabric to a large board. Just make sure to use it in a well-ventilated area and protect your surfaces, because that overspray loves to travel!
- All-Purpose Craft Glue. This is your go-to for general projects. A good tacky craft glue, like Aleene’s Original Tacky Glue, is incredibly versatile. I look for a glue that grabs quickly, dries clear, and doesn’t warp my paper.
- Industrial Strength Adhesive (like E6000 or Gorilla Clear Grip). For projects that need a serious, permanent, waterproof bond, you have to bring out the big guns. This is what you use for gluing non-porous surfaces like metal to glass or for projects that will see a lot of wear and tear.
- A Tape Runner. Another favorite for paper crafters, a tape runner is like a tiny dispenser that rolls out a thin, continuous line of adhesive. It’s super fast and easy for applying adhesive to the back of photos or paper layers.
- Washi Tape. Okay, is washi tape an adhesive or a decorative supply? Yes! It’s a low-tack paper tape that comes in a bazillion colors and patterns. It’s great for adding a quick border, labeling supplies in a cute way, or temporarily holding a die in place as it goes through your machine. It’s functional and fun.
Color & Creativity: Paints, Inks, and More
This section is all about breathing life and color into your projects! Whether you’re a painter, card maker, or mixed-media artist, having a good selection of coloring tools is key to unlocking your creativity.
- A Solid Set of Acrylic Paints. Acrylic paint is the chameleon of the craft world. It works on wood, canvas, fabric, paper—you name it. You don’t need a hundred colors. Just get a good set of primary colors plus black and white, and you can mix virtually any shade you need.
- A Selection of Spray Paints. For a quick, flawless coat of color on larger items, nothing beats spray paint. It’s also great for tricky materials like metal or plastic. Having black, white, and a metallic like gold or silver on hand is a great starting point.
- A Variety of Paintbrushes. You can’t paint without brushes! Having a range of sizes and shapes is key. You’ll want some flat brushes for covering large areas, round brushes for lines, and a few teeny-tiny detail brushes for that intricate work.
- A Watercolor Palette. Watercolors give you a beautiful, translucent effect that’s totally different from acrylics. They’re wonderful for paper crafts and illustration. A simple pan set is a great, easy-to-use place to start.
- Alcohol Markers. These are a major step up from your childhood markers. They blend like a dream without leaving streaks, letting you create smooth gradients and professional-looking art. There’s a reason card makers and illustrators are obsessed with them.
- A Collection of Ink Pads. If you’re into stamping, you know a good collection of ink pads is a must. Start with a high-quality black ink for your outlines, and then slowly build your rainbow of colored dye or pigment inks.
- Embossing Powder. This is pure magic in a jar. You stamp an image with a slow-drying embossing ink, sprinkle this powder on top, and hit it with a heat gun. The powder melts into a raised, glossy finish that adds incredible texture and shine.
- A Heat Gun. This is the mandatory partner for your embossing powder. A hairdryer just won’t cut it. A heat gun provides a concentrated blast of hot air that melts the powder perfectly. It’s also handy for drying paint or glue in a pinch.
- A Mix of Stamps. Stamps are a fantastic way to add repeatable, detailed images to your work. They come in two main styles: traditional wood-mounted rubber stamps and clear photopolymer stamps that you stick on a block. Both are great, and building a collection is half the fun.
- Acrylic Blocks. If you use clear stamps, you’ll need acrylic blocks. They’re clear blocks, often with gridlines, that the stamps temporarily cling to. This lets you see exactly where you’re stamping, which is a huge advantage for perfect placement.
- A Good Set of Colored Pencils. Don’t underestimate the humble colored pencil! A quality set is great for adding soft shading to stamped images or sketching out your designs. Look for a set with a soft, blendable core for the best results.
- Fine-Liner Pens. For journaling, doodling, or adding handwritten details, a set of black fine-liner pens in various tip sizes is indispensable. Get a waterproof, archival ink so it won’t bleed when you color over it with markers.
- Chalk or Soft Pastels. These are wonderful for creating soft, blendable backgrounds on paper. You can scrape a bit of pastel onto your project and blend it out with a cotton ball for a dreamy, ethereal look.
- Glitter. Yes, it’s messy. But is a craft room even complete without it? The trick is to have a system. Get some fine glitter for a subtle shimmer and some chunky glitter for bold statements. Store it in well-sealed shakers and just… embrace the sparkle.
- Embossing Folders. These are plastic folders with a pattern inside. You sandwich a piece of cardstock in the folder and run it through a die-cutting machine. The result is a beautiful, textured pattern pressed right into your paper. It’s such an easy way to add dimension to card backgrounds.
Surfaces & Substrates: The Canvas for Your Creativity
Now that we have all these amazing tools and colors, we need things to put them on! This section is all about the surfaces and substrates—the blank canvases just waiting for your creative touch.
- Good Quality Cardstock. This is the backbone of any paper crafter’s collection. You’ll want a ream of heavyweight (80-110 lb) white cardstock for card bases, plus a variety of your favorite colors.
- Patterned Scrapbook Paper. A few patterned paper pads are a source of endless inspiration. They come in coordinated themes, making it super easy to create beautiful, cohesive projects, from scrapbook pages to party decorations.
- A Roll of Kraft Paper. Kraft paper is a workhorse. You can use it to protect your desk, as rustic-chic gift wrap, or as a sturdy base for mixed-media art. It’s inexpensive and has a great, earthy texture.
- Tissue Paper. Don’t just save it for gift bags! Colorful tissue paper is fantastic for decoupage, creating a delicate, layered look. It’s also great for making paper flowers and pom-poms.
- Wax Paper. This is a secret weapon. Use it as a non-stick surface when working with glue. You can also iron it between two pieces of paper for a cool, translucent effect. Plus, it’s great for protecting surfaces from ink.
- Vinyl (Both Adhesive and Heat Transfer). If you have a cutting machine, vinyl is a must. Adhesive vinyl is basically a fancy sticker, perfect for decorating mugs and walls. Heat Transfer Vinyl (HTV) is for fabric, letting you make custom t-shirts and tote bags. A variety pack is a great way to start without committing to huge rolls.
- A Stack of Canvases. For painters, having a few canvases in different sizes ready to go means you can create the moment inspiration strikes. And they’re not just for paint! Cover them with fabric or paper for unique home decor.
- A Stash of “Blanks”. “Blanks” are just plain, undecorated items waiting for you to customize them. Think plain cotton t-shirts, ceramic mugs, acrylic keychains, and blank tumblers. Having a variety on hand means you’re always ready for a new project.
- Popsicle Sticks / Craft Sticks. Never underestimate the power of a craft stick! They’re great for kids’ crafts, of course, but also for building small structures, making little signs, or just for mixing paint and resin.
- Wood Slices and Shapes. Those blank wood slices, tags, and shapes you see at the craft store are perfect little canvases. You can paint them, wood-burn them, or cover them in vinyl to make ornaments, coasters, and gift tags.
The Digital Crafting Corner
In today’s world, technology plays a huge role in crafting. This section is for the essential digital tools that can take your creative projects to a whole new level.
- A Digital Cutting Machine. This is probably the biggest investment on the list, but it opens up a universe of possibilities. A machine like a Cricut or Silhouette can cut paper, vinyl, fabric, and so much more with incredible precision. It’s the key to everything from custom t-shirts to intricate paper art.
- A Reliable Computer or Laptop. Your cutting machine is only as powerful as the software that runs it. You need a reliable computer that can handle the design software without lagging, so you can create and edit your designs without wanting to throw it out a window.
- A Good Quality Printer. If you want to do “Print Then Cut” projects with your cutting machine, a good printer is a must. An inkjet printer that can handle heavier cardstock is a fantastic choice for this.
- Weeding Tools. If you work with vinyl, weeding tools are non-negotiable. “Weeding” is the oddly satisfying process of removing all the excess vinyl from your cut design. A set usually includes a hook or a pick for pulling away the tiny pieces. A weeding pen is also a brilliant tool for popping out small details.
- Transfer Tape. This is the final piece of the vinyl puzzle. Transfer tape is a sticky sheet that you lay over your weeded design. It lifts the entire design off its backing paper, holding everything perfectly in place so you can transfer it to your final surface.
Organization Station: Big Storage Solutions
Now we get to the part that truly transforms a space: storage! Let’s start with the big furniture pieces that will become the backbone of your organized craft room. Remember, the goal is to give everything a home.
- Shallow Drawer Units (like IKEA ALEX). There’s a reason you see these in every craft room tour. Shallow drawers are infinitely better than deep bins for small supplies. In deep drawers, things just get lost in a jumbled pile. Shallow drawers let you see everything in a single layer. They are perfect for paper, vinyl, and tools.
- An All-in-One Craft Armoire (like the DreamBox). This is the ultimate dream for many crafters. It’s a large cabinet that opens up to reveal a massive, customizable storage system with tons of clear totes, shelves, and a fold-out desk. It lets you have a fully stocked craft room that you can close up and hide away.
- Cube Storage Units (like IKEA Kallax). Another craft room staple, these cube units are super versatile. The cubbies are perfect for holding fabric bins, magazine files, or stacks of yarn. They’re affordable and you can configure them in tons of different ways.
- Bookshelves. Don’t forget about classic bookshelves! Open shelving is great for storing things you want to see and access easily, like jars of buttons, stacks of fabric, or your favorite craft books.
- Wall-Mounted Shelves. Go vertical! Floating shelves are a fantastic way to get supplies up off your floor and workspace. They’re great for storing paint bottles or rolls of ribbon, turning your storage into part of the decor.
- A Dedicated Paper Storage System. If you’re a paper crafter, you know the struggle is real. 12×12 paper gets wrinkled and the corners get bent so easily. A dedicated paper storage unit, whether it’s vertical slots or horizontal trays, is essential to keep your paper flat and pristine.
- A Filing Cabinet. This might seem like an office supply, but a filing cabinet can be an amazing craft storage tool. The drawers are the perfect size for storing stencils, unmounted stamps, or even scraps of vinyl and paper sorted by color in hanging folders.
- Large Bins or Baskets for Soft Goods. For bulky items like yarn, stuffing, or bolts of fabric, large, open-top bins or woven baskets are perfect. You can tuck them under a table or on a bottom shelf for easy access.
- A Ribbon Organizer. Rolls of ribbon can quickly devolve into a tangled nightmare. A ribbon organizer, whether it’s a dowel rod system on the wall or a dedicated box, keeps your ribbons neat, tidy, and easy to dispense.
- A Closet Storage System. If your room has a closet, don’t just shove things in it! Maximize that space with a closet system. A combination of shelves, drawers, and rods can store everything from fabric to extra supplies. An over-the-door organizer is also great for small items.
Organization Station: Small Supplies & Hacks
We’ve handled the big furniture; now let’s zoom in on the clever hacks that tame all those tiny supplies. This is where you can get really creative and tailor your system to you.
- Clear Acrylic Containers. Rule number one of good organization: if you can’t see it, you won’t use it. Clear containers, whether they’re stackable boxes or makeup organizers, let you see your supplies at a glance. This stops you from buying duplicates and makes finding things a breeze.
- A Label Maker. For any container that isn’t clear, a label maker is your best friend. Label everything! When you have dozens of identical boxes, labels are essential for knowing what’s inside without opening every single one. It saves a massive amount of time.
- Drawer Inserts and Dividers. Even in shallow drawers, small items can roll around and get jumbled. Drawer inserts and dividers create specific compartments for everything from beads and buttons to ink pads and washi tape, taming the chaos.
- Desktop Tool Caddies. For the tools you use every single time—like scissors, craft knives, and weeding tools—a desktop caddy is perfect. A rotating one is even better because you can spin it to grab exactly what you need.
- Marker and Pen Stands. It’s often recommended to store markers horizontally to keep the ink flowing evenly. A dedicated marker stand keeps them neat, horizontal, and makes it easy to see all your colors at once.
- Project Pockets or Pouches. To keep all the pieces of a work-in-progress together, clear project pouches are a lifesaver. You can toss your paper, stamps, and embellishments for one project in a single pouch, making it easy to pick up where you left off.
- Magnetic Bowls. If you work with tiny metal items like pins, paper clips, or small dies, a magnetic bowl is a genius hack. It keeps them all corralled and prevents them from getting lost on your desk.
- Spice Racks. Wall-mounted spice racks aren’t just for the kitchen! They are the perfect size for holding small craft paint bottles, glitter jars, or embossing powders, getting them off your desk and onto the wall.
- Jewelry Boxes. Old jewelry boxes or even fishing tackle boxes are perfect for organizing the tiniest embellishments, like beads, sequins, gems, and brads.
- Zip Ties and Binder Clips. These simple office supplies are organization powerhouses. Use zip ties to wrangle the cord jungle behind your desk. Use binder clips to hold fabric swatches together or to clip labels onto bins.
- Floral Wire. Beyond flower arranging, floral wire is great for bundling items, creating custom hangers for lightweight decor, or reinforcing parts of a project.
- Command Hooks and Strips. A must-have for damage-free organizing! Use hooks to hang tools and cutting mats on your wall, and use the strips to mount lightweight shelves or power strips without drilling any holes.
- Twine and Jute. These natural fibers are great for tying up bundles of dowels, wrapping around jars for a rustic look, or creating tags. They’re both a supply and an organization tool.
- Photo Boxes. Those inexpensive plastic photo boxes are great for more than just photos. They’re the perfect size for organizing greeting cards, sticker sheets, or keeping die sets and their matching stamps together.
- A Tabletop Vacuum. Crafting creates tons of little messes—glitter, paper dust, tiny scraps. A small, handheld vacuum is perfect for a quick cleanup of your workspace without having to pull out the big vacuum.
Finishing Touches & Embellishments
This category is all about the little extras that take a project from “nice” to “WOW!” These are the decorative bits and final finishes that add personality and a professional polish.
- A Clear Sealant or Varnish. After you’ve spent hours on a project, you want it to last. A spray-on clear acrylic sealer protects your work with a durable finish. It comes in matte, satin, or gloss, so you can choose your desired level of shine.
- Raffia. This natural fiber adds a wonderful, rustic texture to projects. It’s perfect for tying around jars, making bows for wreaths, or adding a natural touch to gift wrap.
- A Variety of Beads, Gems, and Sequins. A collection of sparkly bits is essential for adding that final touch of bling. You can glue them to paper crafts, sew them onto fabric, or use them to make jewelry.
- A Jar of Buttons. Never throw away the extra buttons that come with new clothes! Start a button jar. Buttons add a charming, homespun feel to almost any project, from pillows to picture frames.
- Faux Clay Sprinkles. These are a really fun and trendy embellishment right now. They look like tiny dessert sprinkles and are perfect for adding a playful, textural element to “fake bake” projects or shaker cards.
The Clean-Up & Maintenance Crew
Last but not least, let’s talk about the items that help you clean up the creative chaos and maintain your tools. A clean-as-you-go habit makes crafting so much more enjoyable.
- A Big Container of Wet Wipes. These are a crafter’s best friend. They’re perfect for quickly cleaning up small paint or glue spills, wiping ink off your hands and stamps, or even for distressing chalk paint. Keep them within arm’s reach.
- Microfiber Cloths. For dusting shelves and wiping down machines without leaving lint behind, microfiber cloths are fantastic. They’re reusable and great for keeping your creative space clean.
- A Handheld Dustbuster or Wet/Dry Vac. For bigger messes—like a glitter explosion or a pile of wood shavings—a small, powerful handheld vacuum is way more effective than a tiny tabletop one. A wet/dry model is even better for handling surprise spills.
- A Lint Roller. If you work with fabric, felt, or yarn, you know that lint gets everywhere. A lint roller is perfect for a quick cleanup of your clothes and your worksurface.
- A Dedicated Sink, if Possible. This is the ultimate dream for messy crafters. Having a sink right in your craft room for washing brushes, hands, and tools makes cleanup infinitely easier. If a sink isn’t possible, keeping a small tub or basin for washing brushes is the next best thing.
Conclusion
And there you have it—the ultimate checklist of 100 things to transform your craft room into a creative powerhouse! I know, 100 items is a lot. Please do not feel like you need to run out and buy all of this at once. Building a well-stocked craft room is a journey, not a race. Start with the basics for the crafts you love, and add to your collection over time.
The real goal here is to create an organized space where finding your tools is easy and stress-free. When you’re not fighting the clutter, you have so much more mental energy to just make beautiful things.
This website contains affiliate links. Some products are gifted by the brand to test. As an Amazon Associate, I earn from qualifying purchases. The content on this website was created with the help of AI.