This website contains affiliate links. Some products are gifted by the brand to test. As an Amazon Associate, I earn from qualifying purchases. The content on this website was created with the help of AI.
These bracelets look clean and professional, like they belong in a high-end boutique. But here’s the secret: they weren’t bought. They were made. The key to creating bracelets that don’t just look good, but actually sell, isn’t just about the beads you pick. It’s all in the technique. It’s the small details that turn a simple hobby into a profitable product.
Many aspiring jewelry makers know the frustration. You’ve followed tutorials, bought the supplies, and spent hours stringing beads, but the finished bracelets still look a little… homemade. Maybe they snap after a few wears, or you can never quite hide that clumsy knot. Worst of all, when you try to sell them, you’re met with crickets. These are common mistakes that trip up even experienced crafters. So in this guide, we’re not just doing another tutorial. We will cover the exact professional method used for best-selling bracelets and fix those mistakes for good. We’ll focus on the three things that make a bracelet sellable: professional materials, a flawless and unbreakable knot, and the secrets of minimalist design that customers can’t resist.
Part 1: Professional Materials Make the Difference
Before we touch a bead, we must talk about materials. This is, hands down, the step most people rush, and it’s the number one reason their bracelets can look cheap and eventually fail. Using low-quality craft store supplies is like trying to build a house with sand—it’s just not going to hold up.
First is the heart of the bracelet: the cord. For professional, durable, and sleek bracelets, you need a high-quality, clear stretch cord. A 0.7mm stretch cord is an excellent choice as it hits that perfect sweet spot between strength and subtlety. It’s tough enough to last, but thin enough to hide the knot inside a bead, making your finish completely seamless. While 1.0mm cord is often recommended for its strength, it can be too bulky for smaller 4mm or 6mm beads, and hiding that knot is a challenge.
For delicate, minimalist work, 0.7mm is the pro’s choice. A non-negotiable step is to always pre-stretch your cord. Take your cut piece and give it a few firm, gentle pulls along its entire length. This gets rid of the initial over-stretch and stops your bracelet from sagging after just a few wears. This tiny step is a total game-changer.
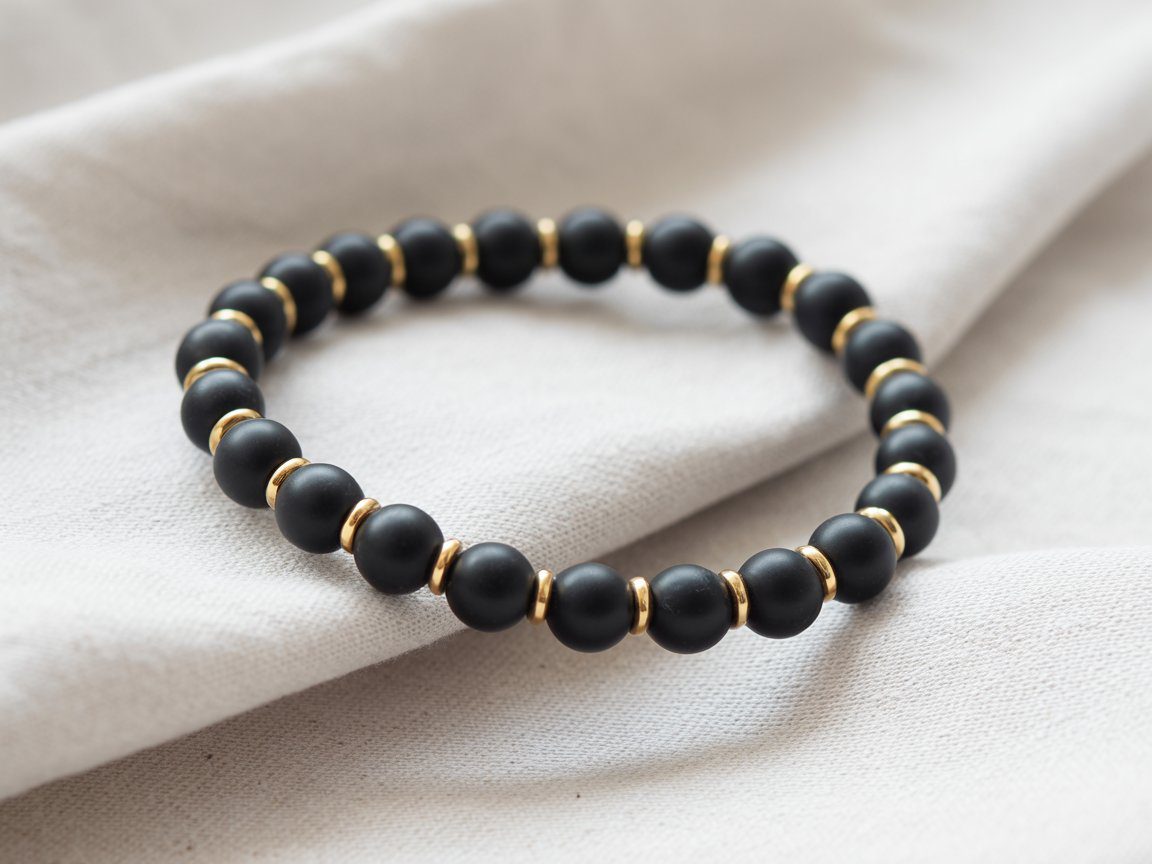
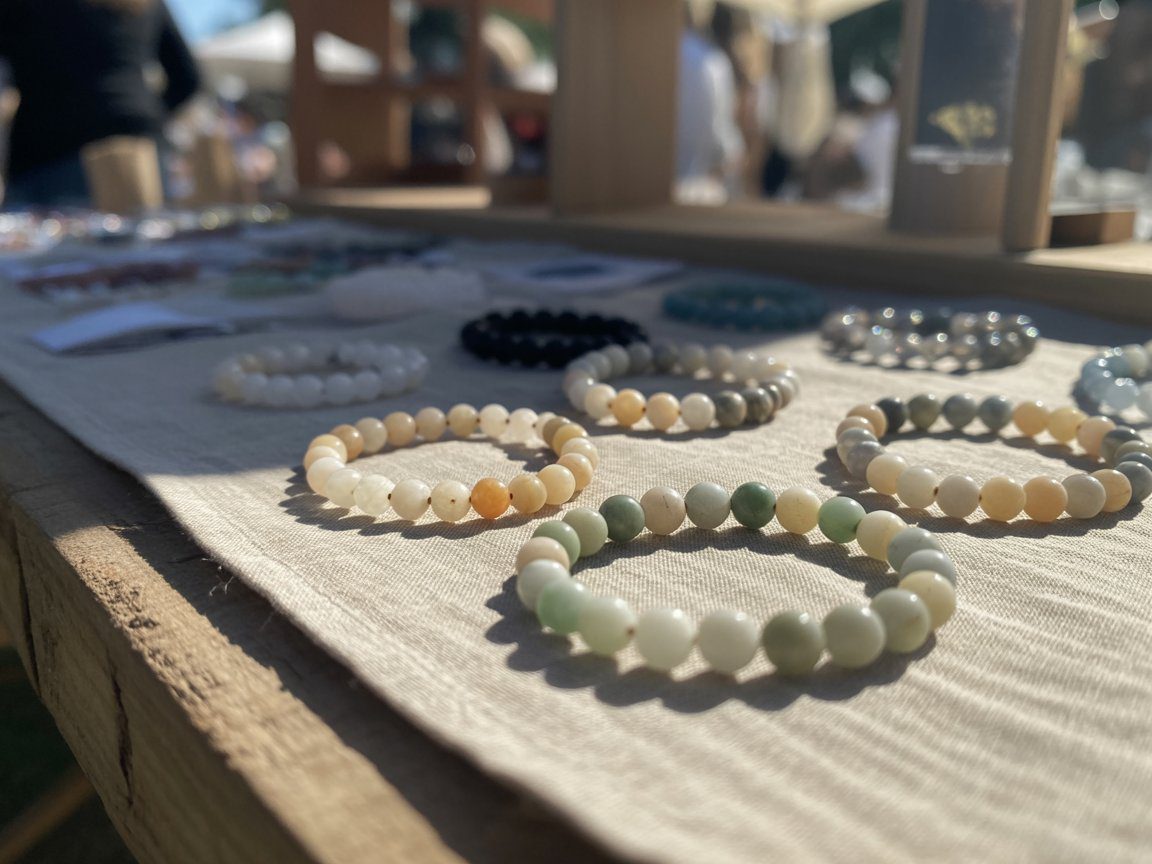
Next, let’s talk beads. For a minimalist style that sells, less is more, but quality is everything. We’re not grabbing a random jumble of plastic beads. We want a look that feels cohesive and premium. Stick to beads in the 4mm to 6mm range; it’s the perfect size for the dainty, stackable bracelets that are so popular. You can find beautiful, high-quality glass beads, but to create a product that lets you charge what it’s worth, consider genuine gemstone beads.
Think about stones like Howlite, Matte Onyx, or Rose Quartz. Their natural weight, cool feeling against the skin, and subtle variations give the bracelet an immediate sense of value that plastic just can’t fake. While you’re at it, consider adding a few high-quality metal spacer beads. A single gold-filled or sterling silver spacer can instantly elevate a simple string of beads into a real piece of jewelry.
Finally, the secret weapon for a bracelet that never breaks: the glue. You need a specialty jewelry and bead glue that has a precision applicator. These glues are made to create a strong but flexible bond with elastic, so the knot will never come undone. Regular super glue can become brittle and may cause the cord to snap right at the knot. The right glue makes your knot permanent and gives you—and your customer—total peace of mind.
Part 2: The Step-by-Step Professional Method
With your pro-level materials ready, let’s build a bracelet that’s made to last and designed to sell.
First, let’s measure. A standard women’s wrist size is around 7 inches, but it’s always a good idea to offer a few sizes. For a 7-inch bracelet, cut an 11-inch piece of your pre-stretched 0.7mm cord. That extra four inches gives you plenty of room to work when you’re tying the all-important knot, preventing the frustration of working with a cord that’s too short.
Now, string the beads. A bead mat is useful here to prevent beads from rolling away. As you string, keep a consistent, gentle tension. Don’t yank the cord tight, as that will create a stiff bracelet and put too much strain on the elastic. You also don’t want any slack, or you’ll see ugly gaps between your beads. Just let them sit snugly next to each other. For minimalist designs, simple repeating patterns are your best friend. Perhaps it’s all one type of gemstone, or maybe an alternation between a gemstone and a tiny metal spacer. It’s a good idea to lay out your pattern first to ensure it looks balanced before you start stringing. If you’re using a single accent bead as a focal point, double-check that it’s sitting right in the center.
Once all the beads are on, it’s time for the most critical part: the knot. This is what separates amateurs from pros. We are not tying a simple granny knot. We are tying a surgeon’s knot. It’s incredibly strong, and it’s very simple to learn.
Let’s walk through it slowly. Take the two ends of your cord. Cross the right end over the left and loop it under, just like you’re starting to tie your shoes. Now, before you pull it tight, take that same right end and loop it under the left one more time. You should have two loops, one on top of the other. Now, pull all four strands—the two loose ends and the two sides of the main loop—outward from the center. Pull it snug, and then pull it TIGHT. You’ll feel a solid little knot click into place. To lock it in, we’ll do one more simple half-knot. This time, just cross the right end over the left and loop it under once. Pull tight again. That is a surgeon’s knot. It is not going anywhere.
Now for the magic trick that makes it invisible. Grab your precision-tip
Part 3: Minimalist Design That Sells

You’ve nailed the technique, so let’s talk about the art. A technically perfect bracelet is great, but it won’t sell if the design isn’t desirable. Minimalist doesn’t mean boring—it means intentional.
First, let’s talk color palettes. Instead of throwing every color of the rainbow into one piece, stick to a focused, sophisticated palette. Monochromatic designs, which use different shades of the same color, are always incredibly chic. Earthy, neutral tones like sand, gray, and matte black are consistent best-sellers. You could also do a simple two-color design, like classic white Howlite with a single gold spacer. Keeping the palette limited makes the piece look deliberate and more expensive.
Second, don’t be afraid to play with asymmetry and the single accent. A bracelet of all uniform 4mm beads is beautiful, but adding just one slightly larger or differently shaped bead off-center can create a very modern and unique look. A single, high-quality gold-filled or sterling silver bead acts as a focal point, drawing the eye and justifying a higher price. The key here is restraint. It’s the confidence to use only one or two special elements that makes a minimalist piece feel so successful.
Finally, think in collections. Don’t just sell random, one-off bracelets. Design three to five bracelets that use complementary colors and can be stacked together. For example, you could create a set with one bracelet of all Matte Onyx, one of all lava stone, and a third that alternates between the two. When you design them as a cohesive set, you encourage customers to buy multiple pieces at once. It also helps you build a clear brand identity. People will start to recognize your style, and that’s how you build a loyal customer base.
Conclusion and Final Check
By following this formula, you can create professional products: pro-grade materials for a bracelet that lasts, a hidden surgeon’s knot for a perfect finish, and thoughtful minimalist design that creates something people want to buy. The difference is in those little details—pre-stretching the cord, using the right knot, and choosing quality over quantity with your beads.
Before you sell a single piece, do this one final quality check: the flex test. Gently stretch every bracelet about 20 times. This mimics regular wear and tear and ensures your knot is totally secure. This final check is your guarantee that you’re only selling a product you can be truly proud of.
Your challenge is to stop making disposable crafts and start creating durable, desirable jewelry. The methods covered today are the foundation for building a real, profitable bracelet business.
What’s been your biggest struggle with making bracelets so far? Is it the knot? Finding good materials? Let me know in the comments below. I read every single one and would love to help out.
If you found this guide helpful, all of the specific tools and materials mentioned are linked below to help you get started.
Thanks for reading. Now go create something beautiful that sells.
This website contains affiliate links. Some products are gifted by the brand to test. As an Amazon Associate, I earn from qualifying purchases. The content on this website was created with the help of AI.