
This website contains affiliate links. Some products are gifted by the brand to test. As an Amazon Associate, I earn from qualifying purchases. The content on this website was created with the help of AI.
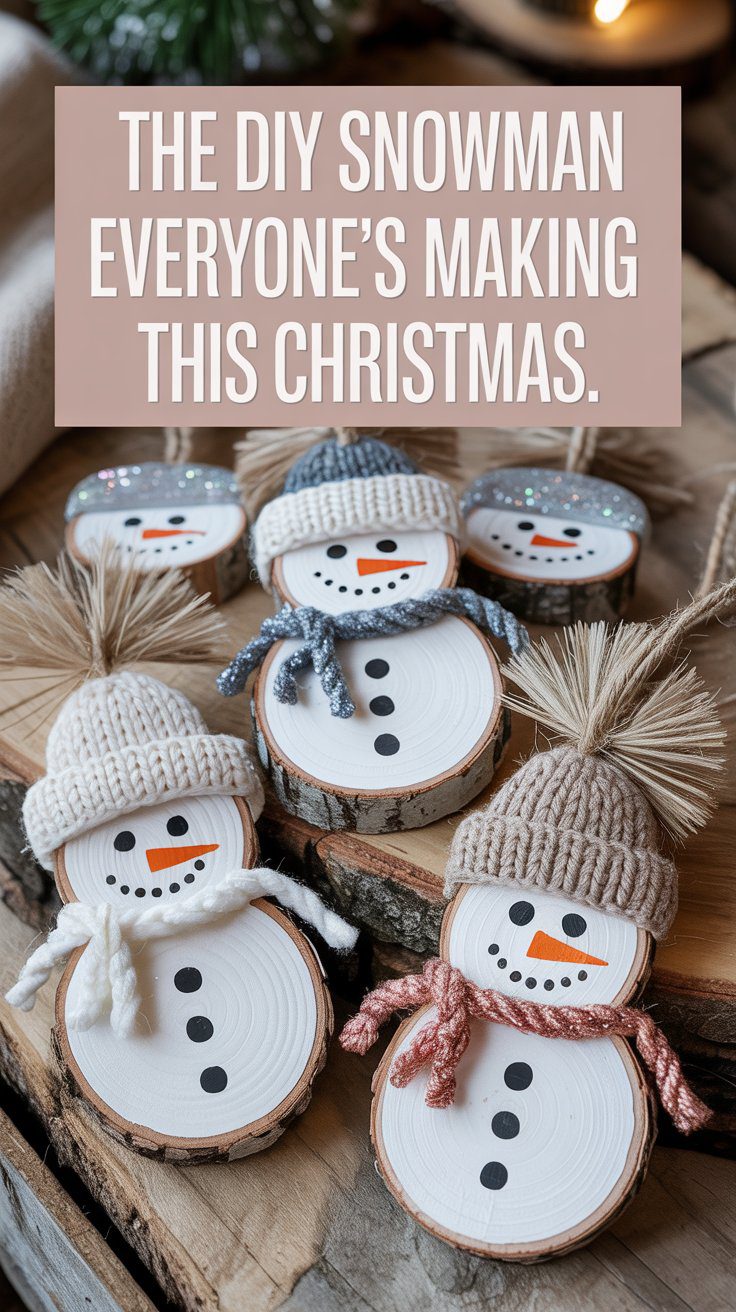
If your vibe this holiday season is cozy chaos and hot glue burns, you’re in the right place. These DIY wood slice snowmen are peak cottagecore meets Christmas-core — rustic, cute, and just messy enough to feel legit handmade. We’re talking sweater-hat energy, glitter snow, and that “I totally could sell these on Etsy” confidence. Grab your paint pens, crank the holiday playlist, and let’s make your tree the main character.
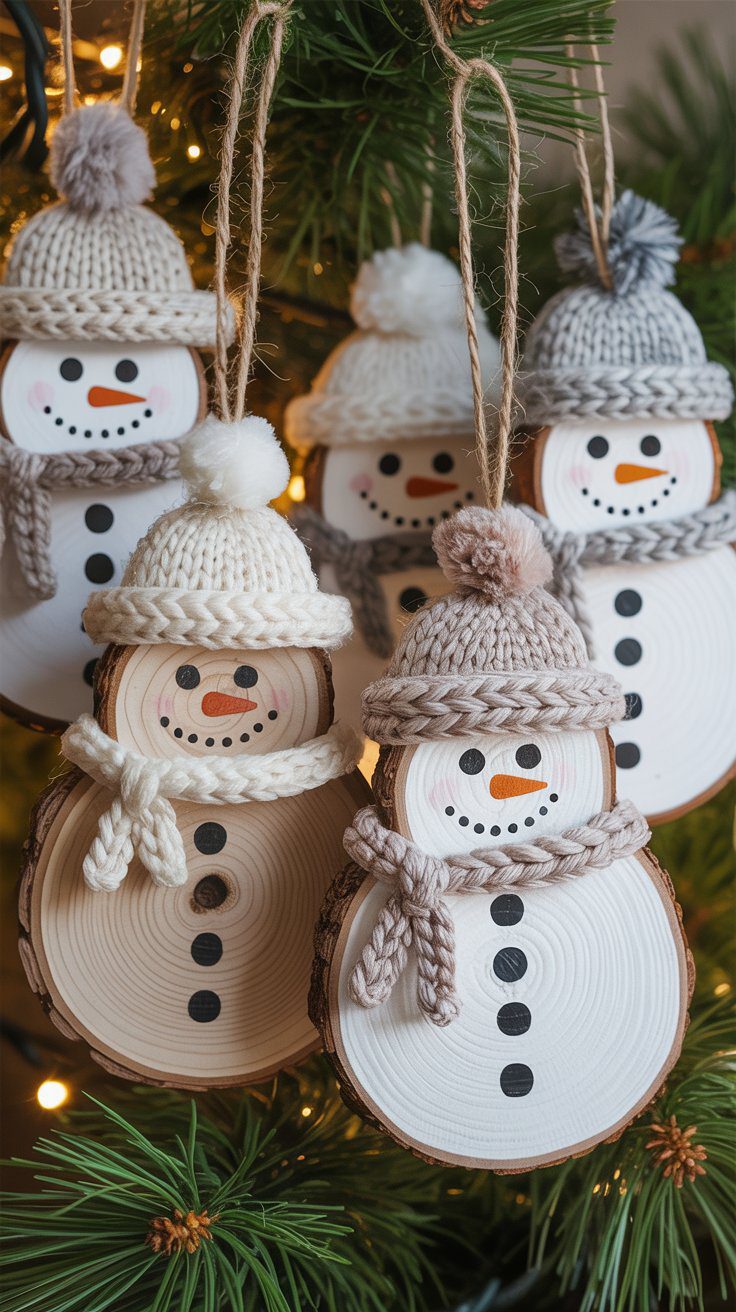
The snowman’s face is hand-painted using a fine brush or paint pen: two small black dots for eyes, a dotted smile, and a small orange triangle for the carrot nose. The natural wood texture peeks through the paint, giving each ornament a unique charm. Once dry, the edges of the slice can be dusted with a bit of glitter or white paint to mimic frost.
Shopping List:
Wood Slices (3–4 inch)
Fine Tip Paint Pens
Matte White Acrylic Paint
Hot Glue Gun
Repurposed Sweater or Yarn Hats
Jute Twine
Fabric Scraps or Yarn for Scarves
Mod Podge Gloss Sealer
Fine Detail Paint Brushes
Glitter Dust or White Paint for Frost Edges
The hats are made from repurposed sweater cuffs or yarn. You cut a 1.5-inch-wide strip from an old knit sleeve (or knit a small tube), roll the edge up to form a brim, tie the top with twine, and fluff it slightly to make a little pom-pom. Each hat sits snugly on the top of the wood slice, glued in place with hot glue. A tiny scarf—made from thin yarn or fabric scraps—is tied around the bottom third of the ornament, completing the cozy winter look.
Prepare the Wood Slices: Lightly sand each 3–4 inch wood slice until smooth. Wipe away dust. Paint the front with one to two coats of matte white acrylic paint, leaving the bark edges natural. Let dry 15–20 minutes between coats.
Paint the Face: Using a fine tip paint pen or small brush, add two small black eyes, a dotted smile, and a tiny orange triangle nose. Let dry completely.
Attach the Slices Together: Apply a generous bead of hot glue to the flat side of one wood slice. Press it firmly onto the second slice, aligning them as needed. Hold in place for 10 seconds to ensure a strong bond. Optionally, reinforce with a small screw or jute twine for added durability.
Add Frost Detail: Lightly dab the slice edges with white paint or brush on a thin layer of fine glitter dust while the paint is still tacky. Let set 10 minutes.
Seal the Surface: Brush a thin coat of Mod Podge Gloss Sealer over the painted face and edges. Let cure at least one hour before handling.
Make the Hat: Cut a 1.5-inch-wide strip from an old sweater cuff. Roll one edge up to form a brim. Tie the open end tightly with jute twine and fluff the top to make a small pom-pom.
Attach the Hat: Add a small bead of hot glue to the top edge of the wood slice. Press the hat into place and hold for 10 seconds.
Add a Scarf: Cut a 6-inch piece of thin yarn or fabric scrap. Tie it around the lower third of the snowman. Trim the ends at an angle.
Add a Hanger: Drill or punch a small hole at the top center. Thread a 6-inch piece of jute twine through and tie a loop for hanging.
Optional Details: Glue on mini black buttons or beads for extra dimension. Seal the entire piece with a coat of Mod Podge for protection and sheen.
To hang them, jute twine or ribbon is threaded through a small hole at the top of the slice and tied in a loop. A quick coat of Mod Podge Gloss Sealer helps protect the paint and gives a gentle sheen.
The finished result feels handmade and heartwarming — a mix of rustic farmhouse style and classic Christmas nostalgia. They’re perfect on the tree, tied to gifts, or sold in small sets at craft fairs. Each one looks slightly different, which is exactly the magic of making them by hand.
This website contains affiliate links. Some products are gifted by the brand to test. As an Amazon Associate, I earn from qualifying purchases. The content on this website was created with the help of AI.
