
This website contains affiliate links. Some products are gifted by the brand to test. As an Amazon Associate, I earn from qualifying purchases. The content on this website was created with the help of AI.
If you’ve been scrolling Pinterest and spotted those adorable little gnomes with floppy hats and fluffy beards, this tutorial will show you exactly how to make one just like the photo — using rope, felt, and a little holiday magic. Your gnome will look unique to you dependign on the materials, how you wrap the rope, etc. – and that’s exactly how it should be – YOUR unique holiday gnome!
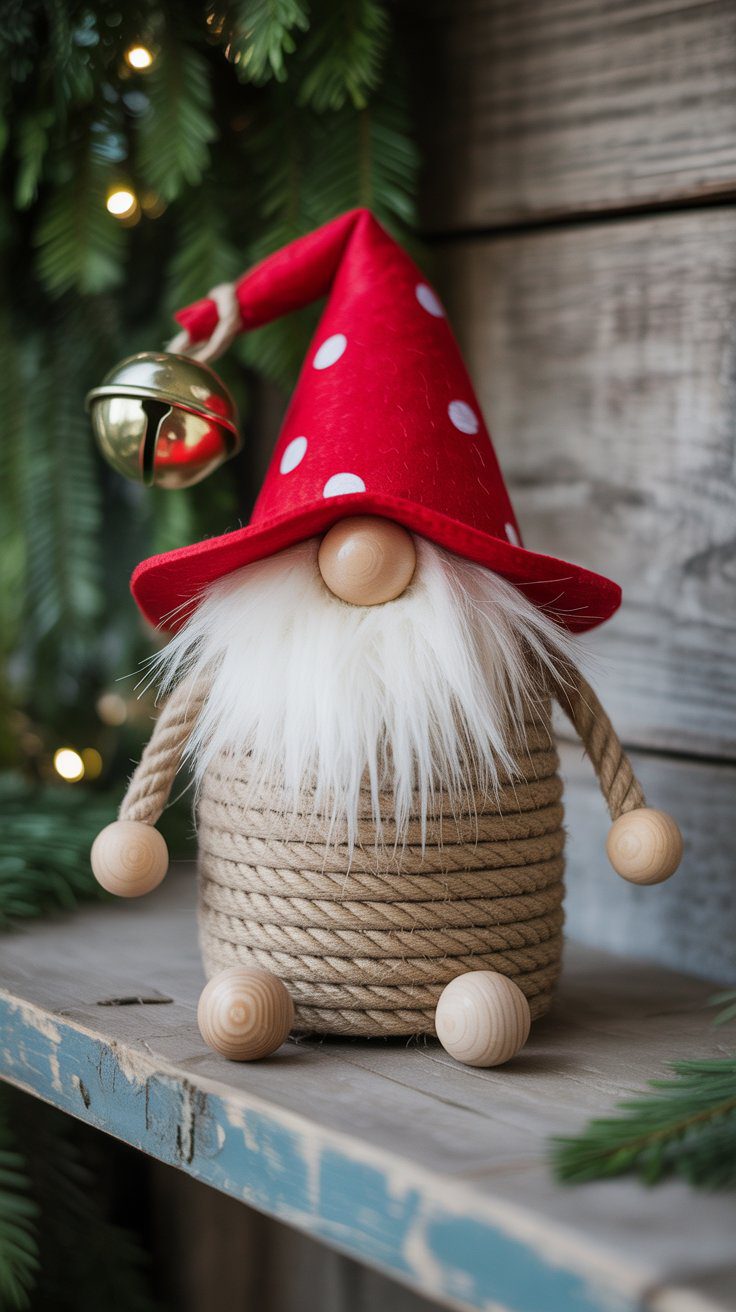
Step 1 – Build the Body
Cut a 7-inch length of thick natural jute rope. Coil it tightly into a short, stout cylinder, adding hot glue between layers to keep the shape.
Step 2 – Add the Arms
Cut two 5-inch rope pieces, coil them into loops, and glue them to each side of the body.
Step 3 – Make the Collar
Cut a 3-inch piece of rope, coil it, and glue it across the front top of the body. Leave a space in the center for the nose.
Step 4 – Attach the Nose
Use a 1-inch round wooden bead, gluing it just under the collar.
Step 5 – Add the Beard
Glue a piece of long, light faux fur under the nose. Let it drape naturally, then trim into a soft rounded shape.
Step 6 – Attach the Feet
Glue two ¾-inch round wooden balls under the body in the front, and to the arms if you like.
Step 7 – Make the Hat
Cut a tall triangle from red felt with white polka dots (about 9 inches tall). Roll it into a cone, hot glue the seam, and slip it over the top of the gnome, covering part of the nose.
Step 8 – Add the Finishing Touch
Glue a small jingle bell to the hat tip and bend it to one side for a whimsical finish.
Pro Tip: Make a few in different sizes for a festive holiday display, or gift them to friends for a cozy handmade touch.
This website contains affiliate links. Some products are gifted by the brand to test. As an Amazon Associate, I earn from qualifying purchases. The content on this website was created with the help of AI.
